37
EN
• The size of wooden strips should be with minimum thickness of 20 mm to
ensure that they can withstand the pressure when installation. At the same
time, wooden strips can also prevent air from entering the interlayer.
• Other wooden blocks should be xed rmly near the wooden strips, which
help to withstand the weight from the air conditioner.
Note: Reserve the holes at the wooden strips for the power cord.
Figure 6
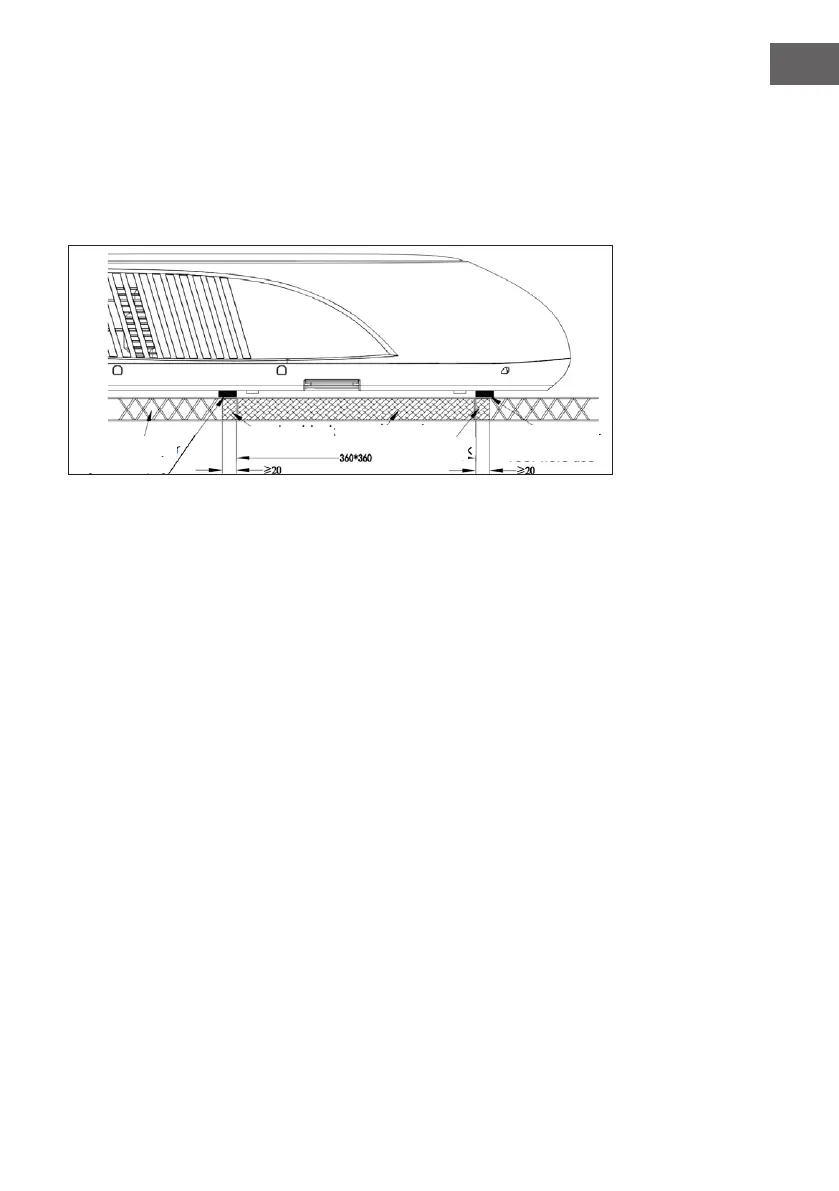
Outdoor Unit Installation
• The outdoor unit should be installed in the center of the roof as much as
possible to ensure a balanced ow of air.
• The position of the outdoor unit must be the same as the vehicle running
direction.
• The installation position should avoid those skylights, replaces or lighting
positions that may affect the air ow
• The minimum distance for the outdoor unit position is shown as Fig. 7, refer to
comparison measurement of hole position.
• Ensure that the roof is clean, dry, and grease-free.
• Conrm the outdoor unit position, make a hole (360 x 360 mm) at the caravan
roof, stick the foam seals around the roof hole.
• Take out the outdoor unit and align it to the roof hole around the foam seals.
Pull power cord and controller cable into the Caravan. (Fig. 9)
• Apply the sealant evenly around the foam seals (inside of the caravan), and it
must be applied to the parts that are in effective contact with the roof, make
sure no connection gap at the installation position.
• There’s a motor for heat dispenser at the rear of the outdoor unit, so the gap
between the caravan roof and outdoor unit should be at least 1 cm, otherwise
the motor will overheat and cause it to stop operating!
roof inlerlayer
wooden block
wooden strip
wooden block
foam seals for
roof hole use