16
kobalttools.com
ASSEMBLY INSTRUCTIONSASSEMBLY INSTRUCTIONS
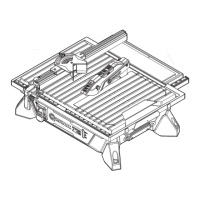
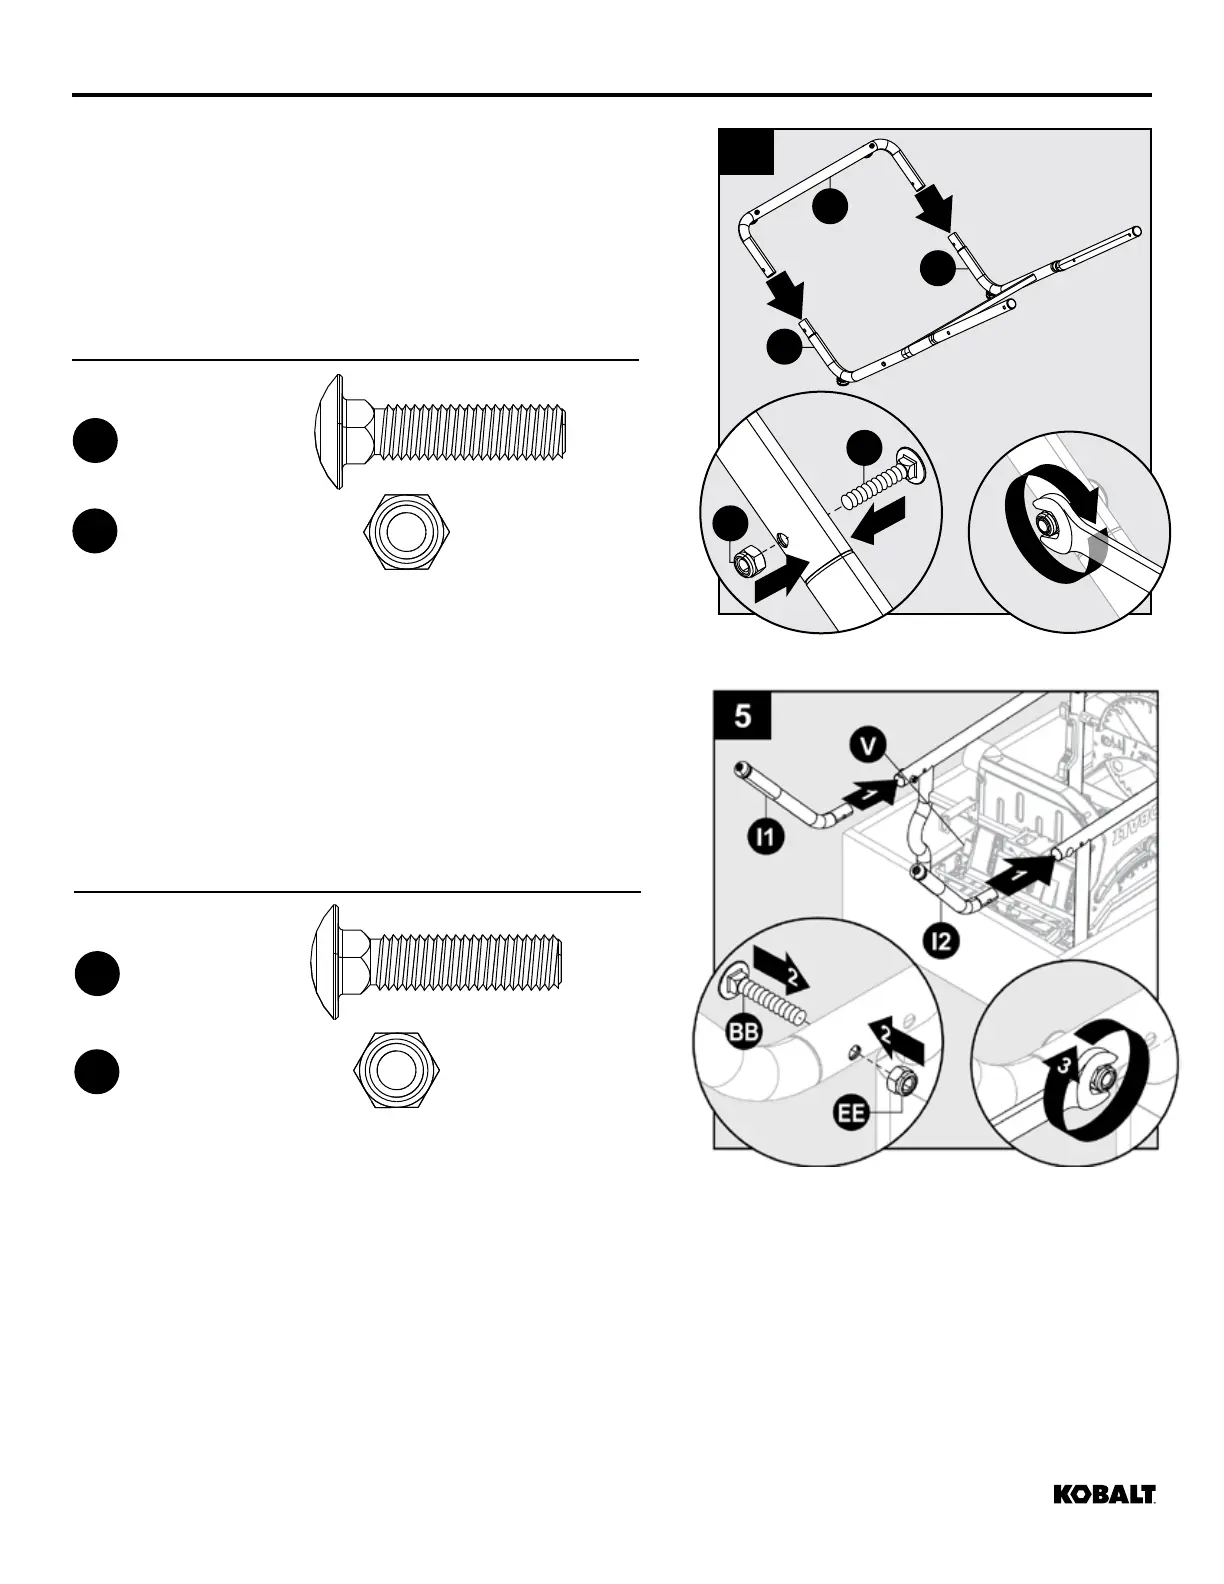
5. With table (V) still in lower packing tray, attach two
handles (I1 & I2) to table (V) with 1-1/2 in. cap screw
(BB) and nut (EE).
Note: Square and round holes can be aligned together.
4. Attach left leg end (S) onto the leg assembly
from step 3. Secure with M8 x 35mm (1.38"). cap
screw (BB) and nut (EE).
Note: The feet on the left leg end (S) should face
to the outside (left).
1
1
2
2
4
BB
EE
N
M
S
Hardware Used
x 2
BB
2 in. Bolt
Qty. 2
Nut
(preassembled
to lower right
leg assembly)
Qty. 2
Washer
(preassembled
to lower right
leg assembly)
Qty. 4
3 in. Cap screw
Qty. 6
Height adjustment
knob
Qty. 1
8 mm Hex bolt
Qty. 1
1-1/2 in. Cap screw
Qty. 4
Spacer
Qty. 6
Nut
Qty. 10
1 in. hex bolt
Qty. 2
AA BB CC
DD
EE
JJ
KK
FF GG
HH
M8 x 35mm
(1.38") Cap
screw
Nut
x 2
EE
2 in. Bolt
Qty. 2
Nut
(preassembled
to lower right
leg assembly)
Qty. 2
Washer
(preassembled
to lower right
leg assembly)
Qty. 4
3 in. Cap screw
Qty. 6
Height adjustment
knob
Qty. 1
8 mm Hex bolt
Qty. 1
1-1/2 in. Cap screw
Qty. 4
Spacer
Qty. 6
Nut
Qty. 10
1 in. hex bolt
Qty. 2
AA BB CC
DD
EE
JJ
KK
FF GG
HH
Hardware Used
x 2
BB
Nut
x 2
EE
2 in. Bolt
Qty. 2
Nut
(preassembled
to lower right
leg assembly)
Qty. 2
Washer
(preassembled
to lower right
leg assembly)
Qty. 4
3 in. Cap screw
Qty. 6
Height adjustment
knob
Qty. 1
8 mm Hex bolt
Qty. 1
1-1/2 in. Cap screw
Qty. 4
Spacer
Qty. 6
Nut
Qty. 10
1 in. hex bolt
Qty. 2
AA BB CC
DD
EE
JJ
KK
FF GG
HH
M8 x 35mm
(1.38") Cap
screw
 Loading...