34
Chapter 6
Cleaning the Print Head
Clean the print head when lines, streaks, or scratches appear on the prints. The
head cleaning tool can be used several times, but should be replaced when the
cleaning pad appears soiled or is no longer effective. Replacement cleaning
tools are available at www.kodak.com/go/printerdock.
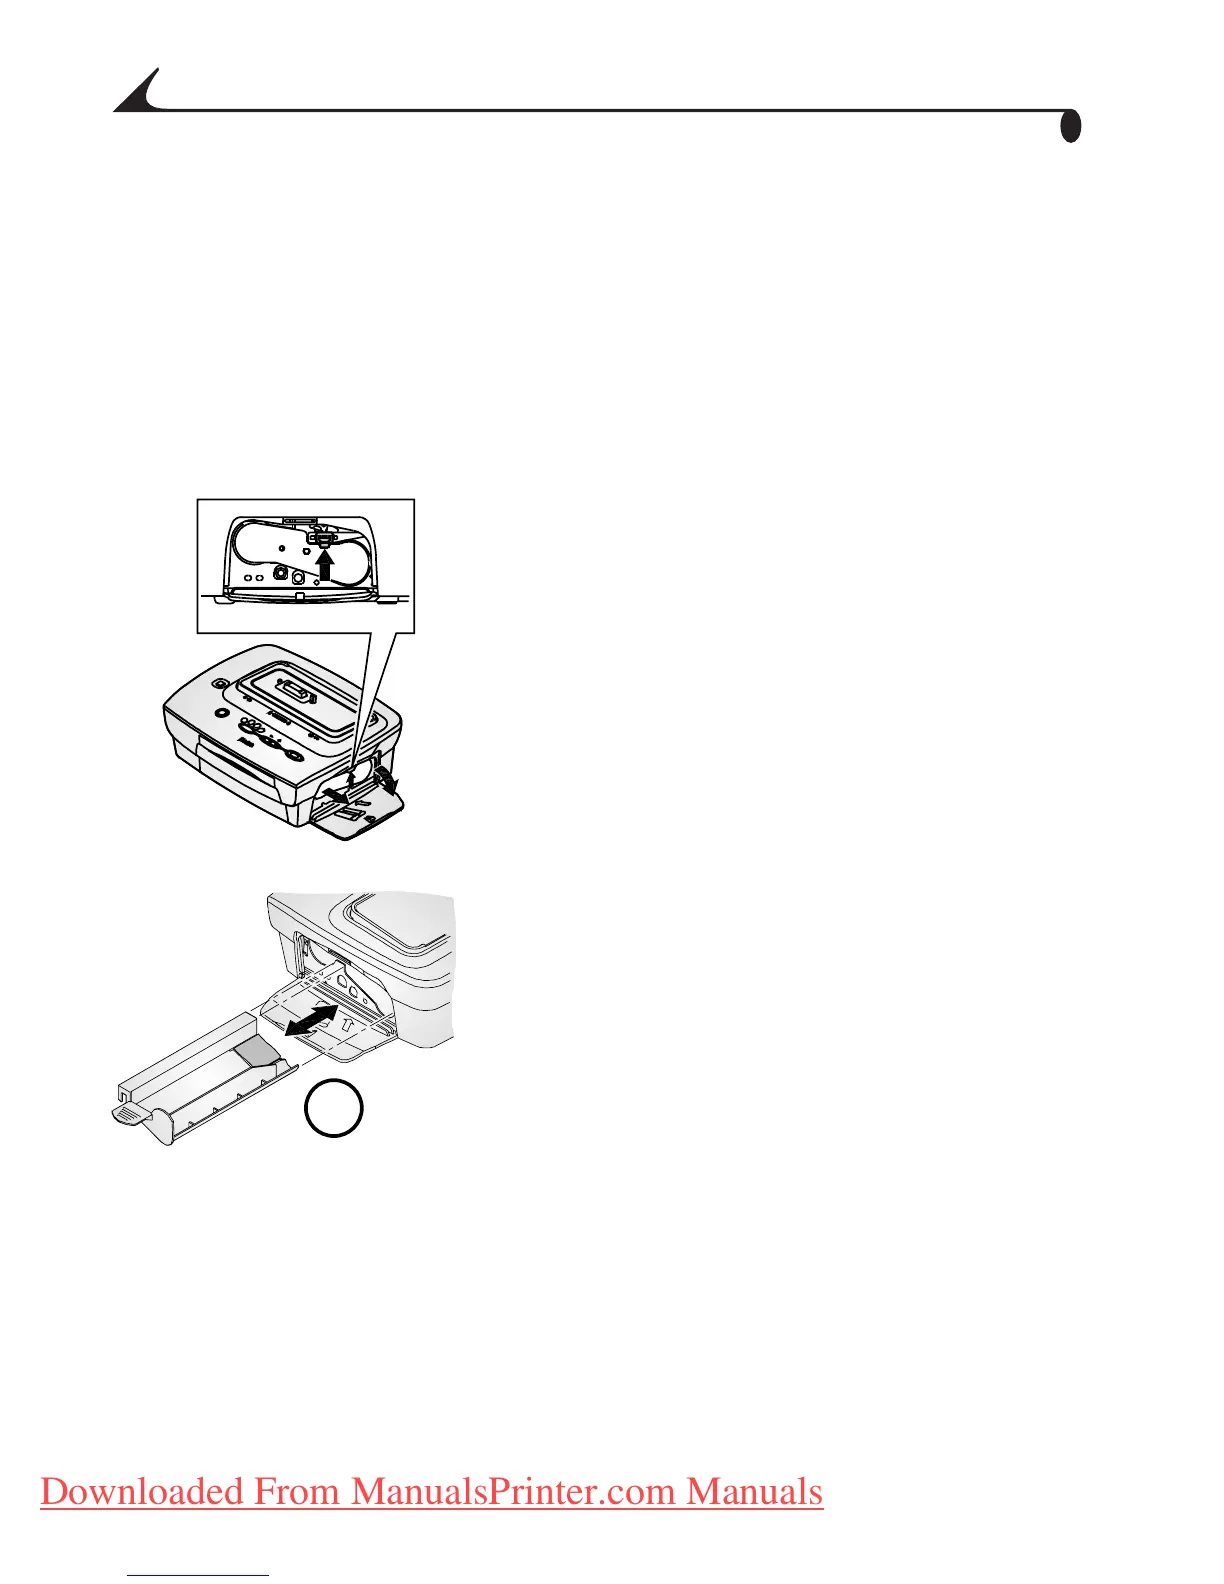
Use the print head cleaning tool to clean the print head.
1 Disconnect the power cord.
2 Open the color cartridge door.
3 Push up on the green lever and remove the
color cartridge.
4 Insert the cleaning tool, white pad facing
up, into the color cartridge slot.
IMPORTANT: Do not touch or remove the
white cleaning pad on the
cleaning tool. The cleaning
tool can only be inserted one
way. Do not force it into the
slot.
5 Reinsert and remove the tool at least 3 to 4
times.
6 Reinstall the color cartridge (see Loading
the Color Cartridge, page 6).
7 Close the color cartridge door.
urg_00041.book Page 34 Friday, January 3, 2003 10:37 AM
Downloaded From ManualsPrinter.com Manuals