Do you have a question about the Kodak Carousel 760 and is the answer not in the manual?
Details on operating voltage, projection lamps, dropping resistor, and dielectric strength testing requirements.
Describes the condenser systems for different projector models and lens compatibility.
Information on slide tray models, capacity, and emergency release procedures.
Explains the function of the select button and the operation of the automatic timer on specific models.
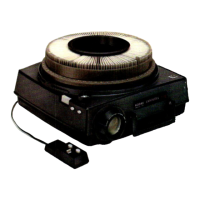
Details on the operation of the remote control cord for forward, reverse, and focus functions.
Explains the function of the thermal fuse for overheating protection and the capacitor for noise suppression.
Step-by-step explanation of the forward projection cycle, including mechanism movements and timing.
Describes the purpose and operation of the half-cycle function for editing and tray rotation.
Explains how the direction lever controls forward and reverse slide movement within the projector.
Details the auto-focus rack movement, photocell interaction, and filament image alignment for focusing.
Explains the sequence for remote focusing using the focus button on specific projector models.
Step-by-step instructions for removing the projector's base cover, including screw locations and reassembly notes.
Procedure for removing and replacing the thermal fuse assembly in various Kodak Carousel projector models.
Instructions for removing the lamp and mirror mount bracket assembly from specific projector models.
Steps for removing and replacing the lamphouse door assembly on models 760, 850, and 860.
Procedure for removing the main drive motor, including belt disengagement and electrical disconnection.
Detailed steps for replacing the fan and fan belt, including timer lever removal and blower housing cover access.
Instructions for removing the grille assembly, including access to screws and wire connections.
Procedure for removing the main mechanism and lens mount assemblies, including disconnects and component separation.
Steps for disassembling the lens mount assembly, including focus motor, barrel rails, and focus shaft removal.
Instructions for disassembling the mechanism assembly, covering top plate, solenoid mount, and cam shaft removal.
Details on removing and disassembling the cam shaft, including components like the 'E' ring, worm gear, and clutch spring.
Explains the components and assembly of the automatic timer mechanism used in specific projector models.
Procedure for replacing the worm pulley and mechanism belt, including shaft lubrication and frame bending.
Instructions for removing the slide lever ramp, including rivet removal and replacement screw procedures.
Steps for disassembling the remote control unit, including switch housing, buttons, and diode removal.
Procedure for removing the carrying handle, handle bracket, and front nameplate using pins and screws.
Instructions for removing the component board assembly, including wiring disconnects and board cover manipulation.
Procedure for removing the remote focusing solenoid from specific projector models, involving desoldering and screw removal.
Steps for removing the remote focusing switch, including lens removal, unsoldering leads, and breaking cement seals.
Instructions for removing and installing the photocell assembly, including circuit board heat-sealing and wiring considerations.
Procedure for removing and installing the leveling foot assembly, including unscrewing past the bind and crimping threads.
Guidelines for adjusting the cycle solenoid for quiet operation and proper stroke, with base cover removed.
Details on adjusting the locator lever's position for proper slide tray engagement and checking cam shaft timing.
Instructions for adjusting the slide lever for correct slide lifting into the tray, ensuring proper engagement and clearance.
Guidance on identifying and correcting issues related to stray light, including condenser lens orientation.
Procedure for adjusting the auto-focus system to achieve the correct null position for reliable focusing.
Steps for aligning the cell housing and auto-focus rack to ensure accurate null positioning and focusing.
Procedure for adjusting the target slide mechanism, focusing on alignment with the lamp filament image.
Instructions for adjusting the auto-focus switch contacts for reliable operation in specific projector models.
Guidance on adjusting the remote focus switch and solenoid bracket for correct operation of the focus motor.
Steps for aligning the projector gate assembly, checking gap with a gauge, and adjusting for proper slide path.
Completes the gate alignment process, including bending a lug for stability and reassembling components.
Instructions for aligning the projector mirror, using a specialized tool or a slide with a hole, to center the light circle.
Troubleshoots causes like solenoid failure, bent clutch spring, or binds, and provides remedies for each.
Covers issues like bent or broken clutch springs, remote cord shorts, or incorrect lever positioning.
Diagnoses problems related to select or index lever interference and improper shifting to the low side of the cam.
Troubleshoots issues with solenoid adjustment, lever binds, hairspring problems, or insufficient reverse button activation.
Addresses causes of unintended reversal, such as binds between levers or defective remote cords.
Identifies sources of noise including fan ribs, lack of lubrication, seating issues, worm pulley high spots, or gear noise.
Troubleshoots why the tray may not rotate when the 'Select' button is held, checking power and locator withdrawal.
Covers causes like unhooked shutter springs, striking cycle levers, or slide lever not raising slides fully.
Diagnoses lens drift due to stray light, incorrect null position, or defective cell housing components.
Addresses lens drift on 'Fan' due to focus rack issues, rack binding, or main drive motor problems.
Continues troubleshooting lens drift on 'Fan' related to focus rack, bindings, and continued drift.
Diagnoses focus motor issues caused by null alignment, cell filters, or housing problems, and checks for continuity.
Troubleshoots a dead focus motor due to loose wiring, burned-out lamp, or null-cell alignment errors.
Addresses focus motor oscillation with slide and lamp on 'High', citing dead spots in the motor.
Troubleshoots continuous focus motor operation due to defective motors, incorrect wiring, or rack striking shutter pin.
Covers failures in remote focus due to defective diodes, burned-out motors, dead focus motors, or incorrect switch adjustments.
Addresses issues focusing on warped slides by checking null and cell alignment.
Troubleshoots slide jamming caused by misaligned gates.
Checks for power supply and cord issues as the primary cause for the projector not starting.
Addresses uneven illumination due to incorrect mirror alignment or an open thermal fuse.
Lists specialized tools required for servicing, including test slides, wrenches, and alignment tools.
Specifies the approved cement (G-135 GLYPTAL) for various adjustment screw applications.
Lists recommended lubricants (Plastilube #1, CITGO PACEMAKER T-30 Oil) and their part numbers for projector maintenance.
Details specific lubrication points, amounts, and frequency for motor bearings, shafts, gears, and levers.
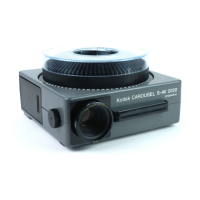
| Type | Slide Projector |
|---|---|
| Model | Carousel 760 |
| Manufacturer | Kodak |
| Film Format | 35mm |
| Slide Format | 2x2 inches |
| Lens Mount | Fixed |
| Focus | Manual |
| Slide Tray Capacity | 80 slides |
| Power | 300W |
| Voltage | 120V |
| Lens | Kodak Ektanar |
| Light Source | Tungsten Halogen |
| Lamp Type | 300W |