Do you have a question about the Kodak CAROUSEL 760H and is the answer not in the manual?
Connects the projector to power and remote control for operation.
Step-by-step guide for properly loading slides into the carousel tray.
Instructions on how to correctly mount the loaded slide tray onto the projector.
Explains the function of buttons that control slide advancement and reversal.
Detailed instructions on how to achieve sharp focus for projected images.
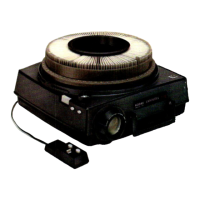
Describes the operation of the remote control for slide advancement.
Guide on how to safely replace the projection lamp.
Detailed instructions for cleaning the projector's optical system.
Specific steps for cleaning projector lenses and internal optics.
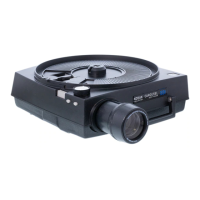
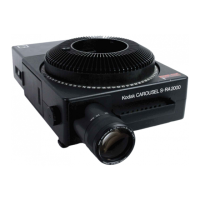
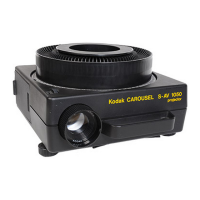
The Kodak Carousel 760H Projector is a sophisticated slide-showing system designed for projecting 2x2-inch slides. It offers a range of features for ease of use, precise control, and reliable performance, ensuring that your slides are displayed with optimal clarity and brilliance.
The primary function of the Kodak Carousel 760H Projector is to project photographic slides onto a screen. It accommodates 140 slides in 2x2-inch cardboard or thin plastic mounts, up to 1/16 inch thick, using the KODAK CAROUSEL 140 Slide Tray. The projector is equipped with an automatic focus control that keeps slides in sharp focus throughout projection, whether you're showing single slides, trays of slides, or stacks of slides with the optional KODAK CAROUSEL Stack Loader. The projector operates on 110- to 125-volt, 60 CPS (Hz) alternating current only.
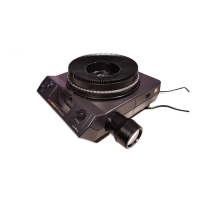
Setting Up: To begin, the power cord and remote-control cord are stored in a compartment on the underside of the projector. These cords are removed by sliding a latch in the direction of the arrow marked "OPEN," opening the door, and then closing and latching it after removal. The remote-control cord plugs into a socket at the rear of the projector, with a small dot on the plug facing upward. The power cord's socket end connects to a 2-prong receptacle at the rear, and the other end plugs into a suitable electrical outlet.
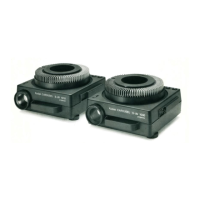
Loading Slides: The KODAK CAROUSEL 140 Slide Tray is designed to hold 140 slides. Before loading, ensure the INDEX HOLE on the bottom of the tray is opposite the INDEX NOTCH. If not, slide the LATCH, turn the bottom plate until alignment, and release the latch. The LOCK RING is removed by turning it in the direction marked "UNLOCK" and lifting it off. Slides are inserted into each slot with the top of the picture down. For cardboard mounts, the printed border or trademark side should face the next lower number. For plastic mounts, the emulsion (dull) surface should face the next lower number. After loading, the lock ring is replaced and turned in the direction marked "LOCK" until secure. It's important to use slides with mounts in good condition, as warped or bent mounts may prevent proper dropping into the projector. Frayed corners should be clipped, and slides with loose or sticky tape should be avoided.
Placing the Slide Tray: The loaded slide tray is placed on the projector by fitting its center hole over the center post. The tray is then turned slowly clockwise until the TRAY INDEX BAR aligns with the GATE INDEX on the projector. The tray will then drop into the operating position. If it doesn't drop easily, check the alignment of the index hole and notch. The tray will drop further down during the first slide change cycle.
Projecting Slides: To turn on the projection lamp, slide the POWER SWITCH to "LAMP." The first slide is projected by momentarily pressing the FORWARD BUTTON on the projector or the "FOR" (forward) button on the remote control. The projected image can be centered vertically on the screen by turning the ELEVATING WHEEL. Horizontal alignment can be adjusted with the LEVELING FOOT. The FORWARD and REVERSE BUTTONS on the side of the projector control the tray's rotation direction.
Focusing: Allow the projector to warm up for about 30 seconds. Rotate the FOCUS KNOB to achieve maximum sharpness at the center of the screen image. If all slides are in the same type of mount, only the first slide needs focusing. For intermixed slide mount types, manual readjustment of focus may be necessary. The automatic focus system's action can be observed by watching the movement of the focus knob or the screen image. Note that a matte-surface (write-on) slide or a mount without film can cause the focus motor to run continuously.
Remote Control: The remote control features "FOR" (forward) and "REV" (reverse) buttons to change slides. Momentarily press either button to change slides in the desired direction. The reverse button must be pressed firmly; otherwise, the tray may rotate forward.
Random Selection of Slides: To project a specific slide, press and hold down the SELECT BAR firmly. Rotate the tray until the desired slide number is opposite the gate index. Release the select bar, and the slide will be projected.
Removing the Slide Tray: With the projector turned on, press and hold the SELECT BAR firmly. Rotate the tray until the tray index bar is opposite the gate index. Release the select bar and lift off the tray.
Showing Single Slides: With the projector turned on, insert a correctly oriented slide into the projector gate, pushing it down as far as it will go. After viewing, press the SELECT BAR to eject the slide. Slides up to 1/8 inch thick can be projected this way.
After the Show: Remove the tray, slide the power switch to "OFF," and lower the front of the projector by turning the elevating wheel. Retract the leveling foot and the lens by turning the focus knob counter-clockwise. Unplug the power and remote-control cords, fold them into 4-inch lengths, and place them in the cord compartment.
Long-Run Applications: Ensure unrestricted airflow to the projector openings. If used in a display or cabinet, provide an adequate outlet for warm air from the rear grill vent. Cool, dust-free air is ideal for cooling. Protect the projector from elements if used outdoors.
Editing Slides: Slides can be previewed singly as described above. To reorient or replace a slide during projection, remove the lock ring, firmly press and hold the select bar, and then remove the slide. The optional KODAK CAROUSEL Stack Loader can also be used for editing.
Darkened Screen Between Slide Trays: To prevent a brightly illuminated screen after the last slide in a tray, insert a 2x2-inch piece of thin cardboard (or an extra slide) into the projector gate before placing a tray. This will enter a blocked-off space in the tray during projection and return to the gate when the tray is removed.
Projector Care: The projector requires no lubrication as all bearings are self-lubricating.
Thermal Fuse: The projector includes a thermal fuse to prevent overheating and damage from exhaust-fan failure. If the fuse opens due to overheating, the projector will not operate and will require factory or repair-station attention.
Projection-Lamp Replacement: The projector uses a code ELH projection lamp with a rated life of 35 hours. Other lamps are available: code ENH (175 hours, less brightness) and code ENG (15 hours, 30% greater brightness). Lamp life can be extended by using the LOW setting on the lamp switch. It's advisable to keep a spare lamp. If a lamp burns out, set the power switch to "FAN" for cooling, remove the slide tray, and allow the projector and lamp to cool before turning off the projector and removing the power cord. To replace the lamp, turn the projector bottom side up and rotate the coin-slotted screw in the LAMP DOOR counterclockwise to open it. Ensure the projector and lamp are cool. Push the LAMP-RELEASE LEVER downward until it's free of its retaining clip, then raise it fully, grasp the lamp, and remove it. Insert a new lamp into the socket, ensuring a prong is in each slot. Avoid touching the transparent part of the lamp; if touched, wipe with a clean, soft cloth moistened with rubbing alcohol. Lower the lamp-release lever to seat the lamp, then push down until it's held by its retaining clip. Close and fasten the lamp door.
Cleaning: To maintain bright, sharp screen images, keep the optical system clean. Dust or fingerprints on lenses reduce brightness and cause unsharpness or low contrast.
Projection Lens Cleaning: Turn the focus knob clockwise until the lens is fully out. Carefully move the focus knob toward the side of the projector while withdrawing the lens. Blow off any dust or dirt. Clean the front and rear surfaces of the lens gently with KODAK Lens Cleaning Paper or a soft, lintless cloth. If needed, breathe on the lens or use a drop of KODAK Lens Cleaner. Replace the lens by moving the focus knob toward the side of the projector and guiding the lens back into position, ensuring the gear teeth engage the focus-knob shaft.
Condenser Lens, Heat-Absorbing Glass, and Mirror Cleaning: Turn the projector bottom side up and open the LAMP DOOR. Push the LENS RETAINER downward until it's free, then raise it fully. Carefully lift out the CONDENSER LENS and HEAT-ABSORBING GLASS. Clean both sides with KODAK Lens Cleaning Paper or a soft, lintless cloth, avoiding fingerprints. Replace the lens and heat-absorbing glass in their original locations, with the flat side of the condenser lens facing the front. Incorrect positioning of the large condenser lens can cause the focus motor to malfunction. Gently clean the MIRROR surface with KODAK Lens Cleaning Paper or a soft, lintless cloth moistened with KODAK Lens Cleaner. Close and fasten the lamp door.
| Type | Slide Projector |
|---|---|
| Model | CAROUSEL 760H |
| Manufacturer | Kodak |
| Film Format | 35mm |
| Carousel Capacity | 80 slides |
| Focusing | Manual |
| Light Source | Tungsten Halogen |
| Slide Format | 2" x 2" (5cm x 5cm) |
| Voltage | 120V |
| Projection Method | Front |