EMERGENCY
SLIDE-TRAY
REMOVAL
If
the slide-changing mechanism should become inopera-
tive because of a defective slide (see page 7), a foreign
object, etc,
turn
the coin-slotted TRAY-REMOVAL SCREW in
either direction,
as
far
as
it will go, to retract the tray
lock_
While holding the screw in
this
position,
lift
off the tray_
When
you remove the tray
in
this manner,
turn
the
tray
up-
side down and realign the index notch and index hole
as
described
on
page 7; then set the tray to one
side_
Remove
the defective slide from the projector
by
pushing down-
ward
on
the select bar, or if necessary, pull the slide from
the gate
by
hand. Replace the tray
on
the projector.
PROJECTION
TIPS
LONG-RUN
APPLICATIONS
-Allow
for
unrestricted flow
of
air
to
the projector open-
ings_
If
the projector is used
in
a window display or
in
a
cabinet, provide
an
adequate outlet
for
the warm air
ex-
pelled from the rear
grill
vent. The ()ir circulating through
the projector should
be
as
dust-free
as
possible.
-Better
cooling results if cool air
is
available
to
the pro-
jector.
Normal
room temperatures are adequate.
-If
the projector
is
used outside,
it
should
be
protected
from the elements.
EDITING
SLIDES
To
preview your slides prior
to
placing them in the tray,
you can project them singly,
as
described
on
page 10_
If
you want
to
reorient or replace a slide in the tray during
projection, remove the lock ring from the tray. Firmly
press and hold down the select bar; then remove the slide
from the tray.
You
can now change the orientation or
re
-
place the
slide_
The optional
KODAK
CAROUSEL
Stack Loader, described
on
page 14, provides a suitable way
to
edit your slides_
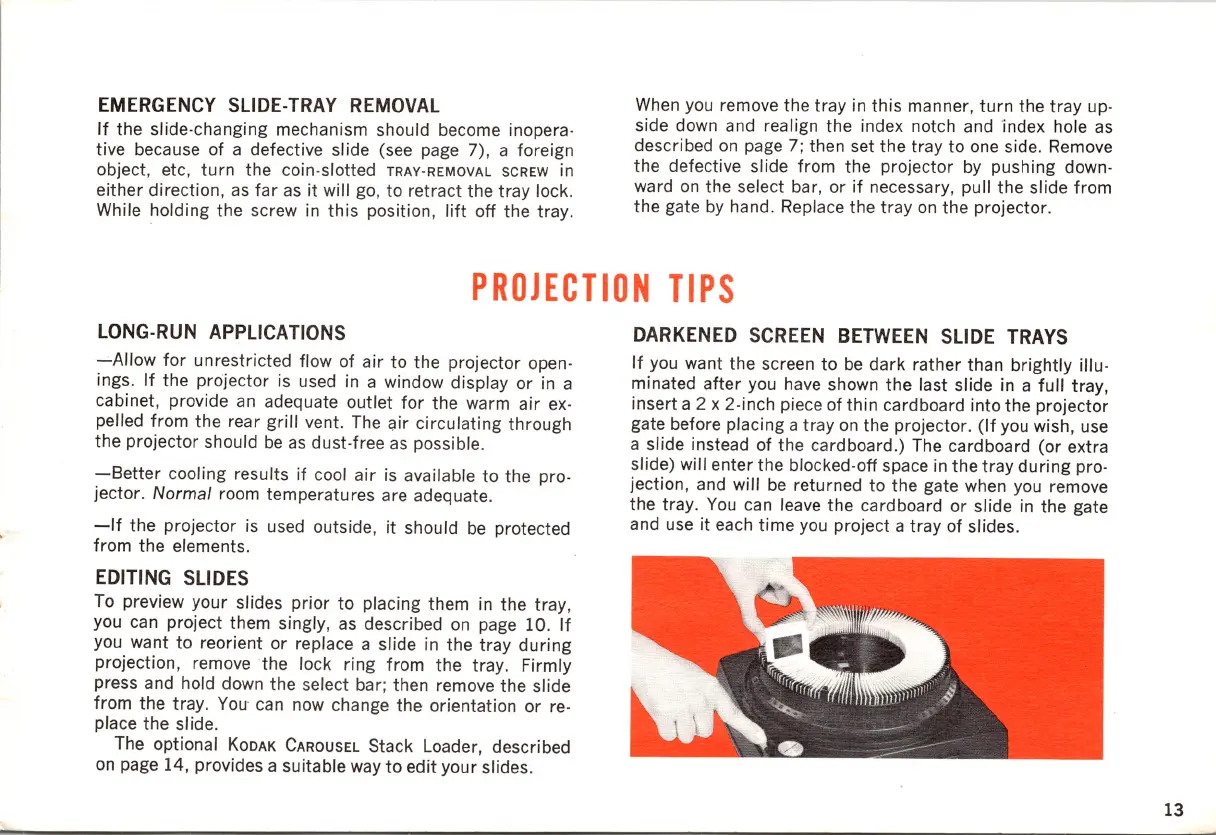
DARKENED
SCREEN
BETWEEN
SLIDE
TRAYS
If
you want the screen to
be
dark rather than brightly illu-
minated after you have shown the last slide in a
full
tray,
insert a 2 x 2-inch piece of thin cardboard into the projector
gate before placing a tray
on
the projector.
(If
you wish, use
a slide instead of the cardboard_) The cardboard (or extra
slide) will enter the blocked-off space in the
tray
during
pro-
jection, and will
be
returned to the gate when you remove
the tray.
You
can leave the cardboard or slide
in
the gate
and use
it
each
time
you project a tray of slides_
13
 Loading...