6781)
152550
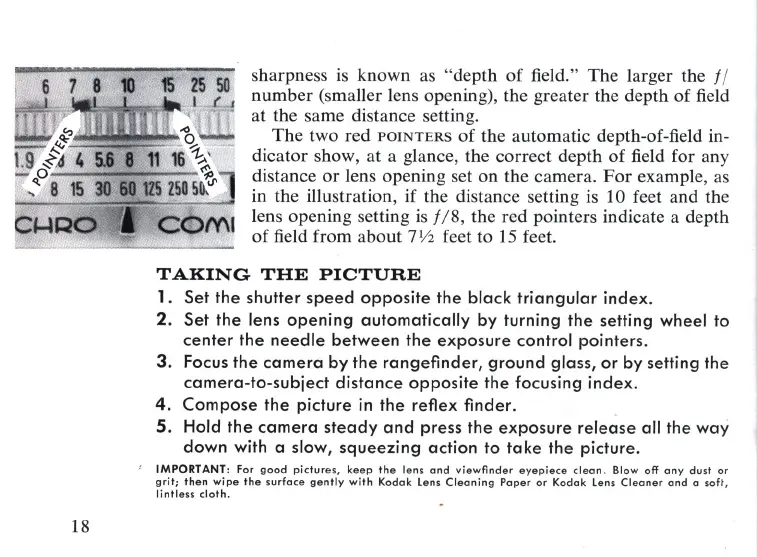
sh
ar
pness
is
known as
"dept
h
of
field."
The
larger the f!
number
(sma
ll
er
lens opening), the greater the depth
of
field
at
the same distance setting.
18
I
.l
The
two red
POINTERS
of
the
automatic depth-of-field in-
di
cator
show,
at
a glance, the correct depth
of
field for any
distance
or
lens opening set on
the
camera.
For
example, as
in the illustration, if the distance setting
is
10 feet and the
lens opening setting
is
t
/8,
the red pointers indicate a depth
of
field from
about
7Y2
feet to 15 feet.
TAKING
THE
PICTURE
1.
Set
the
shutter
speed
opposite
the
black
triangular
index.
2.
Set
the
lens
opening
automatically
by
turning
the
setting
wheel
to
center
the
needle
between
the
exposure
control
pointers
.
3.
Focus
the
camera
by
the
rangefinder,
ground
glass,
or
by
setting
the
camera-to-subject
distance
opposite
the
focusing
index.
4.
Compose
the
picture
in
the
reflex
finder.
5.
Hold
the
camera
steady
and
press
the
exposure
release
all
the
way
down
with
a
slow,
squeezing
action
to
take
the
picture.
IMPORTANT
:
For
good
pictures,
keep
the
lens
and
viewfi
nd
er
eyepiece
cleon
.
Blow
off
cny
dust
or
gri
t;
then
wipe
the
su
rfa
ce
gent
ly
with
Kodak
len
s
Cleaning
P
oper
or
Kodak
l
ens
Cleaner
and
a
soft,
lintles$
cloth.
 Loading...