EasyManua.ls Logo

Kodak Scan Station 700 - User Manual

Kodak Scan Station 700
178 pages
Print Icon
To Next Page IconTo Next Page
Loading...

Table of Contents

Other manuals for Kodak Scan Station 700

Questions and Answers

  • D
    Daniel HunterSep 8, 2025
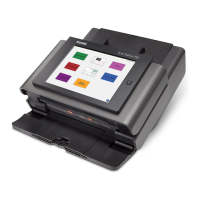
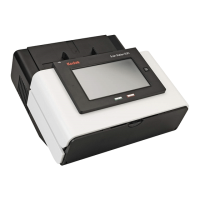
    What to do if Kodak Scan Station 700 Scanner shows error reading the selected certificate?
    • A
      Ashley SimsSep 8, 2025
      If you encounter an error stating 'There was an error reading the selected certificate' on your Kodak Scan Station, it means the certificate is on a drive that is no longer accessible. To resolve this, go to the Kodak Scan Station 700 Series - Scanner Administration, select Destinations, choose SharePoint, and set the Certificate field to an accessible drive.
  • R
    Robert RiosAug 23, 2025
    Why Kodak Scan Station 700 Series scanner administration application cannot communicate with the scan station after power saver mode?
    • K
      Kara MasonAug 23, 2025
      If your Kodak Scan Station 700 Series scanner cannot communicate with the Scanner Administration application after being idle and entering power saver mode, it's likely due to network infrastructure restrictions. Wake On LAN (WOL) works best when the scanner and application are on the same subnet because it relies on a broadcast address. While WOL can function across subnets, its reliability decreases as the scanner remains in power saver mode because ARP tables in routers/switches may no longer contain the scanner's information. To improve reliability, assign a Static IP address to the Scan Station.
  • V
    Victor MillerAug 25, 2025
    How to verify an SMTP server address for Kodak Scan Station 700 Scanner?
    • J
      John JosephAug 25, 2025
      To verify an SMTP server address for your Kodak Scan Station, use the Test Connection feature in the Kodak Scan Station 700 Series - Scanner Administration application. Additionally, send mail to the SMTP server using a mail client application from a PC on the same network as the Scan Station. If the mail is successfully sent and received, the SMTP server address is valid. If you cannot send an email, review any error messages as the authentication credentials may be invalid.
  • S
    Stephanie MercerAug 27, 2025
    What to do if Kodak Scanner is unable to scan to network folder?
    • K
      kimberly14Aug 27, 2025
      If you are unable to scan to a network folder with your Kodak scanner, use another computer on your network to ping the NETBIOS computer name of the share destination. If you get a reply, NETBIOS name resolution is working, and the problem may be with the share name or permissions. If you don't get a response, NETBIOS name resolution is not working. You can use the IP address or, in some cases, the Fully Qualified Domain Name in place of the server name. If NETBIOS name resolution is not working and it is your only choice, ask your network administrator about changing your router’s configuration. Also, ensure the shared folder's permissions allow the Scan Station to read and write to the folder.
  • W
    walkercrystalAug 27, 2025
    How to find the SMTP server address for Kodak Scan Station 700?
    • J
      jordan47Aug 27, 2025
      To find the SMTP server address for your Kodak scanner, check the settings of the mail client on your workstation for the IP address or Fully Qualified Domain Name (FQDN) of the SMTP server. Alternatively, examine the full email header of emails sent from an internal mail client, or ask the mail server administrator for this information.
  • R
    Robert NealSep 22, 2025
    How to find your network domain name for Kodak Scan Station 700?
    • E
      Eric CarterSep 22, 2025
      To find and set the domain name your Kodak Scan Station will use, from a PC logged onto the same network/domain, right-click on Computer and select Properties. Select Advanced System Settings to display the System Properties window, then select the Computer Name tab. The Domain name is listed in the Domain field. Copy this name. To set the domain name on your Scan Station, from the Kodak Scan Station 700 Series - Scanner Administration application, select the Configuration tab, then Edit>Device Settings. Select Device Options, click Next, then click the Network Destination Credentials down arrow and enter the Domain name.
  • A
    Antonio MaxwellSep 16, 2025
    Why Kodak Scan Station 700 no images are being displayed?
    • E
      Elizabeth ThompsonSep 16, 2025
      If no images are being displayed when scanning with your Kodak Scan Station, ensure the documents are placed properly in the input tray based on how your job is configured. For example, if your job is set up to scan documents one-sided - face down, be sure the side you want to scan is facing the input tray (not facing you).
  • J
    Jason ContrerasSep 18, 2025
    How to fix Kodak Scanner device name is not unique?
    • C
      Colin OconnorSep 18, 2025
      All Kodak Scan Stations have a default name assigned from the factory: KSSxxxxxxxx (where xxxxxxxx represents the Scan Stations’ serial number). If you leave the Device Name option blank, the Scan Station will use this default name. If you want to change the default name, you must select a unique name.
  • P
    Patrick Hawkins Jr.Sep 7, 2025
    How to fix Kodak Scan Station 700 FTP authentication?
    • H
      Heather BlakeSep 7, 2025
      To resolve FTP authentication issues with your Kodak Scan Station, configure both proxy credentials and FTP server credentials if your network requires a proxy server to access external FTP sites. The proxy credentials should include the username, password, and authentication method (User after login or None). You may also need to configure a username and password to access the FTP server. The Scan Station also supports anonymous FTP.
  • E
    Edward SandovalSep 4, 2025
    How to fix Kodak Scanner workgroup authentication?
    • M
      Maria JohnsonSep 4, 2025
      To address workgroup authentication issues with your Kodak scanner, check the permissions of the shared folder on the PC sharing the folder. Ensure the folder's permissions allow access to the Scan Station.

Summary

Safety Information

Environmental and Battery Precautions

Details on environmental compliance, EU regulations, battery safety, and disposal.

Acoustic Emission and EMC Statements

Acoustic Emission Standards

Specifies the noise emission levels for the device.

EMC Compliance Statements

Details regulatory compliance for electromagnetic compatibility in different regions.

Chapter 1: Overview

Whats Included in the Box

Lists the components included with the Kodak Scan Station.

Setting Up the Scan Station

Chapter 3: Installation and Getting Started

Setup Overview

List of tasks required to prepare for Scan Station configuration.

Installing the Scanner Administration Application

Procedure for installing the software used to manage Scan Stations.

Scan Station Components

Front View Identification

Illustrates and labels the components visible on the front of the Scan Station.

Inside View Identification

Illustrates and labels the internal components of the Scan Station.

Rear View Identification

Illustrates and labels the ports and connectors on the rear of the Scan Station.

Chapter 2: Pre-installation Checklist

Network Configuration Details

Information required for network connectivity and setup.

Best Practices for Setup

Recommendations for creating user groups and network folders.

UNC Names for Network Folders

Guidance on using Universal Naming Convention for network paths.

Main Screen Interface

Scanners Tab Overview

Displays discovered and configured Scan Stations.

Configuration Tab Overview

Allows configuration and setup of Scan Stations.

Menus and Navigation

File Menu Options

Provides options for managing configurations like Add, Save, and Delete.

Edit Menu Options

Offers access to Device Settings, Scan Settings, Destinations, Groups, and Jobs.

Scanner Menu Options

Includes functions for managing Scan Stations like Add, Discover, and Modify.

Remote Access Password Management

Set and manage passwords for remote communication with Scan Stations.

Refreshing Scan Station Status

Displays the current operational state of selected Scan Stations.

Device Management Functions

Options for retrieving logs, updating time/date, and power options.

Uploading Firmware Updates

Process for updating the Scan Station's firmware.

Help Menu and Icons

Accessing help topics and understanding UI icons.

Chapter 4: Configure Device Settings

Device Settings Configuration

Main area to configure device parameters for email, fax, AD, and defaults.

Email Server Configuration

Set up SMTP server details for sending email.

Active Directory Server Configuration

Configure connection to AD for authentication and user lookup.

Fax Configuration

Set up parameters for sending and receiving faxes.

Configuring Device Options

Set device options like language, passwords, network, date/time, and power.

Network Destination Credentials Setup

Enter username, password, and domain for network access.

Automatic Configuration Schedule

Schedule automatic checks for firmware and configuration updates.

General Configuration Options

Control file naming, USB saving, network folder visibility, and fast scanning.

Log All Transactions

Enable logging of all Scan Station activities for auditing purposes.

Date and Time Settings

Set the date format, time zone, and time display on the Scan Station.

Configuring Email Settings

Configuring Active Directory Server Settings

Configuring Fax Settings

Email to Fax Setup

Configure Scan Station to send scanned images as faxes via email.

Sending Faxes from Scan Station 730 EX

Receiving Faxes at Scan Station 730 EX

Chapter 5: Define Scan Settings

Defining Scan Settings Process

Overview of how to create and configure scan settings.

Scan Settings Configuration

Scan As Selection

Choose scanning mode: Color, Grayscale, or Black and White.

File Type Selection

Select output file format: JPEG, TIFF, PDF, DOC, RTF, XLS.

Input Type and Resolution

Configure document feeding orientation and image resolution (DPI).

Black and White Settings

Adjust compression and quality for B&W scans.

Color Settings

Conversion Quality and Contrast

Optimize image quality and foreground detail for B&W scans.

Compression and Quality Options

Select compression type and quality for color/grayscale scans.

Color Balance Adjustment

Adjust color balance for color images to correct background hues.

Advanced Settings

Hole Fill and Blank Image Detection

Fill document holes and discard blank pages automatically.

Image Edge Fill and Streak Filter

Fill image edges and filter vertical streaks from scans.

Color Dropout Settings

Eliminate form backgrounds to isolate entered data.

Auto Color Detection Configuration

Automatically save color pages as color/grayscale images.

Multifeed Detection and Document Handling

Configure multifeed detection sensitivity and response.

Barcode Type Configuration

Select supported barcode types for data extraction.

PDF Settings

Filename Settings

User Input and Directory Separators

Configure user-provided file name inputs and separators.

Indexes in Filenames

Incorporate defined index field names into file paths.

Chapter 6: Index Templates

Creating an Index Template

Process for defining barcode and OCR regions for indexing.

Index Field Editor Usage

Tool for creating barcode and OCR index fields on scanned images.

Index Template Settings Screen (Name)

Screen for naming and saving index templates.

Setup Index Templates Screen

Interface for adding, editing, and deleting index templates.

Index Template Settings Configuration

Create and maintain index fields within a template.

File Name Settings Configuration

Define components for file names and paths, including device name, user, and date.

Index Template Settings (Name) Screen

Enter a name for the configured index template.

Index Field Editor Screen

Create barcode and OCR index fields by selecting areas on an image.

Barcode Field Properties Screen

Configure specific properties for barcode index fields.

Barcode Reading Parameters

Settings for minimum length, confidence, orientation, and filtering.

Barcode Separation and Quality

Define barcode separation behavior and scan quality.

OCR Field Properties Screen

Configure specific properties for OCR index fields.

Use Cases for Barcode Detection

Car Dealership Example

Illustrates using barcode detection for loan application processing.

Shipping Company Example

Demonstrates using barcode detection for foreign shipment processing.

Hotel Management Company Example

Shows barcode usage for tracking hotel service discounts.

Chapter 7: Create Destinations

Accessing the Destinations Screen

Steps to open the interface for creating destinations.

Destination Layout and Terminology

Explains the structure and terms used in destination setup.

Setting Up an Email Destination

Configure Scan Station to send documents to an email address.

Importing an Email Address Book

Import email addresses from a CSV file into the Scan Station.

Setting Up a Network Destination

Configure Scan Station to save documents to a network folder.

Setting Up a Printer Destination

Configure Scan Station to send scanned documents to a printer.

Setting Up Fax or Email to Fax Destination

Configure destinations for sending faxes or email-to-fax.

Adding a SharePoint Group

Configure Scan Station to send documents to a SharePoint site.

Adding a Kofax Front Office Server Group

Configure Scan Station to send documents to Kofax Front Office Server.

Chapter 8: Add and Manage Groups

Assigning Groups for Job Access

Organize users into groups to control access to Scan Station jobs.

Adding Active Directory Groups

Import groups from Active Directory for user management.

Adding Individual Users

Add specific users from Active Directory to Scan Station groups.

Finishing Group Configuration

Review and save the configured groups and user assignments.

Chapter 9: Create Jobs

Defining Job Name and Appearance

Set the job name and select its display format on the Scan Station.

Selecting Scan Settings for Jobs

Choose the scan settings profile to be used for a specific job.

Selecting Destinations for Jobs

Assign output destinations for scanned documents within a job.

User Home Directory and Email Address Options

Automatically create destinations based on logged-in user's AD info.

Associating Groups with Jobs

Link jobs to specific user groups for access control.

Associating Index Templates with Jobs

Apply index template rules to documents scanned with a job.

Chapter 10: Monitor and Manage Your Scan Stations

Scanners Tab Overview

View and manage detected Scan Stations on the network.

Toolbar Functions

Quick access buttons for common Scan Station management tasks.

Refreshing Scan Station Grid View

Update the display to show the latest Scan Station status.

Retrieving and Saving Log Files

Save log and transaction files from selected Scan Stations.

Upload Configuration Files

Send configuration settings to selected Scan Stations.

Grid View Column Descriptions

Network Configuration Options

Adding a Scan Station

Discovering Devices

Modifying a Scan Station

Deleting a Scan Station

Changing Remote Access Password

Configurations and Configuration Files

Updating Your Scan Station

Method 1: Uploading via Administration Application

Update configurations and firmware using the management software.

Uploading Firmware Files

Process for transferring firmware updates to the Scan Station.

Method 2: Network Folder Monitoring

Automatic Configuration Schedule Setup

Define network folder and schedule for automatic updates.

Method 3: USB Drive Configuration Update

Method 4: Interactive USB Configuration Update

Method 5: USB Drive Firmware Update

Scan Station Security Features

Password Protecting the Scan Station

Retrieving and Clearing Files

Retrieving Scan Station Log File

Save the operational log file from the Scan Station.

Method 2 for Log Files

Using a USB drive to save log files.

Clearing a Log File

Retrieving Scan Station Transaction Log File

Method 2 for Transaction Logs

Using a USB drive to save transaction logs.

Clearing a Transaction Log File

Saving All Log Files

Scan Station Details

Updating Time;Date Remotely

Turning Off Scan Stations

Restarting Scan Stations

Moving Scan Stations Between Networks

Chapter 11: Maintenance

Opening the Scan Station Cover

Steps to safely open the Scan Station for access.

Cleaning Procedures

Cleaning the Feed Rollers

Instructions for cleaning the document feeding rollers.

Cleaning the Separation Module

Steps for removing and cleaning the separation module.

Cleaning the Feed Module

Instructions for removing and cleaning the feed module.

Vacuuming the Scan Station

Procedure for cleaning internal dust and debris from the Scan Station.

Cleaning the Imaging Area

Steps for cleaning the optical path for optimal image quality.

Running a Transport Cleaning Sheet

Using a cleaning sheet to remove residue from the paper path.

Replacement Procedures

Replacing Separation Module and Tires

Instructions for replacing worn separation module components.

Replacing the Pre-Separation Pad

Procedure for replacing the pre-separation pad.

Replacing the Feed Module and Tires

Instructions for replacing the feed module and its tires.

Adjusting Pre-Separation Roller Tension

Supplies and Consumables

Chapter 12: Troubleshooting

General Problem Solving Guide

Chart to diagnose and resolve common Scan Station operational issues.

Document Feeding and Jamming Issues

Solutions for documents jamming or multiple feeding.

Scan Station Not Scanning;Feeding

Troubleshooting steps for when the Scan Station fails to scan.

Image Display and Quality Issues

Resolving problems with blank images, roller marks, streaks, and poor quality.

Network Authentication Issues

Troubleshooting problems related to network authentication and credentials.

SMTP Server Troubleshooting

Steps to resolve issues with sending emails via SMTP.

FTP Authentication Problems

Troubleshooting FTP connection issues and credentials.

Scan to Network Share Issues

Resolving problems with accessing network shared folders.

Certificate Reading Errors

Troubleshooting issues with selected security certificates.

Indicator Lights Status

Saving Error Log Files

Contacting Service and Support

Chapter 13: Glossary

Appendix A: Specifications

System Requirements for Administration Software

Operating system and framework requirements for the management application.

Appendix B: Supported Network Protocols

Appendix C: Warranty - US and Canada

Limited Warranty Terms

Details of the warranty coverage provided for Kodak Scanners.

Warranty Exclusions

Conditions under which the limited warranty does not apply.

Installation Warning and Disclaimer

Legal disclaimer regarding consequential or incidental damages.

Obtaining Limited Warranty Service

Procedures for requesting warranty service and support.

Service Options

On-Site Service

Description of technician dispatch for on-site repairs.

Advanced Unit Replacement (AUR)

Process for receiving a replacement unit before returning the defective one.

Depot Service

Instructions for shipping the product to an authorized repair center.

Important Service Restrictions

Key limitations and conditions for warranty service eligibility.

Contacting Kodak Alaris for Support

Kodak Scan Station 700 Specifications

General IconGeneral
Scanner TypeDocument Scanner
Optical Resolution600 dpi
Maximum Resolution1200 dpi
Color Depth24-bit
Scan Speed (Color, 200 dpi)70 ppm
Scan Speed (Black & White, 200 dpi)70 ppm
Scan Speed (Simplex, Letter)70 ppm
Scan Speed (Duplex, Letter)140 ipm
Scan Speed (Black & White)70 ppm
Scan Speed (Color)70 ppm
Document Feeder Capacity75 sheets
Daily Duty Cycle6, 000 pages
Maximum Document Size216 x 356 mm (8.5 x 14 in.)
Output FormatsJPEG, PDF, Searchable PDF, TIFF
ConnectivityEthernet
DisplayTouchscreen
Control PanelTouchscreen
Operating System CompatibilityLinux
Power Consumption15W (Standby)

Related product manuals