TP-6591 10/1332 Section 3 Scheduled Maintenance
4
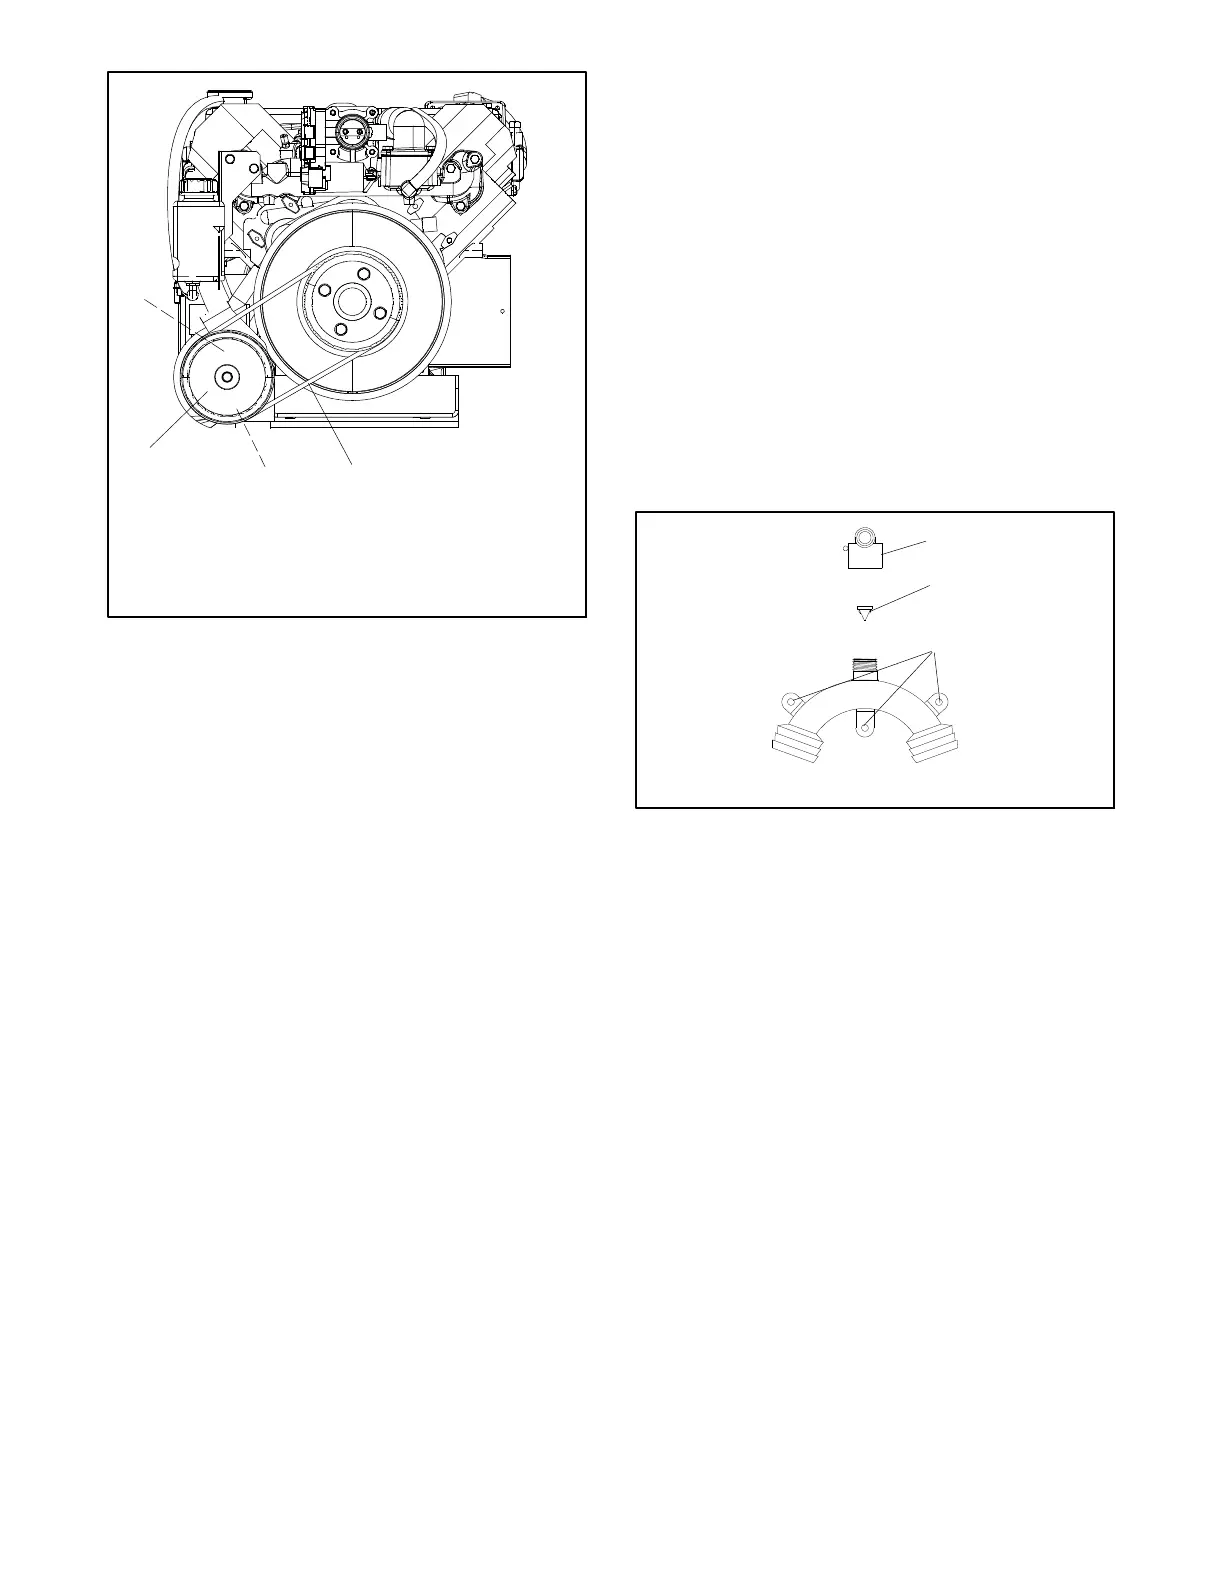
3
21
1. Check the seawater pump belt deflection (tension) here
2. Seawater pump adjusting screw (behind pulley)
3. Seawater pump pulley
4. Pivot screw (behind pulley)
Figure 3-12 Belt Tension
Seawater Pump Belt Tensioning Procedure
1. Remove the air intake panel in order to remove the
flywheel guard.
2. Check the belt tension at the midpoint of the
longest span of the belt using a belt-tensioning tool
set to 55 lbs. See Figure 3-12. Recheck a new belt
tension after 10 minutes of operation.
Note: If the belt tension is not within specifications,
go to step 3. If the belt tension is within
specifications, go to step 7.
3. Loosen the pivot and adjusting screws.
4. While prying the seawater pump outward, tighten
the adjusting screw.
5. Tighten the pivot screw.
6. Recheck and adjust as necessary.
7. Replace the flywheel guard and air intake panel
3.7.6 Siphon Break
A siphon break prevents seawater entry into the
generator set’s engine when the engine exhaust
manifold outlet is less than 230 mm (9 in.) above the
waterline of a fully loaded, docked or stationary craft.
See Figure 3-14. The siphon break may malfunction
when the generator set operates while the craft is in
contaminated waters or saltwater. Use the following
procedure to inspect the siphon break at the intervals
listed in the service schedule.
Siphon Break Inspection
1. Stop the generator set.
2. Remove the retaining cap and remove the reed
valve for inspection. See Figure 3-13.
1. Cap 2. Reed valve 3. Mounting base
1
2
3
Figure 3-13 Siphon Break
3. Use a mild detergent to remove residue and
oxidation from the reed valve.
4. Clear blockage from the reed valve opening.
5. Replace the siphon break if the reed valve is
cracked or if the reed valve material has hardened
or deteriorated.
6. Install the reed valve into the mounting base with
the valve downward. See Figure 3-13, item 2.
7. Install and only finger tighten the retaining cap. Do
not overtighten it.
 Loading...