TP-6551 2/1428 Section 3 Scheduled Maintenance
Note: Use soft, distilled, or demineralized water when
mixing coolant.
Note: Do not mix extended- or long-life coolants and
conventional (green) coolants.
Note: Do not mix different types and/or colors of
coolants.
Note: Consult the engine manufacturer’s operation
manual for additional engine coolant
specifications.
4. Replace the radiator’s pressure cap.
5. Operate the engine until the thermostat opens and
the radiator upper hose becomes hot.
6. Stop the engine and allow it to cool.
7. Remove the radiator’s pressure cap.
8. Add coolant to the radiator to just below the
overflow tube on the filler neck.
9. Replace the radiator’s pressure cap.
10. Maintain the coolant level in the coolant overflow
bottle between the High and Low markings.
Note: Periodically check the coolant level by removing
the radiator’s pressure cap. Do not rely solely on
the level in the coolant overflow bottle. Add fresh
coolant until the level is just below the overflow
tube opening.
3.7.4 Flushing and Cleaning
For optimum protection, drain, flush, and refill the cooling
system at the interval listed in the service schedule.
Flushing and Cleaning Procedure
1. Remove the pressure cap and open the radiator’s
coolant drain valve and let the system drain
completely. Remove the pressure cap to simplify
draining.
2. Drain, clean, and flush the coolant overflow bottle.
3. Flush the system with clean water.
4. Close the radiator’s coolant drain valve.
5. Fill the system with the recommended coolant.
6. Replace the pressure cap.
3.7.5 Pressure Cap
The cooling system utilizes a pressure cap to raise the
boiling point of the coolant, enabling higher operating
temperatures. If the cap leaks, replace it with a cap of the
same rating.
3.8 Belt Check
Check the belt tension a t the intervals specified in the
service schedule. If the tension is not within
specification, adjust as necessary using the following
procedure.
Adjust the tension of the alternator/fan belt so that the
belt can be depressed about 12.7 mm (0.5 in.) when
applying finger pressure. Use the following procedure
to adjust the belt.
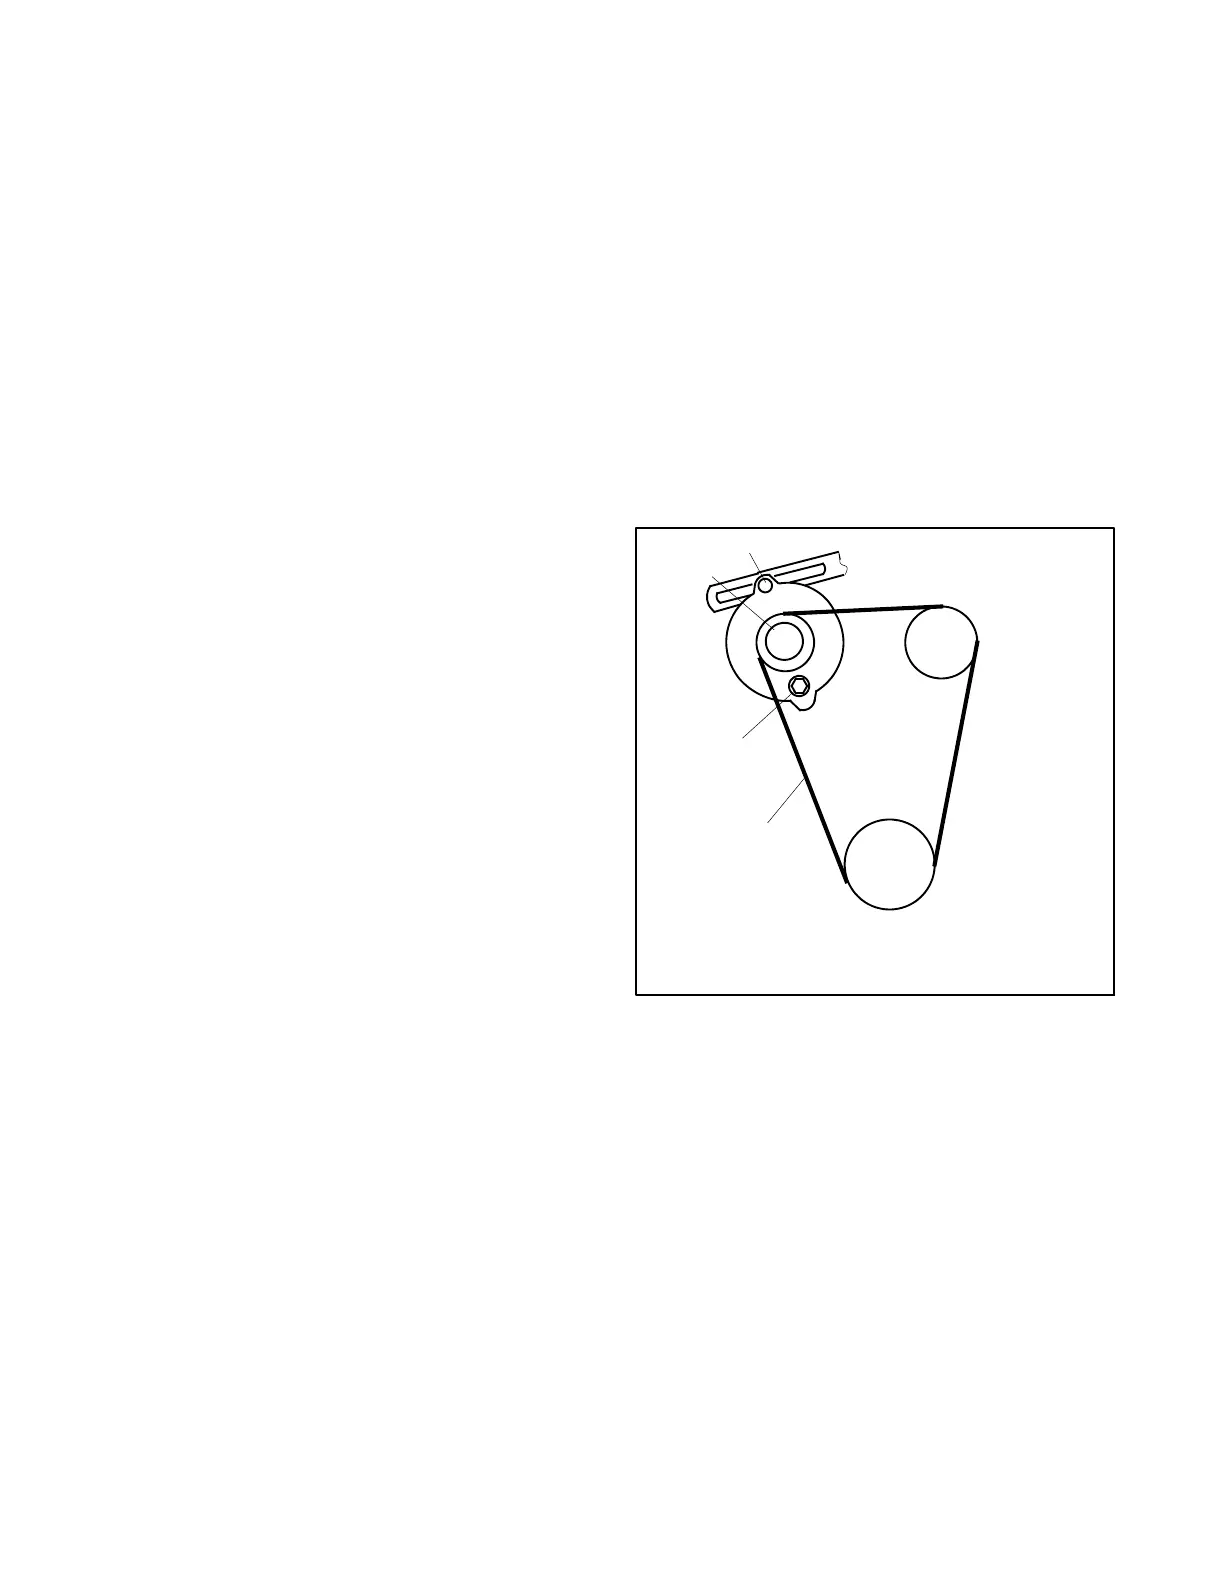
1. Battery charging alternator pulley
2. Adjusting screw
3. Check the alternator belt tension here
4. Alternator pivot screw
2
1
4
3
Figure 3-11 Belt Tension
Belt Tensioning Procedure
1. Disconnect the battery, negative lead first.
2. Loosen the pivot and adjusting screws.
3. While prying the battery charging alternator
outward, tighten the adjusting screw.
4. Tighten the p ivot screw.
5. Recheck and adjust as necessary.
6. Reconnect the battery, negative lead last.
Note: Also check the fan belt for cracks or tears
and replace the belt if necessary.
 Loading...