TP-6907 5/16 93Section 7 Disassembly/Reassembly
7.3 Enclosure Disassembly
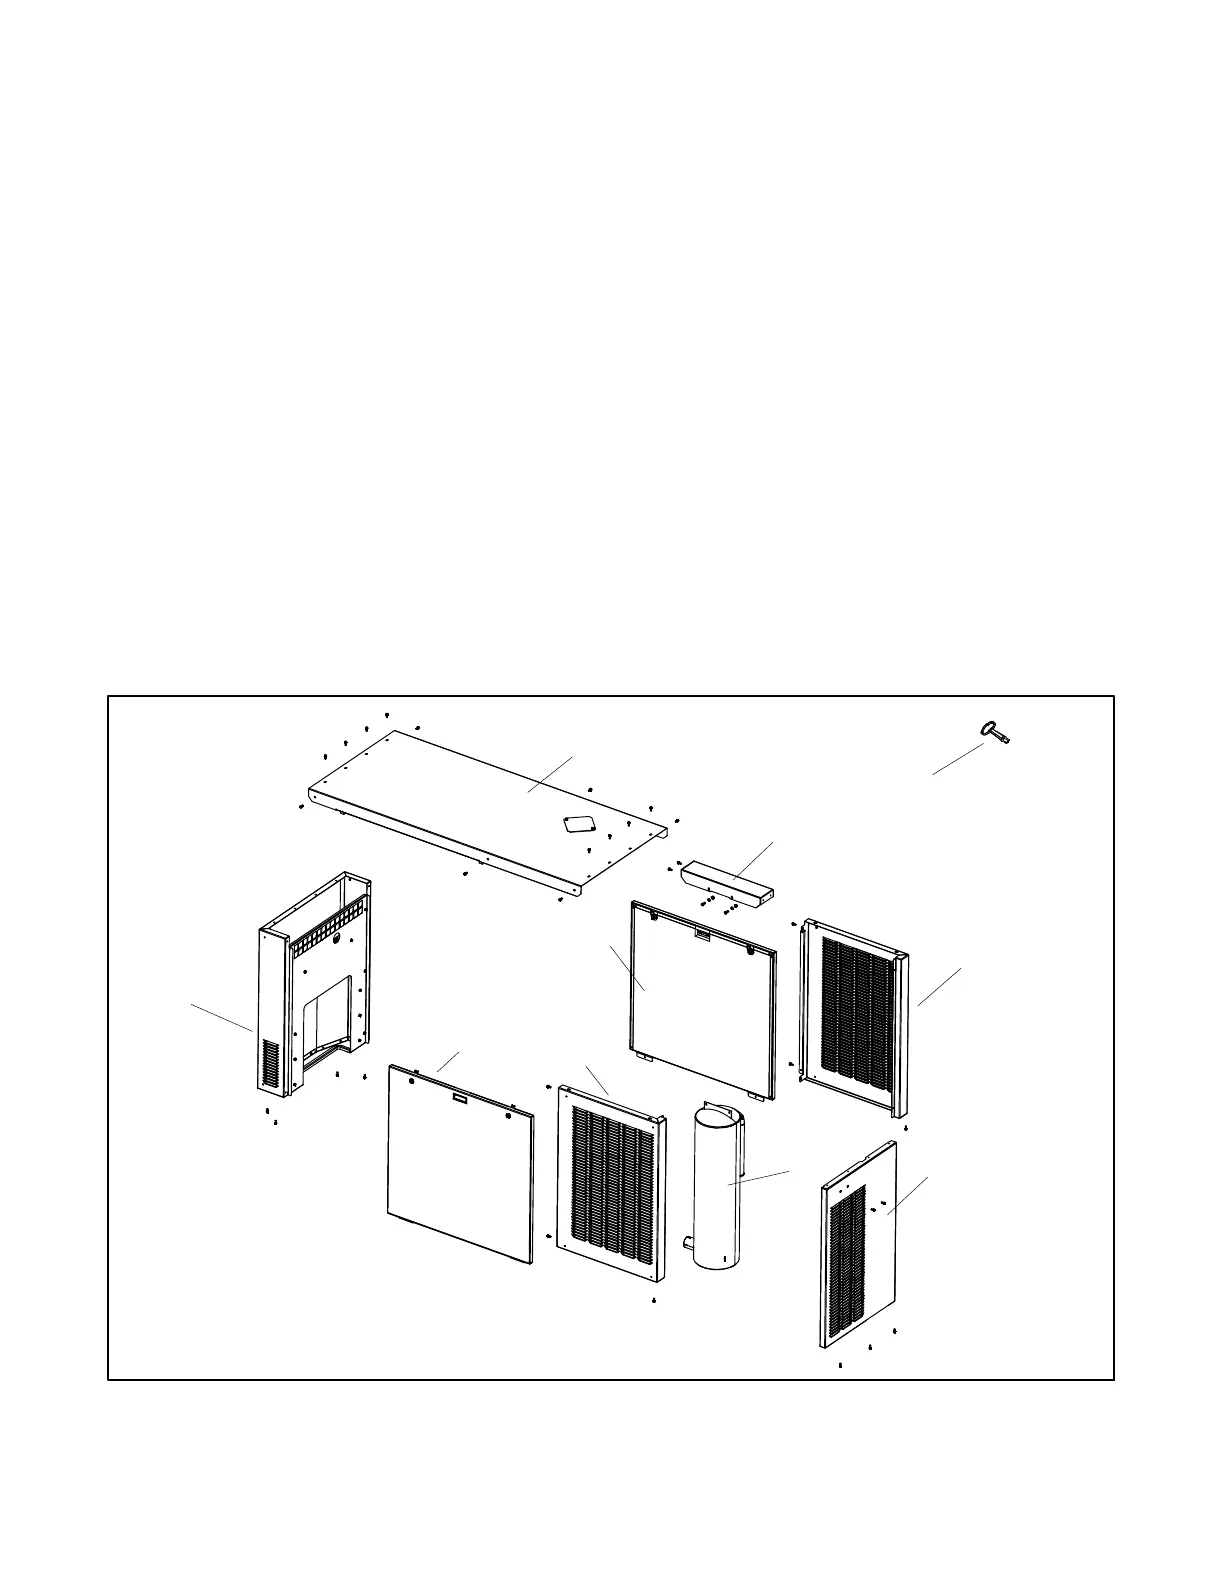
See Figure 7-1 for an illustration of enclosure parts.
Remove enclosure panels as necessary to access the
alternator.
1. To remove the doors:
a. Use the latch opening key to unlock the door.
b. Lift and remove the door.
c. Disconnect the ground cable on the back of the
door.
2. To remove the roof:
a. Remove the fourteen screws that secure the
roof, three screws in each side and four on each
end.
b. Lift and remove the roof.
3. To remove the side panels:
a. Remove the two screws that secure the side
panel to the bulkhead.
b. Remove the screw that secures the side panel
to the skid.
c. Lift and remove the side panel.
4. To remove the front panel:
a. Remove the three screws connecting the front
panel to the skid.
b. Remove the two screws connecting the front
panel to the exhaust mounting bracket.
c. Lift and remove the front panel.
5. To remove the rear panel:
a. Remove the four screws that connect the rear
panel to the skid.
b. Disconnect and remove the engine snorkel
from the air cleaner.
c. Lift and remove the rear panel.
GM91044
1. Roof
2. Exhaust mounting bracket
3. Key, latch opening
4. Side panel
5. Front panel
6. Silencer
7. Door
8. Rear panel assembly
1
4
2
6
5
3
7
7
8
4
Figure 7-1 Enclosure
 Loading...