TP-5986 4/0338 Section 9 Generator Disassembly/Reassembly
1
2
3, 4, 5 6
7
8
9
10 11
12
1314
1718192021
88
8
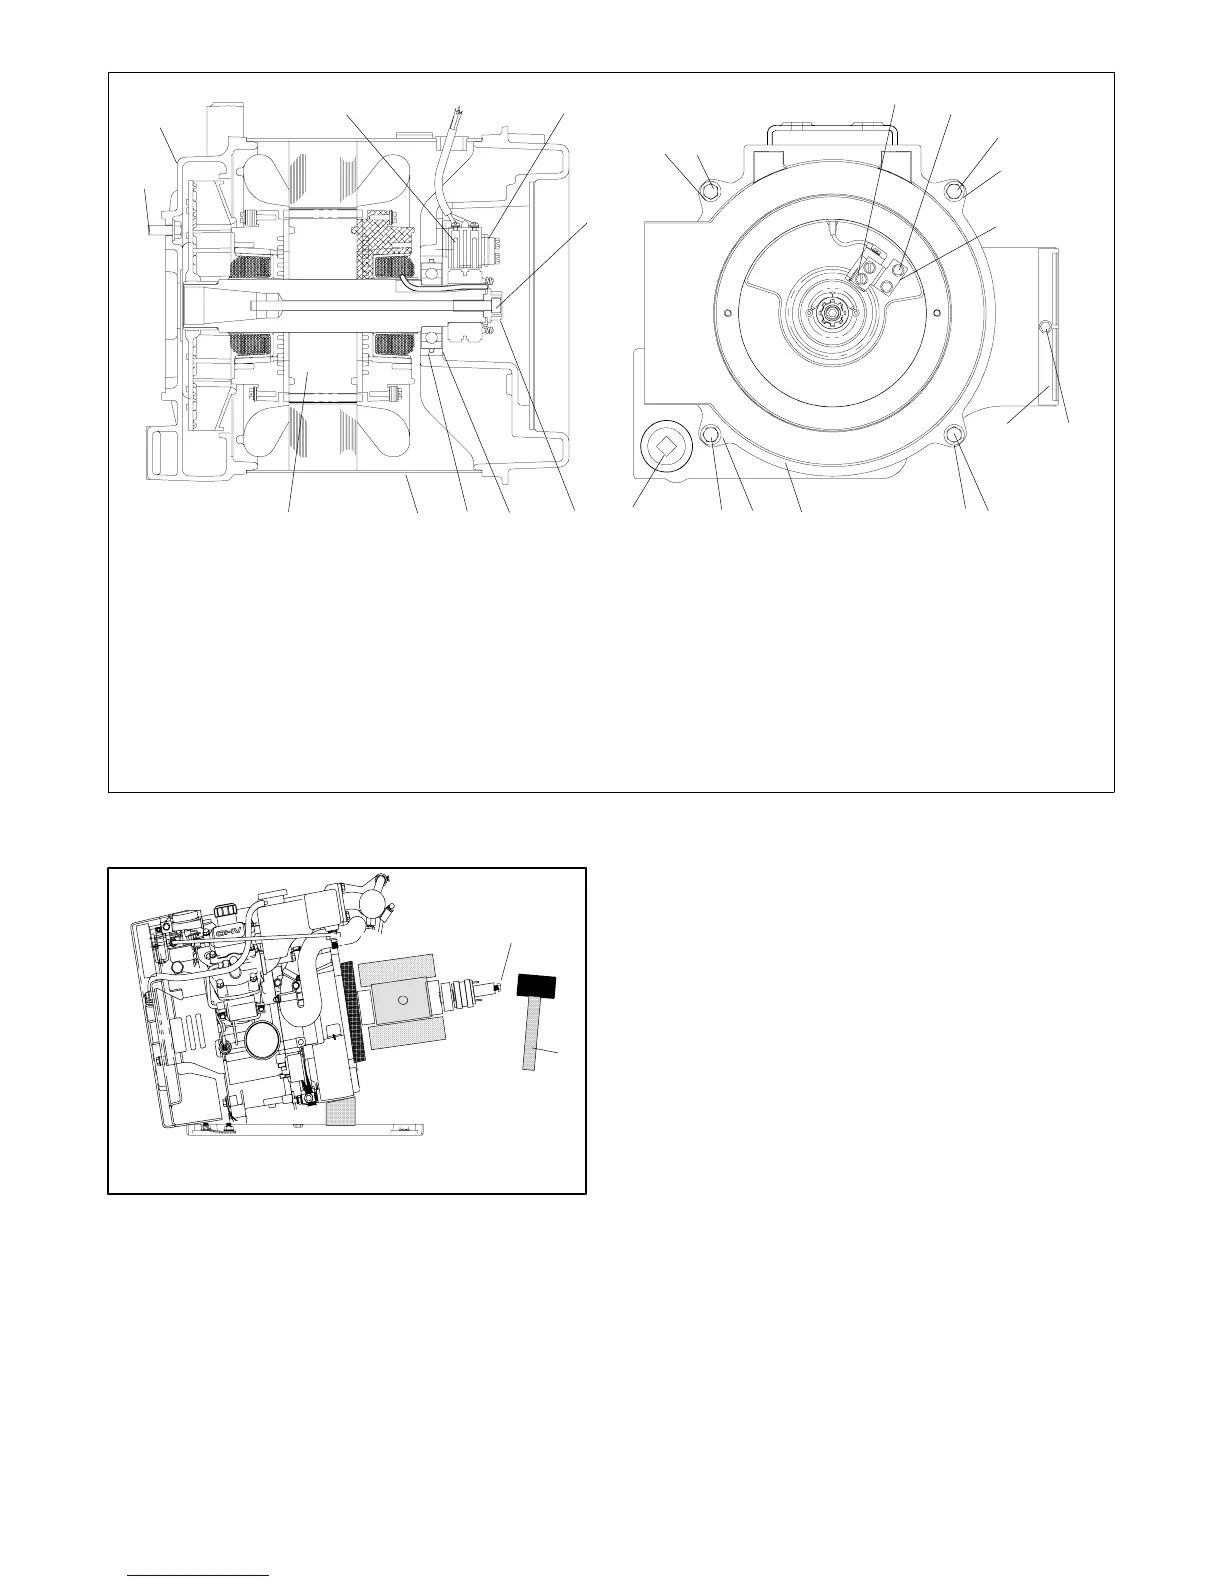
201-191-1
1. Generator adapter plate bolt, quantity 4
2. Generator adapter
3. Spring
4. Brush holder
5. Brush, quantity 2
6. Brush holder shim
7. Rotor bolt
8. Hardened washer
9. Generator overbolt, quantity 4
10. Retainer wire
11. Brush assembly mounting screws, quantity 2
12. Bracket, brush holder
13. Fan guard bolts, quantity 2
14. Fan guard
15. End bracket
16. Pipe plug
17. End drive fitting
18. End bracket bearing
19. O-ring
20. Stator assembly
21. Rotor assembly
1516
9
99
Figure 9-3 Alternator Assembly Components
2
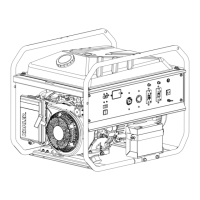
1
1. Rotor bolt
2. Hammer
598692
Figure 9-4 Removing the Rotor
18. Remove the end bracket overbolts. See
Figure 9-3. Use a rubber mallet to separate the
end bracket from the stator housing.
19. Carefully remove the stator assembly from the
generator adaptor plate.
20. Remove the rotor bolt and end drive fitting.
21. Reinstall the rotor bolt (without end fitting), finger
tighten, and back off two turns.
22. Strike the bolt with a hammer until the rotor is freed
from the engine tapered drive shaft. Do not
damage through bolt threads or bolt head. See
Figure 9-4.