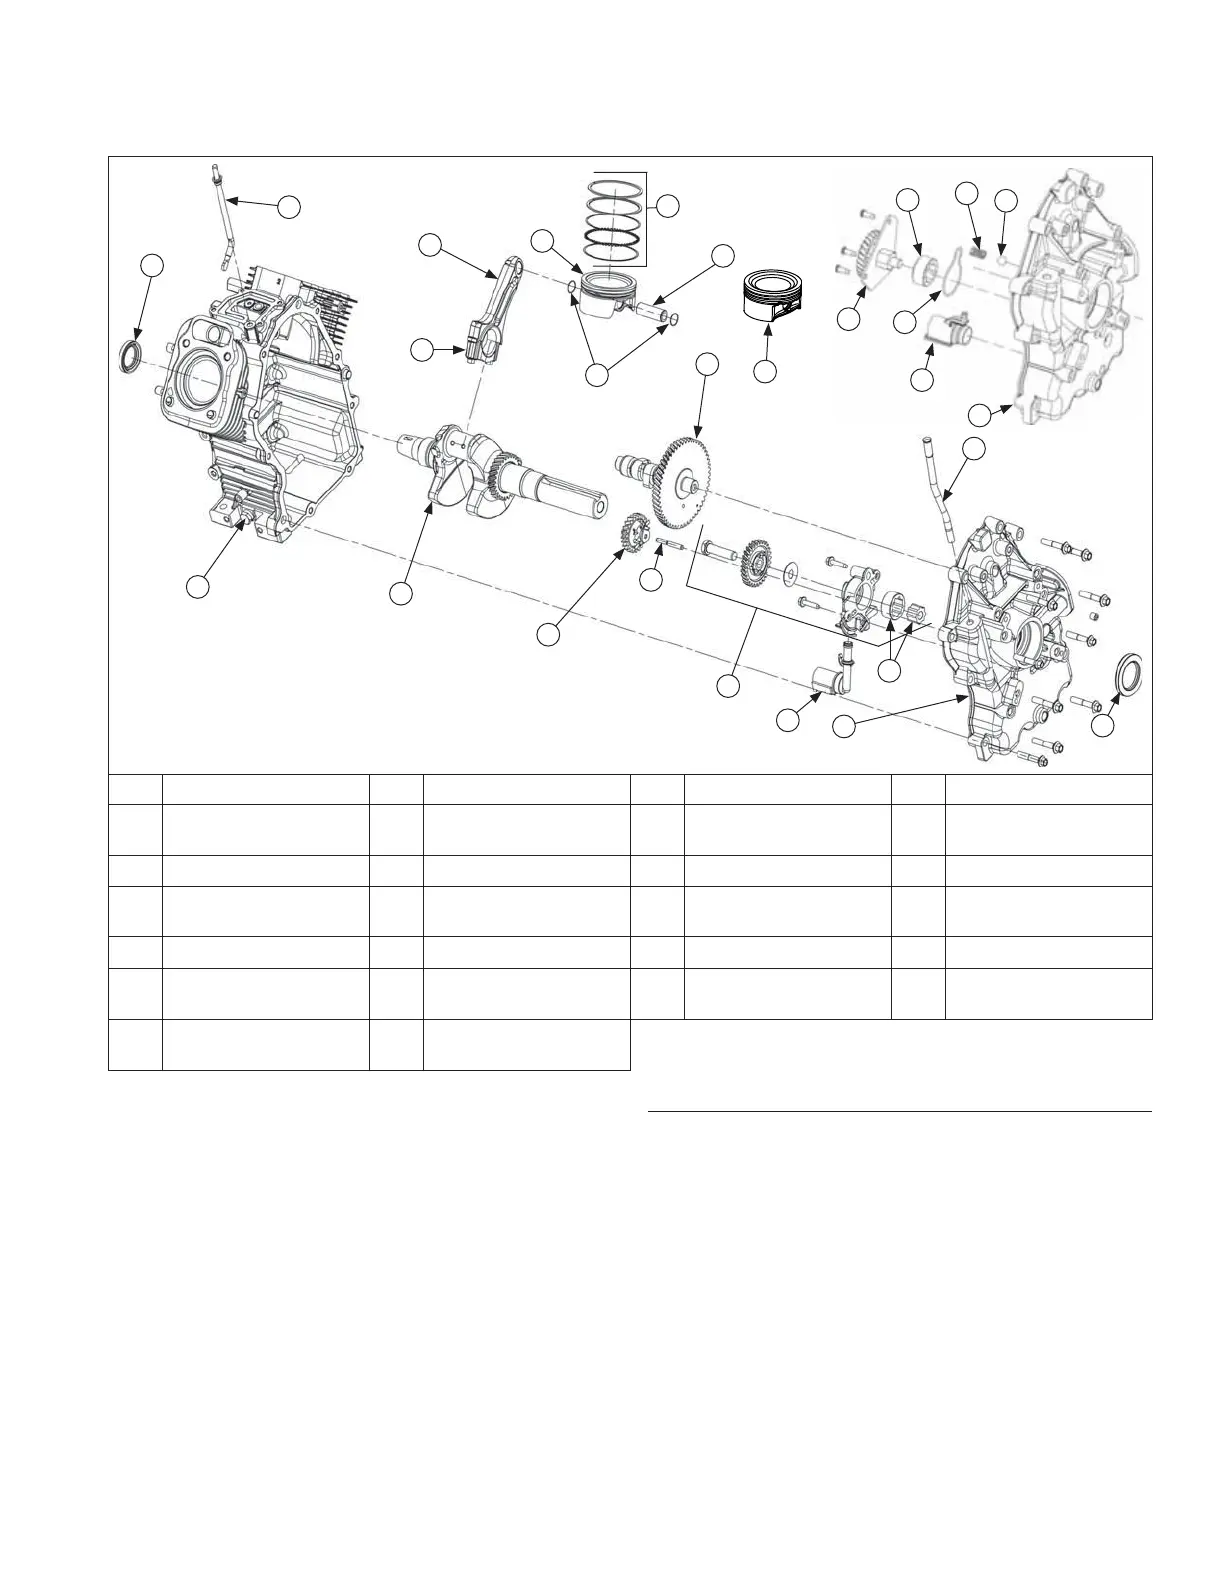
Crankcase Components
A
Q
P
H
F
E
B
A
C
D
G
I
L
J
S
O
N
M
R
K
Z
T
W
V
U
X
Y
A Oil Seal B Closure Plate (Style A) C Gerotor Gear (Style A) D Dipstick Tube
E
Oil Pick-Up Tube
(Style A)
F
Oil Pump Assembly
(Style A)
G Governor Gear Shaft H Governor Gear
I Camshaft J Piston Pin K Piston Ring Set L Piston Pin Retainer
M Piston (Style B) N Connecting Rod O
Connecting Rod End
Cap
P Crankshaft
Q Crankcase R
Governor Cross Shaft
S
Piston (Style A)
T
Closure Plate (Style B)
U
Outer Gerotor Gear
(Style B)
V Ball (Style B) W Spring (Style B) X
Oil Pump Cover O-ring
(Style B)
Y
Oil Pump Assembly
(Style B)
Z
Oil Pick-Up Tube
(Style B)
NOTE: Make sure engine is assembled using all
specifi ed torque values, tightening sequences
and clearances. Failure to observe specifi cations
could cause severe engine wear or damage.
Always use new gaskets. Apply a small amount
of oil to threads of critical fasteners before
assembly, unless a sealant or Loctite
®
is
specifi ed or preapplied.
Make sure all traces of any cleaner are removed before
engine is assembled and placed into operation. Even
small amounts of these cleaners can quickly break down
lubricating properties of engine oil.
Check closure plate, crankcase, cylinder heads, and
valve covers to be certain all old sealing material has
been removed. Use gasket remover, lacquer thinner, or
paint remover to remove any remaining traces. Clean
surfaces with isopropyl alcohol, acetone, lacquer thinner,
or electrical contact cleaner.
Install Flywheel End Oil Seal
1. Make sure seal bore of crankcase is clean and free
of any nicks or burrs.
2. Apply a light coat of P80 Emulsion Lubricant (refer to
Tools and Aids) to outside diameter of oil seal.
3. Drive oil seal into crankcase using a seal driver.
Make sure oil seal is installed straight and true in
bore and tool bottoms against crankcase.
Reassembly
10724 690 06 Rev. P KohlerEngines.com

 Loading...