8.3
Section 8
Disassembly
8
Remove Muffl er
1. Remove the exhaust system and a aching
hardware from the engine. On engines equipped
with a port liner, remove it now.
2. Remove the oxygen sensor and disconnect the
connector from the wire harness.
Remove Air Cleaner Assembly
Heavy Duty Air Cleaner
1. Remove the three hex fl ange nuts securing the air
cleaner assembly to the thro le body. See Figure
8-7.
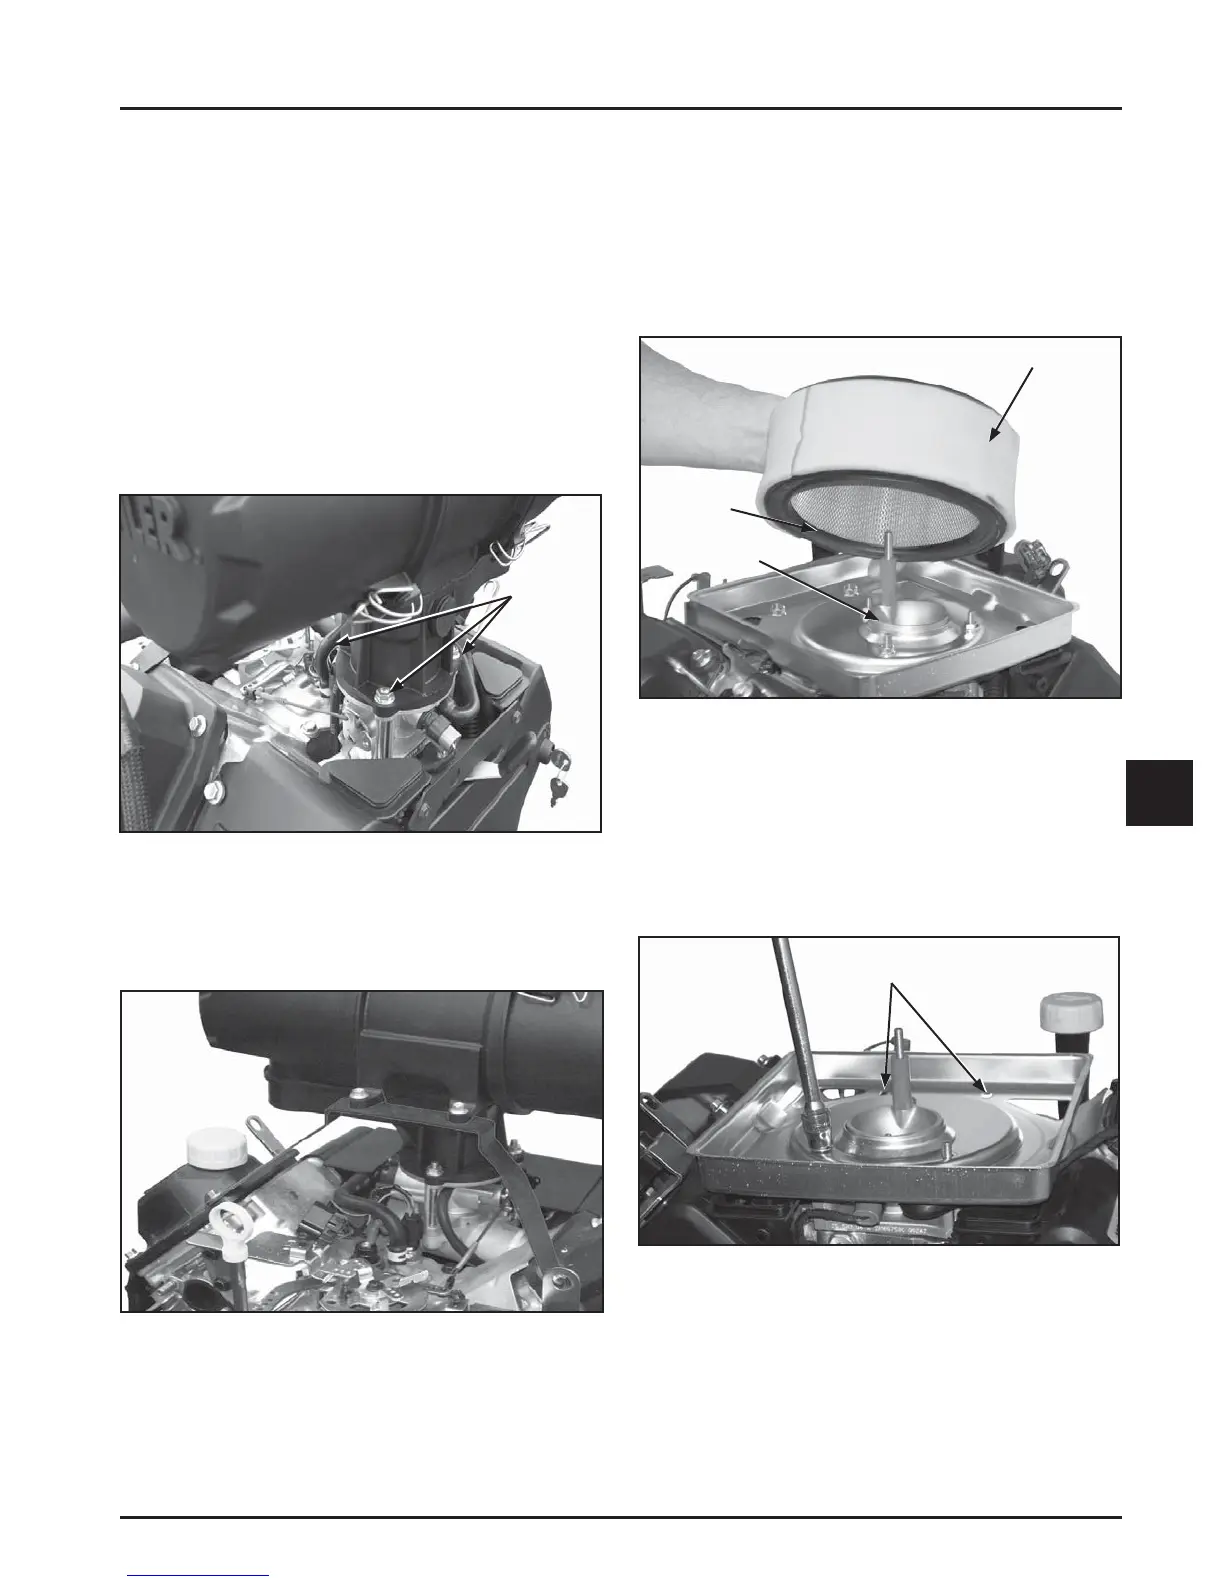
Low-Profi le Air Cleaner (Optional)
1. Loosen the retaining knob and remove the cover.
2. Remove the wing nut from the element cover.
3. Remove the element cover, the air cleaner
element with precleaner, and the stud seal. See
Figure 8-9.
Figure 8-9. Removing Air Cleaner Element,
Precleaner, and Stud Seal.
4. Remove the three hex fl ange nuts. See Figure
8-10.
5. Remove the two hex fl ange screws securing the
base and then remove the base. See Figures 8-10
and 8-11.
Figure 8-10. Removing Air Cleaner Base Nuts.
Figure 8-8. Air Cleaner Bracket Mounting Fastener
Location.
Hex
Flange
Nuts
Figure 8-7. Heavy Duty Air Cleaner Mounting
Fastener Location.
2. Remove the two hex fl ange screws securing the
air cleaner assembly to the air cleaner bracket and
remove the air cleaner assembly. See Figure 8-8.
Air Cleaner
Element
Precleaner Element
Stud Seal
Hex Flange
Screws