45
Reassembly
18 690 01 Rev. B KohlerEngines.com
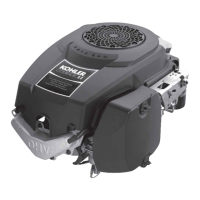
Install Closure Plate
Torque Sequence
52
4
6
1
3
NOTE: Make sure governor lever is against cup on
governor gear assembly.
1. Check to be sure sealing surfaces of crankcase and
closure plate are clean and free of nicks or burrs.
2. Install dowel pins and install a new closure plate
gasket (dry) onto dowel pins.
3. Install closure plate to crankcase. Carefully seat
ends of camshaft and balance shaft into their mating
bearings. Rotate crankshaft slightly to help engage
governor gear teeth.
4. Install screws securing closure plate to crankcase.
Torque screws in sequence shown to 24 N·m
(212 in. lb.).
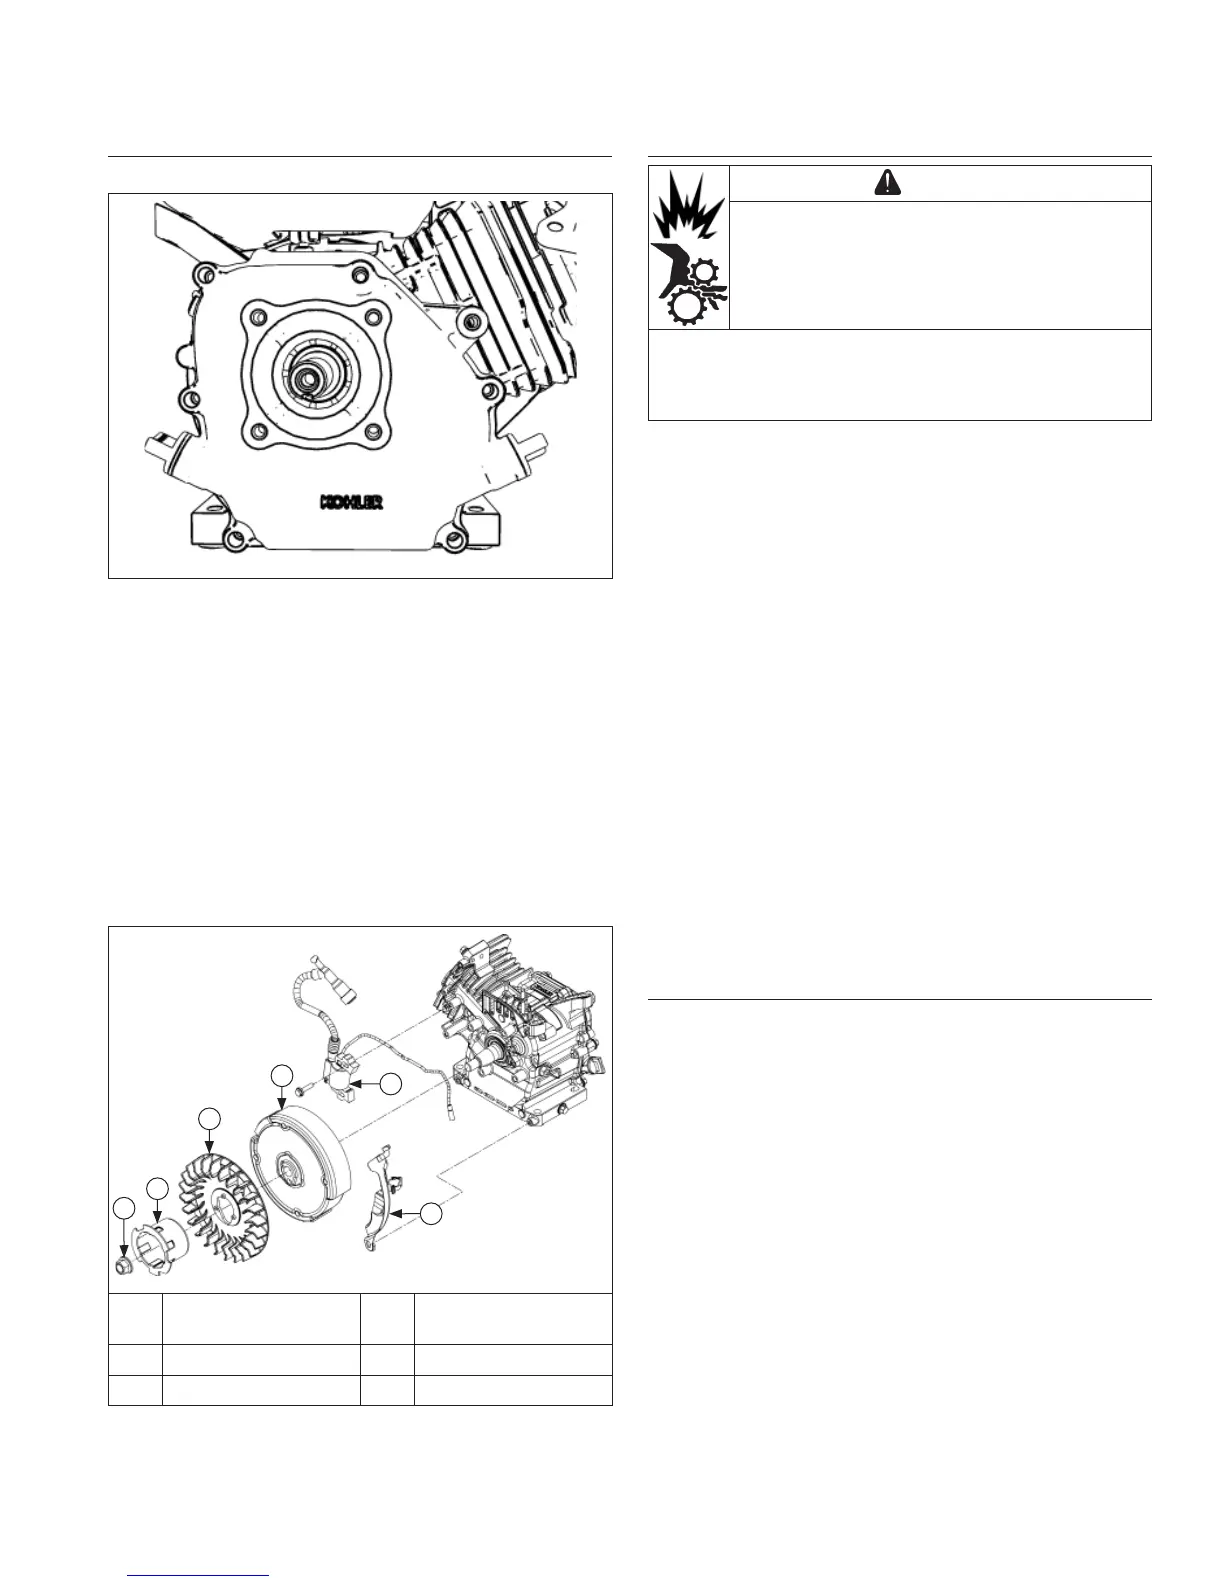
Flywheel/Ignition Components
A
B
C
D
F
E
A
Flywheel Retaining
Nut
B Drive Cup
C Flywheel Fan D Flywheel
E Flywheel Shield F Ignition Module
Install Flywheel
CAUTION
Damaging Crankshaft and Flywheel can
cause personal injury.
Using improper procedures can lead to broken
fragments. Broken fragments could be thrown from
engine. Always observe and use precautions and
procedures when installing fl ywheel.
NOTE: Before installing fl ywheel make sure crankshaft
taper and fl ywheel hub bore are clean, dry, and
completely free of lubricants. Presence of
lubricants can cause fl ywheel to be over
stressed and damaged when nut is torqued to
specifi cation.
NOTE: Make sure fl ywheel key is installed properly in
keyway. Flywheel can become cracked or
damaged if key is not installed properly.
1. Install woodruff key into keyway of crankshaft. Be
sure that key is properly seated and parallel with
taper of shaft.
2. Install fl ywheel onto crankshaft, being careful not to
shift position of woodruff key.
3. Install fl ywheel shield and secure with screw.
4. Install fan bosses into matching holes in fl ywheel.
5. Position drive cup on fl ywheel, engaging boss on its
base with corresponding hole on fl ywheel. Hold in
position and install nut. Finger tighten to keep cup
indexed.
6. Use a fl ywheel strap wrench and torque wrench to
tighten fl ywheel nut. Torque nut to 74 N·m
(655 in. lb.).
Install Ignition Module
NOTE: Ensure ignition module is correctly oriented.
1. Turn fl ywheel so magnet is away from location
where ignition module will be installed.
2. Install ignition module loosely to bosses with screws.
Move module as far away from fl ywheel as possible,
then tighten screws just enough to hold it in position.
3. Rotate fl ywheel in a clockwise direction until magnet
is under 1 leg of ignition module.
4. Insert a 0.254 mm (0.010 in.) fl at feeler gauge
between leg of module and magnet. Loosen nearest
screw, allowing magnet to draw module against
feeler gauge. Push against module to hold leg tight
against feeler gauge while tightening screw.
5. Rotate fl ywheel until magnet is under other leg of
module. Loosen nearest screw, allowing magnet to
draw module against feeler gauge. Push against
module to hold leg tight against feeler gauge while
tightening screw.
6. Torque both module screws to 8 N·m (70.8 in. lb.).
7. Rotate fl ywheel back and forth, checking to make

 Loading...