47
Reassembly
18 690 01 Rev. B KohlerEngines.com
d. Hold adjuster from turning and tighten locknut.
Torque locknut to 10 N·m (88.5 in. lb.).
e. Recheck that clearance is correct.
5. Set gap of new spark plug to 0.76 mm (0.030 in.).
6. Install spark plug in cylinder head and torque to
27 N·m (20 ft. lb.).
Install Throttle Plate
Install throttle plate with screws.
Install Engine Air Shroud
Install cylinder shroud. Torque screws to 8 N·m
(70.8 in. lb.).
Install Carburetor
1. Install a new insulator to cylinder head gasket onto
carburetor studs, followed by insulator, carburetor to
insulator gasket, carburetor, and air cleaner gasket.
2. Connect throttle link and dampening spring into their
respective holes on throttle lever.
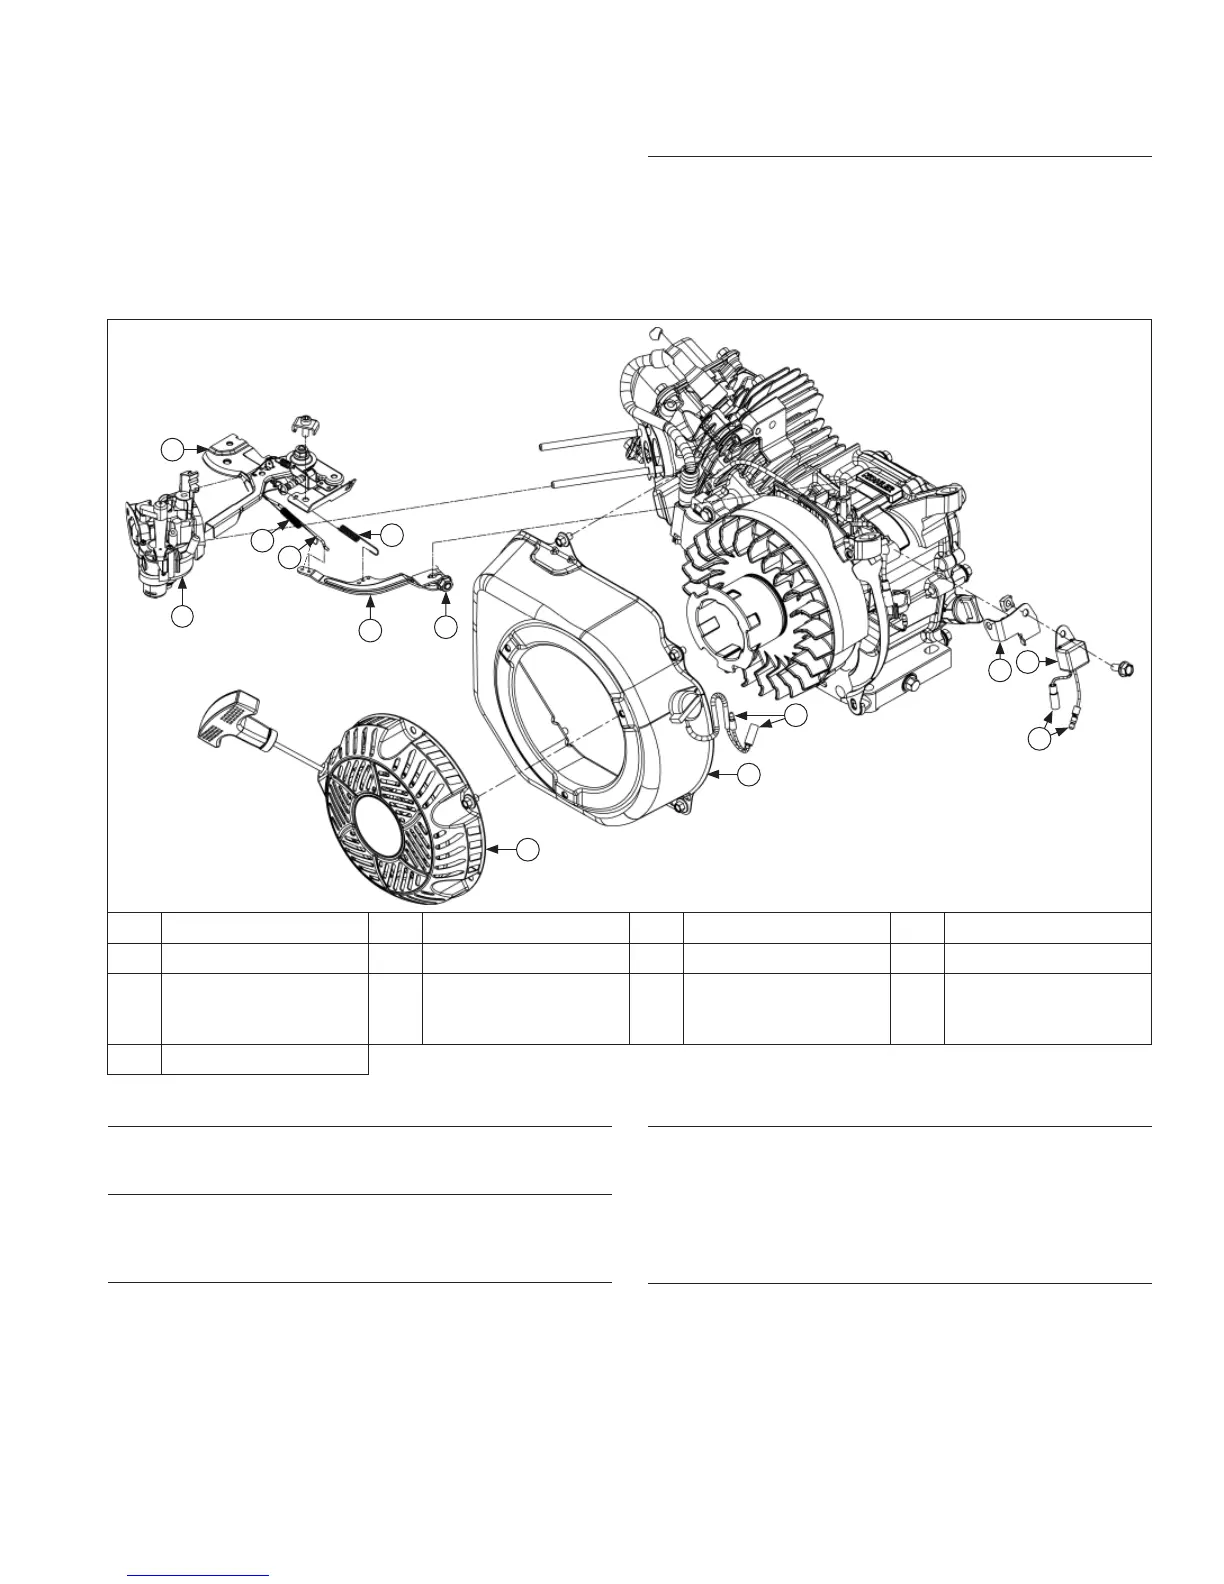
Blower Housing/Control Panel Components
G
F
L
M
E
D
A
B
J
H
C
I
K
A Governor Lever B Nut C Governor Spring D Throttle Link
E Dampening Spring F Control Assembly G Carburetor H Retractable Starter
I
On/Off Wiring
Harness Bullet
Connector
J Blower Housing K
Oil Sentry
™
Wiring
Harness Bullet
Connector
L Oil Sentry
™
Module
M Oil Sentry
™
Bracket
Install Blower Housing
1. Position spark plug lead in molded clip in carburetor
insulator.
2. Install blower housing on crankcase with screws.
Torque screws to 10 N·m (88.5 in. lb.).
Install Electric Starter and Control Panel (if
equipped)
1. Align and mount electric starter onto crankcase.
Install and torque screws to 24 N·m (212 in. lb.).
2. Connect electrical leads for Oil Sentry
™
, ignition
module, key switch, relay, and starter.
3. Mount control panel to crankcase and secure with
screws. Ensure ground wires are placed between
screw and bracket. Torque screws to 24 N·m
(212 in. lb.).
Install Valve Cover
1. Install a new valve cover gasket onto valve cover.
2. Install valve cover/gasket assembly on head with
screws and torque to 8 N·m (71 in. lb.) using
sequence shown.
 Loading...