8
3. Unscrew and remove the oil ll cap/dipstick;
wipe o oil. Reinsert the dipstick into the oil ll
tube and rest the cap on the tube. Do not thread
the cap onto the tube.
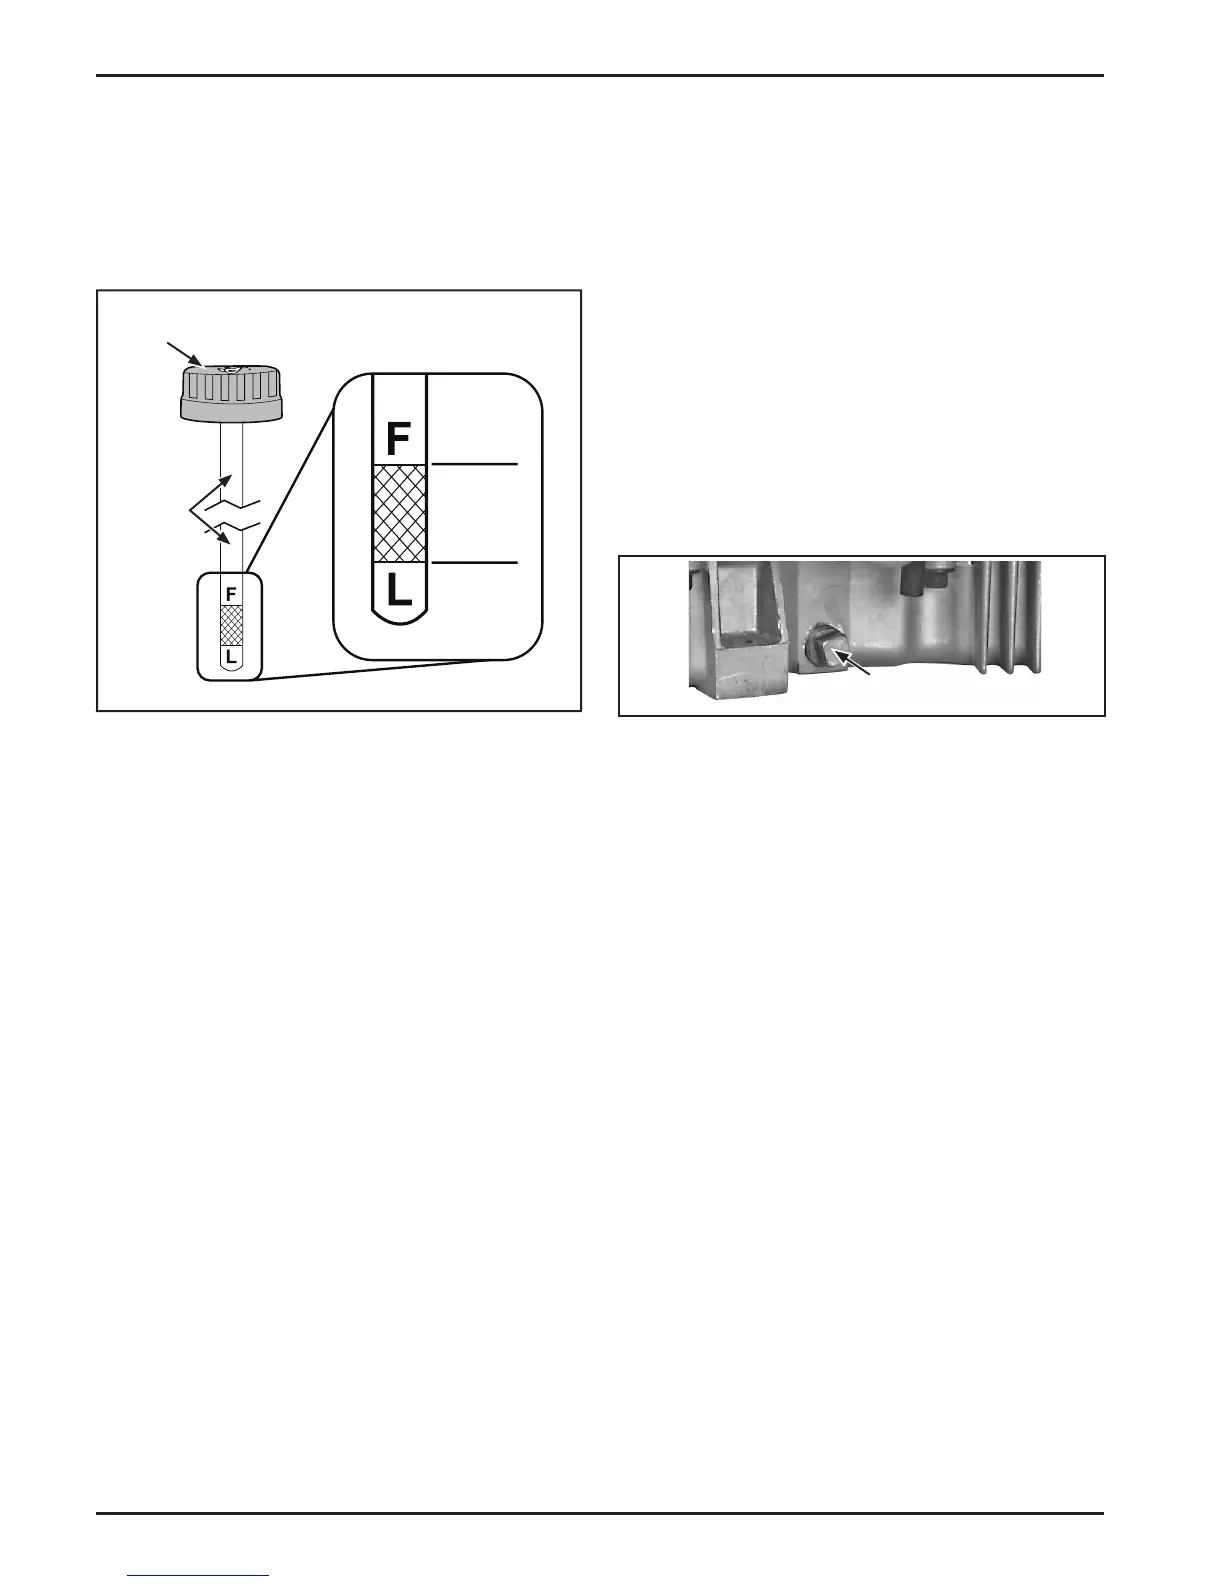
4. Remove the oil ll cap/dipstick and check oil level
is correct. The correct oil level is between the F
and L marks on the dipstick. See Figure 4.
Oil Fill
Cap
Dipstick
Operating
Range
Figure 4. Correct Oil Level.
5. If the level is low, add oil of the proper type (Refer
to Oil Type) and to the correct level. Always check
the level before adding more oil.
NOTE: To prevent extensive engine wear or
damage, always maintain the oil level
within the Operating Range.
6. Reinstall the oil ll cap/dipstick and tighten on oil
ll tube.
Oil Sentry™
Some engines are equipped with an optional Oil
Sentry™ switch. This switch is designed to prevent the
engine from starting in a low oil or no oil condition.
The Oil Sentry™ may not shut down a running
engine before damage occurs. In some applications
this switch may activate a warning signal. Read your
equipment manuals for more information.
NOTE: Make sure the oil level is checked BEFORE
EACH USE and is maintained up to the F
mark on the dipstick. This includes engines
equipped with Oil Sentry™.
Oil Disposal
Protect and respect the environment. Dispose of oil
at your local recycling center or municipal collection
center in accordance with local ordinances.
Change Oil
Change oil aer every 100 hours of operation (more
frequently under severe conditions). Rell with oil as
specied in the Viscosity Grades Table. See Figure 2.
Change the oil while the engine is still warm. The oil
will ow more freely and carry away more impurities.
Make sure the engine is level when lling, checking, or
changing the oil.
Change the oil as follows:
1. To keep dirt, debris, etc., out of the engine, clean
the area around the oil ll cap/dipstick before
removing it. See Figure 3.
2. Remove one of the oil drain plugs and the oil
ll cap/dipstick. Allow ample time for complete
drainage. See Figures 5 and 6.
Oil Drain Plug
Figure 5. Oil Drain Plug (Starter Side).
3. Reinstall the drain plug and torque to
13.6 N·m (10 . lb.).
4. Fill the crankcase, with new oil of the proper type,
to the F mark on the dipstick. Refer to Oil Type.
Always check the level with the dipstick before
adding more oil.
5. Reinstall the oil ll cap/dipstick and tighten
securely.
NOTE: To prevent extensive engine wear or
damage, always maintain the proper oil
level in the crankcase. Never operate
the engine with the oil level below the
L mark or above the F mark on the
dipstick.
Change Oil Filter
Replace the oil lter at least every other oil change
(every 200 hours of operation). Always use a genuine
Kohler oil lter. Replace the oil lter as follows:
1. Drain the oil from the engine crankcase. Remove
one of the oil drain plugs and the oil ll cap/
dipstick. Allow ample time for complete drainage.
See Figures 3, 5, and 6.
2. Allow the oil lter to drain.
 Loading...