EasyManua.ls Logo

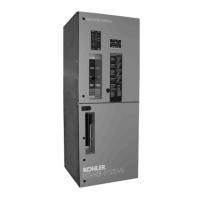
Kohler KCT MPAC 1000 - User Manual

Kohler KCT MPAC 1000
76 pages
Print Icon
To Next Page IconTo Next Page
Loading...
Automatic Transfer Switches
Operation and
Installation
Models:
KCT, KCP
Power Switching Device:
Standard
Open-Transition 30 to 4000 Amps
Programmed-Transition 150 to 4000 Amps
Electrical Controls:
MPAC 1000t
TP-6126 8/02b

Table of Contents

Questions and Answers

  • K
    Kevin JonesAug 4, 2025
    Why does the red LED stay on for more than 24 hours on my Kohler KCT MPAC 1000?
    • D
      David WellsAug 4, 2025
      If the red LED on your Kohler Switch stays on for more than 24 hours, it could be due to several reasons. One possibility is that one or more cells in the battery are defective or damaged, in which case you should load test the battery and replace it if needed. Another reason might be that the charger has reduced its output voltage because of a DC overload or short. Try removing the source of the overload or short, disconnect the charger’s black (NEGATIVE) ring terminal from the battery, and reapply AC power to see if the green LED lights up. Finally, excessive DC equipment drawing too much current could be the issue. Try turning off unnecessary DC equipment while charging.
  • L
    Lisa RobertsAug 11, 2025
    What to do if the red and green LEDs stay on for more than 24 hours on my Kohler KCT MPAC 1000?
    • C
      Crystal FernandezAug 11, 2025
      If both the red and green LEDs on your Kohler Switch stay on for more than 24 hours, it could be due to a few reasons. One reason might be that on-board DC systems are drawing between 1.5 – 5A. To resolve this, try turning off excessive DC equipment while charging. Another possibility is that one or more cells in the battery are defective or damaged. In this case, you should load test the battery and replace it if necessary. Lastly, extremely low AC voltage at the battery charger could be the cause. Try applying a higher AC voltage source or reducing the length of the power cord.
  • M
    Mark TannerAug 19, 2025
    Why does the green LED stay on when the battery is low on my Kohler KCT MPAC 1000?
    • B
      bridget54Aug 19, 2025
      If the green LED on your Kohler Switch stays on even when the battery is low, consider these potential causes. It could be due to an open DC output fuse, which you can fix by replacing the DC output fuse with a Bussmann AGC--10. Another cause might be faulty or contaminated terminal connections; clean and tighten or repair all terminal connections. Also, one or more defective or damaged cells can cause this issue, so load test the battery and replace it if necessary.
  • M
    Michelle FlemingAug 26, 2025
    What to do if neither of the LEDs turn on when the AC power is applied to my Kohler KCT MPAC 1000 Switch?
    • H
      Henry ButlerAug 27, 2025
      If neither of the LEDs on your Kohler Switch turn on when AC power is applied, it could be due to a couple of reasons. First, check if there is AC power available at the charger. If not, connect AC power or reset the AC breaker on the main panel. If power is available, there may be a component failure, in which case you should return the charger to the Service Department.

Summary

Safety Precautions and Instructions

General Safety Warnings

Defines Danger, Warning, Caution, and Notice levels for hazards.

Accidental Starting Hazards

Details risks and procedures for preventing accidental generator starts.

Battery Hazards

Covers risks related to sulfuric acid, explosion, and ventilation for batteries.

Hazardous Voltage and Electrical Shock

Warns about severe injury or death from hazardous voltage and moving rotors.

Heavy Equipment Safety

Addresses hazards related to unbalanced weight and proper lifting practices.

Moving Parts and General Notices

Covers hazards from moving parts and important operational notices.

Introduction

List of Related Materials

Lists related Kohler literature part numbers for further reference.

Service Assistance

Section 1 Product Description

Purpose of Automatic Transfer Switches

Explains the function of ATS in transferring loads between power sources.

Transfer Switch Nameplate Information

Details information found on the transfer switch nameplate for identification.

Kohler Model Code Interpretation

Explains how to decode the transfer switch model designation.

Section 2 Installation

Introduction to Installation

Outlines steps for installing the transfer switch and general requirements.

Receipt and Inspection of Unit

Covers procedures for inspecting the unit upon delivery and checking for damage.

Lifting Procedures

Provides guidelines and warnings for safely lifting the transfer switch unit.

Storage Guidelines

Details recommended storage temperatures and humidity for the transfer switch.

Unit Unpacking

Instructions on how to unpack the transfer switch carefully to avoid damage.

Mechanical Installation Requirements

Covers planning, foundation preparation, and mounting the transfer switch.

Manual Operation Check

Procedures for checking the manual operation of the contactor mechanism.

Manual Operation (30-200 Amp Open-Transition)

Specific steps for manually operating 30-200 amp open-transition switches.

Manual Operation (225-4000 Amp Open-Transition)

Procedures for manually operating 225-4000 amp open-transition switches.

Manual Operation (Programmed-Transition Switches)

Details manual operation for programmed-transition switches with dual operators.

Electrical Wiring Procedures

Guidelines for connecting sources, loads, and control wiring for the transfer switch.

AC Power Connections

Information on determining cable size and making AC power connections.

Cable Connection and Torque Specifications

Instructions for connecting cables and tightening lugs to specified torque values.

Interconnection Diagram Overview

Explanation of the provided interconnection diagram for system wiring.

Engine Start Connection

Details on connecting the generator set remote starting circuit to the transfer switch.

Auxiliary Contacts

Information on connecting and the number of auxiliary contacts available on switches.

Controller Ground Connection

Verification of the grounding wire connection for the controller's enclosure.

Section 3 Setup and Test

Introduction to Setup and Testing

Overview of the setup and testing procedures for the transfer switch.

User Interface Panel Overview

Description of the user interface panel, including pushbuttons and LED indicators.

Controller Reset Procedure

Steps to reset the controller without disconnecting power.

Controller Main Logic Board

Information on the main logic board, DIP switches, and connectors.

Main Logic Board DIP Switch Settings

Explains the function and factory settings of DIP switches for test and exercise.

Main Logic Board Inputs and Outputs

Details factory assignments for controller inputs and outputs.

Communications Connections

Information on serial port and Modbus network interface connections.

Programmed-Transition Interface Board (PTIB)

Description of the PTIB and its connection to the main logic board.

System Parameters Configuration

Overview of system parameters and factory settings for voltage and frequency sensing.

Time Delay Settings

Lists factory settings for various adjustable time delays in the system.

Generator Set Preparation

Steps for preparing the generator set before testing the transfer switch.

Functional Test Procedures

Outlines the three main checks for the functional test: manual, voltage, and automatic.

Manual Operation Test

Instructions for performing the manual operation test of the transfer switch.

Voltage Check Procedure

Detailed steps for checking source voltages, frequency, and phase rotation.

Automatic Operation Test Procedure

Step-by-step guide to conducting the automatic operation test of the ATS.

Exerciser Setup and Operation

Instructions for activating and configuring the exerciser for generator set testing.

Warranty Registration Process

Information on completing the startup notification form for warranty registration.

Section 4 Operation

Introduction to Operation Sequences

Describes typical transfer switch operating sequences and controller information.

Automatic Operation Sequence

Explains the sequence of operation for normal source failure and restoration.

Automatic Operation Sequence (Return to Normal)

Illustrates the sequence when the normal source is restored.

User Interface LED Indicators (Loss of Normal Source)

Details LED indicator behavior during loss of the normal power source.

System Test Procedures

Instructions for simulating source failure and performing tests with or without load.

Test with Load Sequence Flowchart

Flowchart illustrating the sequence for a loaded system test.

User Interface LED Indicators During Loaded Test

Explains LED behavior during a loaded system test.

Exerciser Operation and Setup

Details how to activate, set up, and operate the exerciser function.

Exercise without Load Sequence

Flowchart for the exercise sequence without transferring the building load.

Exercise with Load Sequence

Flowchart for the exercise sequence with load transfer.

User Interface LED Indicators During Loaded Exercise

Explains LED behavior during a loaded exercise run.

Peak Shave;Area Protection Sequence

Describes the operation sequence when peak shave or area protection is activated.

Pre- and Post-Transfer Load Control Sequence

Details the timing and operation of pre- and post-transfer load control signals.

Fault Conditions and Service Required LED

Lists faults that trigger the Service Required LED and how to clear them.

Controller Power Supply Operation

Explains how the controller is powered and its behavior during dark times.

Section 5 Scheduled Maintenance

Introduction to Scheduled Maintenance

Emphasizes the importance of preventive maintenance for safe and reliable operation.

Testing Procedures

Covers generator set exercise and automatic control system testing.

Inspection and Service Guidelines

Provides guidance on annual inspections and general maintenance tasks.

General Inspection Procedures

Details external and internal inspection steps for the transfer switch.

Other Inspections and Service

Information on additional inspections and when to contact authorized service personnel.

Comprehensive Service Schedule

A detailed schedule outlining recommended maintenance tasks and frequencies.

Section 6 Accessories

Introduction to Accessories

Lists and describes available accessories for the transfer switch.

MPAC Setup Program Usage

Explains how to use the PC-based setup program for configuration and diagnostics.

Control Switches Overview

Introduces control switches like preferred source and supervised transfer switches.

Preferred Source Switch Functionality

Details the operation and effect of the preferred source selector switch.

Preferred Source Selection Effects

Table showing how preferred source selection impacts system parameters and time delays.

Supervised Transfer Control Switch Operation

Explains the operation of the supervised transfer control switch in auto, manual, and transfer modes.

In-Phase Monitor Functionality

Describes the in-phase monitor's role in ensuring phase alignment during transfers.

Programmable Inputs and Outputs Overview

Introduces programmable inputs and outputs available via terminal strips and I/O modules.

Programmable Input;Output (I;O) Modules

Details the I/O modules, their connections, and capabilities.

I;O Module Connection Procedures

Steps for connecting I/O modules to the controller and their ratings.

I;O Module Address Configuration

How to check and set I/O module addresses using DIP switches.

I;O Module Faults and Diagnostics

Information on diagnostic LEDs and common I/O module faults.

Load Shed (Forced Transfer to OFF) Functionality

Explains the load shed accessory for removing non-critical loads.

Security Cover Installation

Details the purpose and features of the security cover.

Battery Charger Overview and Safety

Describes the 3-stage electronic battery charger and its safety warnings.

Battery Charger Connection Procedure

Step-by-step instructions for connecting the battery charger to the battery.

Battery Charger Disconnection Procedure

Steps for safely disconnecting the battery charger.

Battery Charger Operation Modes

Explains the 3-stage charging process and LED indicator meanings.

Battery Charger Troubleshooting Guide

Lists common battery charger problems, their causes, and solutions.

Battery Charger Specifications

Lists technical specifications for the battery charger, including dimensions.

Appendix A Abbreviations

Appendix B Specifications

Withstand and Closing Current Ratings

Table of ratings for open- and programmed-transition models with circuit breakers/fuses.

Circuit Breaker Ratings and Types

Lists specific circuit breaker types and their maximum sizes for various switch ratings.

Environmental Specifications

Details operating and storage temperature, humidity, and altitude limits.

Codes and Standards Compliance

Lists standards and codes that the ATS meets or exceeds.

Diagrams and Drawings Reference

Lists references for schematics, wiring diagrams, and dimension drawings.

Kohler KCT MPAC 1000 Specifications

General IconGeneral
TypeAutomatic Transfer Switch
Amperage1000A
VoltageUp to 480V
Frequency50/60 Hz
StandardsUL 1008, CSA C22.2 No. 178
Poles3
Enclosure TypeNEMA 1

Related product manuals