191
12
_07
A
A
A
A
A
A
B
C
Fig. 12.6
Fig. 12.7
Fig. 12.8
Fig. 12.10
Fig. 12.9
ED0053029590
INFORMATION ON ADJUSTMENTS
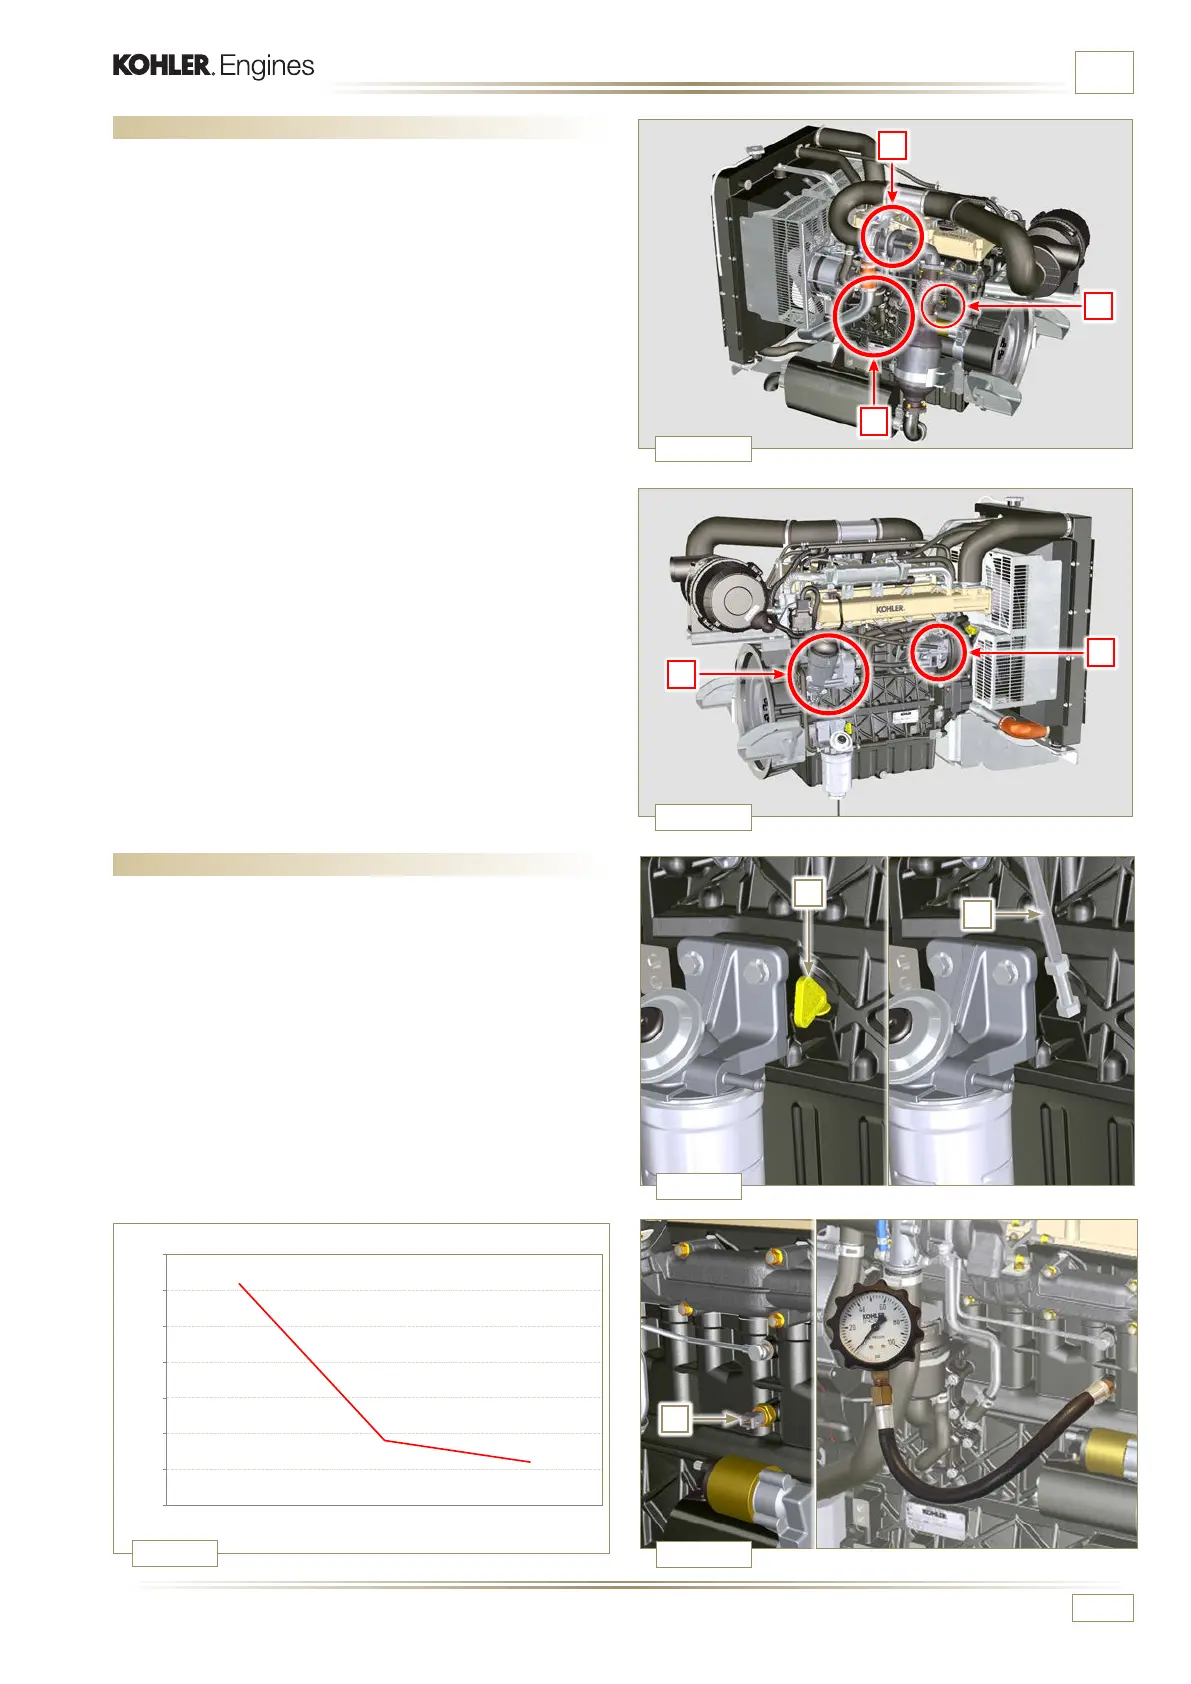
12.5 Oil leak check
Check that there are no leakages next to area A.
1 -
Start the engine at idle speed or without a load and check
whether there are any leakages next to area A.
2 - It is anyhow necessary to also check the seals of all main
components and their surface contact, such as:
- crankcase and gasket (side 1a PTO)
- oil sump and exhaust caps
- cylinder head and its assembled components
- rocker arm cover
- Timing system carter and gasket (side 2
a
PTO)
- oil dipstick housing or rod support tube.
NOTE:
Perform the checks described in Points 1 and 2
periodically and during maintenance procedures.
It is also necessary to check for leakages on the
components that are not listed.
I f n e c e s s a r y, d i s a s s e m b l e t h e c o m p o n e n t s t h a t h a v e a l e a k a g e
and investigate the possible cause.
The components must be replaced otherwise they do not
guarantee their sealing.
12.6 Oil pressure check
1
- Replace the oil dipstick A with a thermocouple B.
2 - Unscrew and remove the oil pressure switch C and screw
on a 10 bar pressure gauge in its seat (Fig. 12.10).
3 - Start the engine at idle speed and without a load, check
the oil pressure value according to the oil temperature
(Fig. 12.9).
NOTE: The graph in Fig. 12.9 illustrates the pressure line
with speed of 1000 Rpm.
4 - If the pressure values are below the values indicated in
Fig. 12.9, check to identify the cause of the problem.

 Loading...


