EasyManua.ls Logo

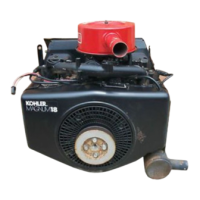
Kohler MAGNUM M18

Kohler MAGNUM M18
139 pages
To Next Page IconTo Next Page
To Previous Page IconTo Previous Page
Loading...
SECTION
5
AIR
CLEANER
Air
Cleaner
SS
Aa
Cover
A
Element
Cover
Seal
ты
a
Element
^
Cover
Bn
Optional
VP
TUS
Precleaner
Ба
і
4
Heater
i
Heater
dT
©
SS
Cover
Paper
Element
Base
Seal
DOS
er
m
d
==,
СЭ
Base
Screws
(4)
Air
Cleaner
1
E
oui
Base
a
Breather
~
Hose
On
The
Application.
Figure
5-4.
Anti-Icing
Air
Cleaner
Assembly.
Disassembly
1.
Remove
the
wing
nut
and
air
cleaner
cover.
2.
Remove
the
element
cover
seal,
element
cover,
paper
element,
precleaner,
and
air
cleaner
base
seal.
3.
Remove
the
base
screws,
air
cleaner
base,
breather
hose,
and
gasket.
Reassembly
1.
Install
the
gasket,
air
cleaner
base,
breather
hose,
and
base
screws.
NOTE:
Make
sure
breather
hose
seals
tightly
in
the
air
cleaner
base
and
breather
cover
to
prevent
unfiltered
air
from
entering
engine.
2.
Install
the
air
cleaner
base
seal,
paper
element,
precleaner
(cleaned
and
oiled),
element
cover,
and
element
cover
seal.
3.
Install
the
air
cleaner
cover
with
the
inlet
duct
po-
sitioned
for
the
season
of
operation.
Refer
to
the
decai
on
the
air
cleaner
cover
(Figure
5-5).
Position
Air
Cleaner
As
Shown
Below
For
Proper
Engine
Operation
ENGINE
TOP
VIEW
WINTER
SUMMER
BELOW
45°F
(10°C)
ABOVE
45°F
(10°C)
Figure
5-5.
Typical
Decal
-
Anti-Icing
Air
Cleaner
Cover
Positions,
For
“Winter”
Position
-
Make
sure
the
inlet
duct
fits
completely
over
heater
plate
or
heater
cover.
Refer
to
Figure
5-6.
Make
sure
the
air
cleaner
cover
is
sealed
tightly
around
the
entire
perimeter
of
air
cleaner
base.
NOTE:
Proper
sealing
around
base
is
necessary
to
prevent
unfiltered
air
from
entering
the
engine,
To
prevent
vapor
lock
and
to
ensure
proper
engine
operation,
do
not
operate
the
engine
during
“summer”
season
with
the
air
cleaner
cover
in
the
“winter”
position.
Always
refer
to
the
decal
on
the
air
cleaner
cover
for
proper
position.
5.3

Related product manuals