TP-6881 7/15 117Section 6 Disassembly/Reassembly
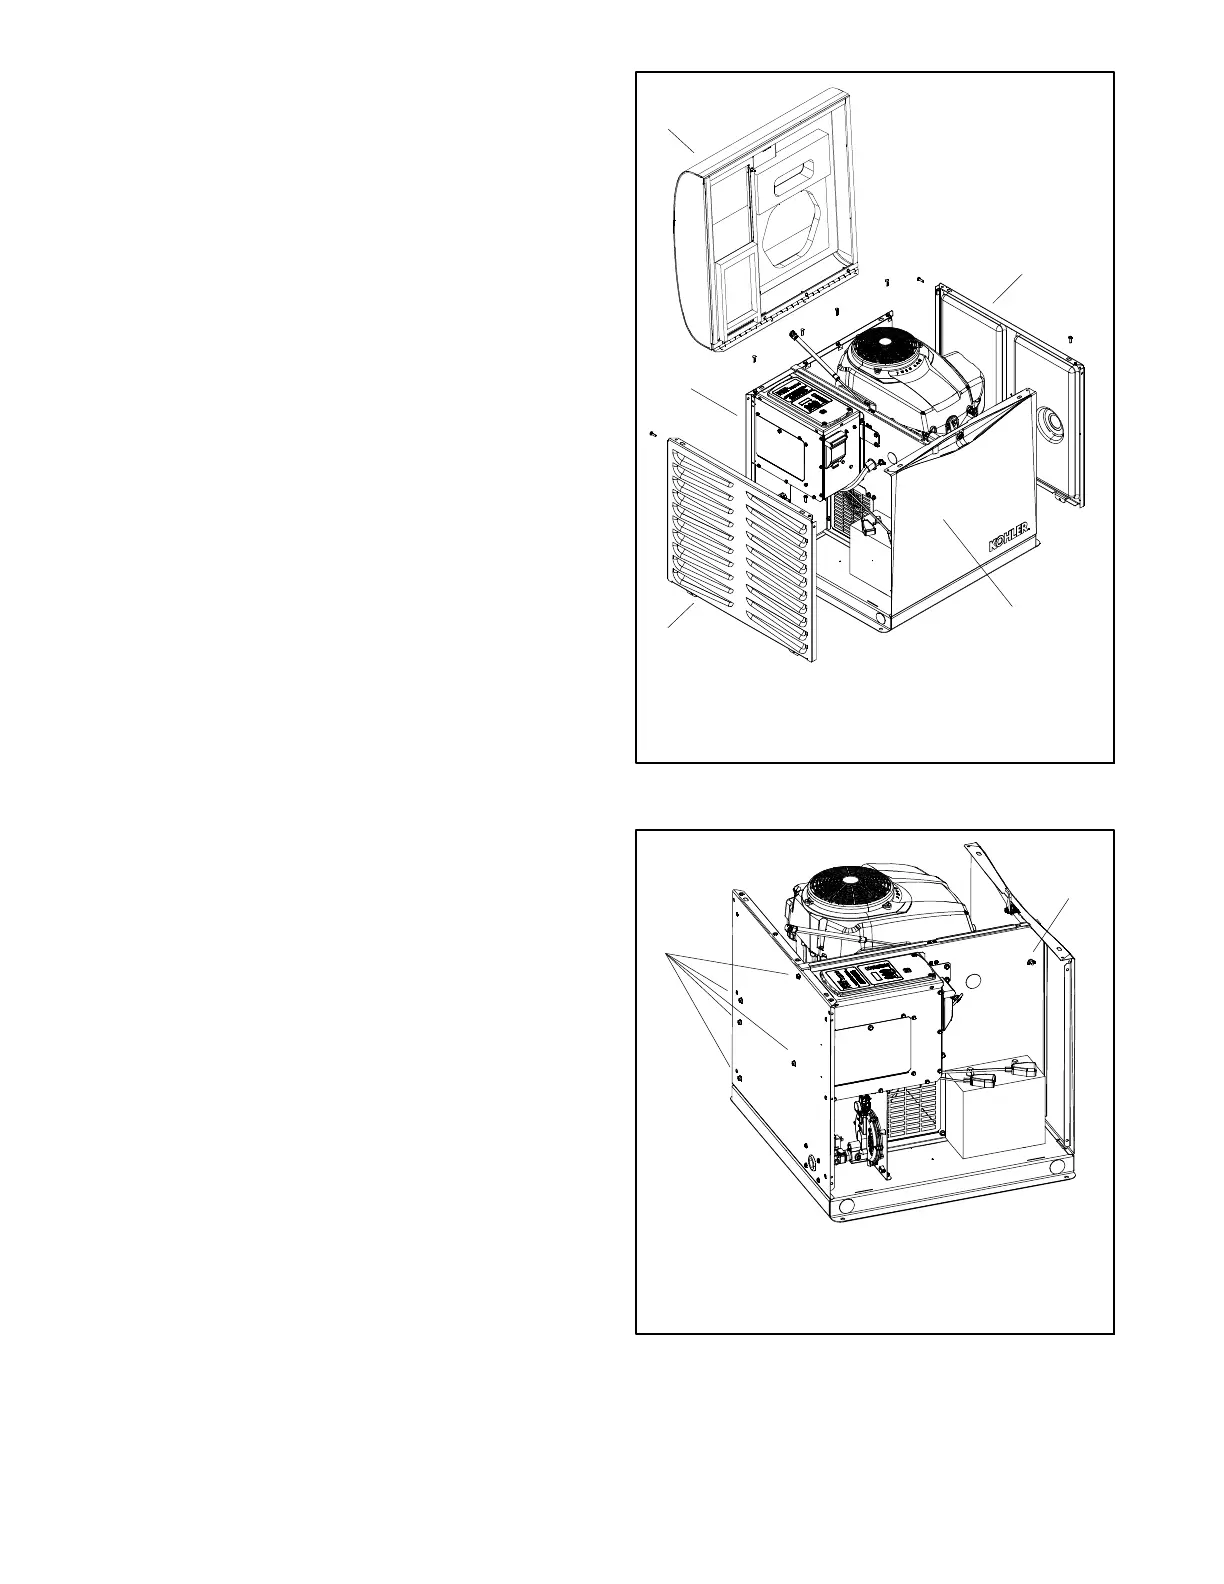
Installing the enclosure
24. Reinstall the enclosure panels in reverse order of
removal. See Figure 6-20 and Figure 6-21. Refer
to the disassembly instructions, if necessary.
a. Install the front panel.
b. Position the rear panel and thread the load
leads through the hole in the rear panel into the
junction box. Connect the load leads to the
circuit breaker.
c. Install the rear panel.
d. Install the left side panel (air-intake end).
e. Install the right side panel (exhaust end).
Important: Do not allow the roof to hang from the
hinge in an overextended or unsupported position.
Without support from the piston, the weight of the roof
will damage the sheet metal. Get assistance to hold the
roof open while completing the connection procedure.
25. To install the roof:
a. Position the enclosure roof and secure with the
four hinge bolts.
b. Reattach the roof support piston.
c. Slide the retaining ring onto the support piston.
Note: Ensure that the retaining ring holds the
support piston firmly in place. Crimp the
retaining ring if necessary.
1. Roof
2. Right side panel (exhaust end)
3. Front panel
4. Left side panel (air intake end)
5. Rear panel
1
TP-6881
5
4
2
6
Figure 6-20 Enclosure
1
2
1. Rear panel hex head screws (qty. 5)
2. Front panel wingnut
Figure 6-21 Front and Rear Panels
 Loading...