SEN03837-01
WA250, 250PZ-6 30-120 25
120 Testing and adjusting, Part 2
Testing wear of brake disc
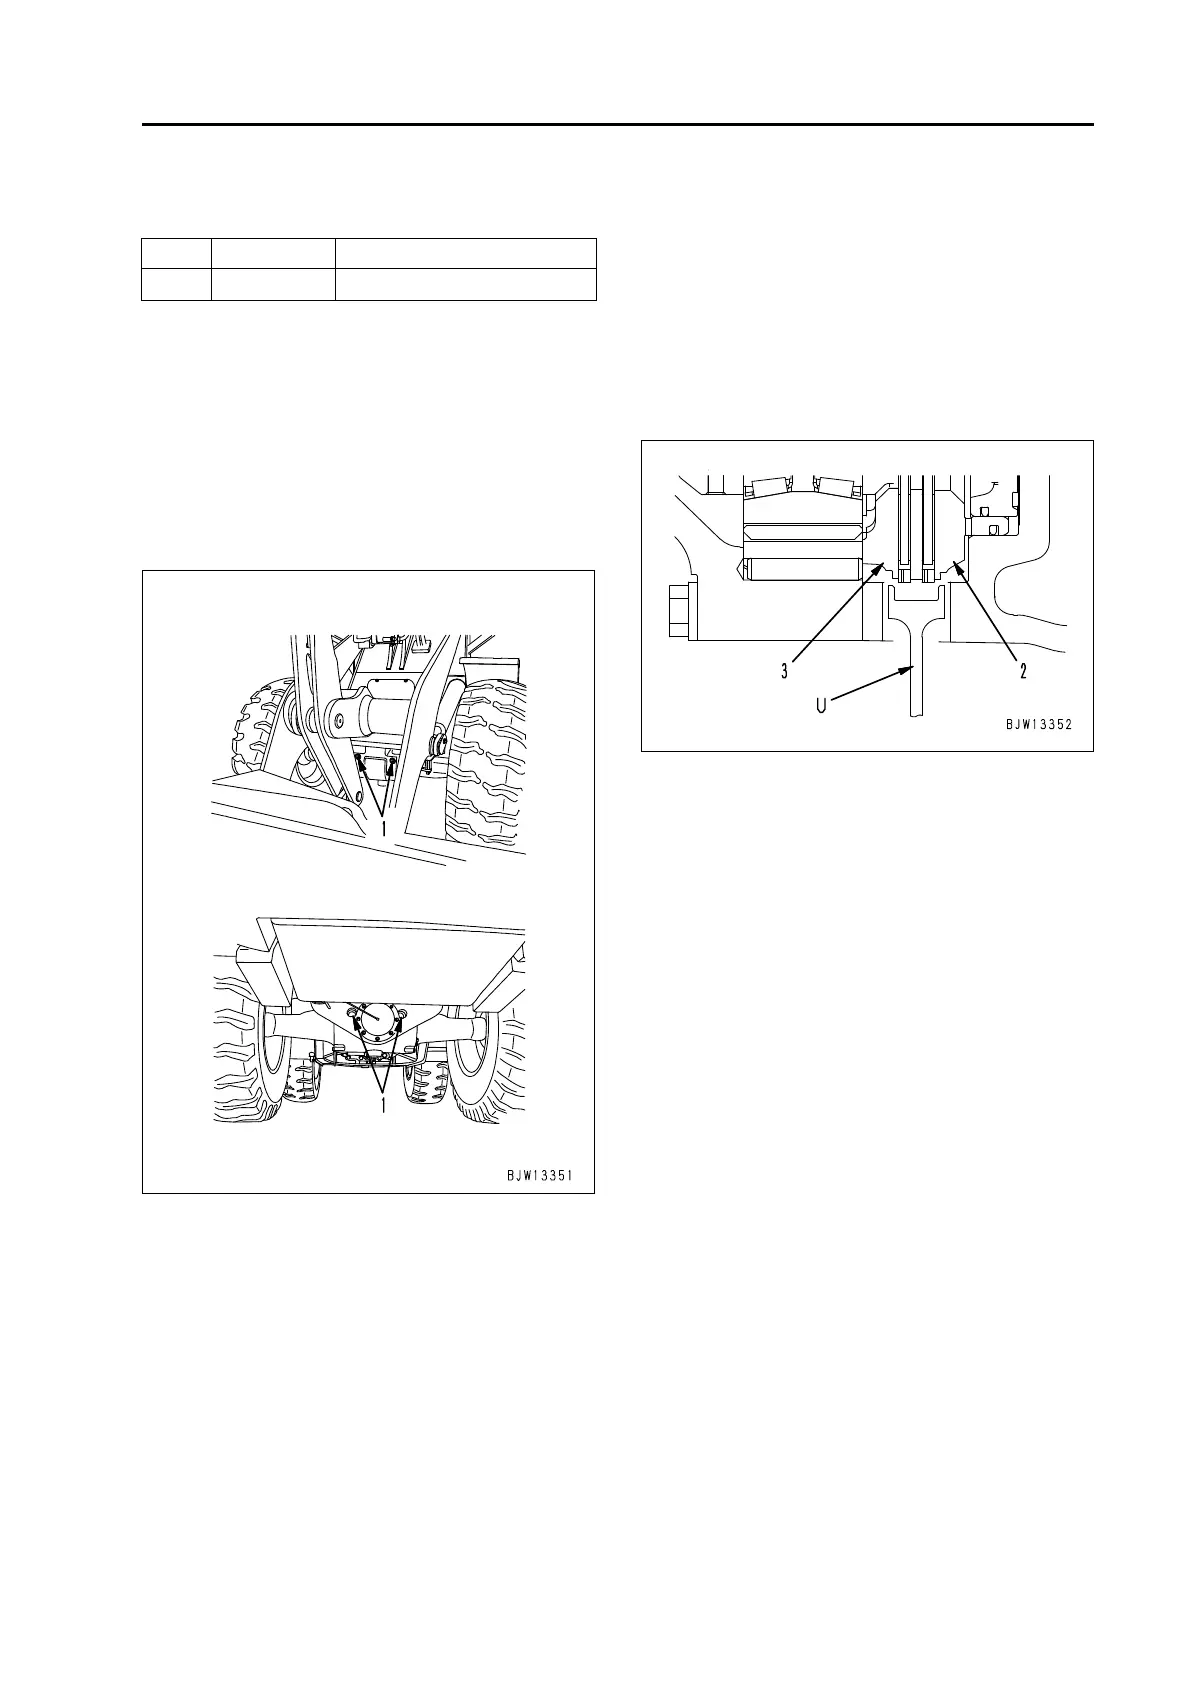
Testing wear of brake disc 1
Necessary tools
k Stop the machine on a level ground, lower
the work equipment to the ground, and set
chocks under the tire securely.
a There are inspection plugs on the right and left
sides of the front and rear axles. Check at all of
the 4 plugs similarly.
1. Remove inspection plug (1) from the axle
housing.
2. While pressing the brake pedal, insert testing
gauge U in the inspection plug hole and pinch
the inspection projection around piston (2) and
plate (3) with the inspection gauge tip.
Reference: Testing gauge U is component part
of tool kit.
a If you can pinch the inspection projection
around piston (2) and plate (3) with the
inspection gauge tip, the brake disc is
worn more than the repair limit. In this
case, replace the brake disc.
3. After finishing the work, remove the measuring
instruments and return the removed parts.
3 Inspection plug (1):
127.4 – 176.4 Nm {13 – 18 kgm}
Symbol Part No. Part name
U 418-98-31110
Testing gauge
 Loading...