34
Taking Pictures (Cont’d)
Taking Pictures using the LCD Monitor
- This section explains the basic procedure for shooting still images using
AUTO mode.
-We recommend that you prepare a fully charged spare battery (sold
separately, rechargeable lithium-ion battery NP-600) or use the AC adapter
AC-9 (sold separately).
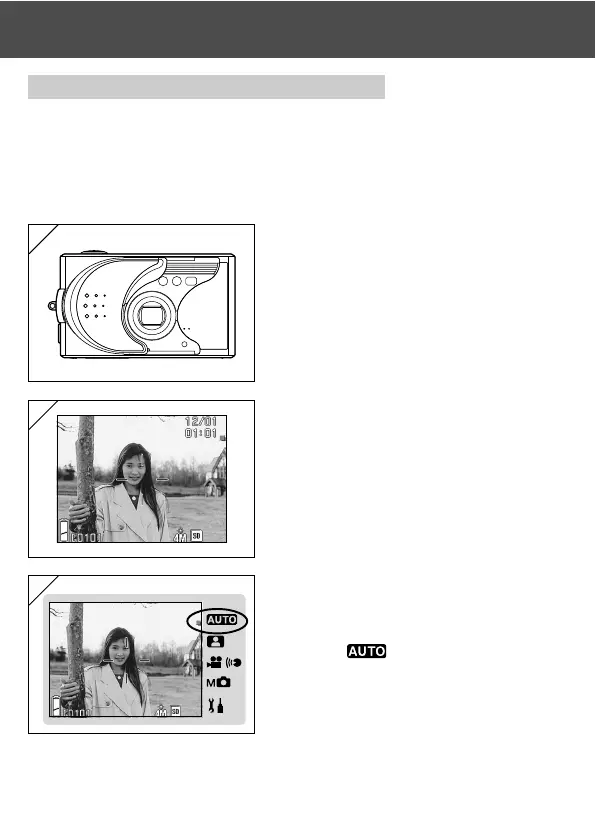
1. Opening the lens cover turns ON the
power.
• If the surface of the lens is dirty, gently
wipe it clean with a soft, dry cloth.
2. The LCD monitor lights up and the live
image (the image seen through the
camera lens) is displayed.
• The date and time display disappears after
about 5 seconds.
3. Set the shooting mode to “AUTO”.
(p.32)
• Check that the shooting mode icon (쐽) is
in the
position.
1
2
3

 Loading...