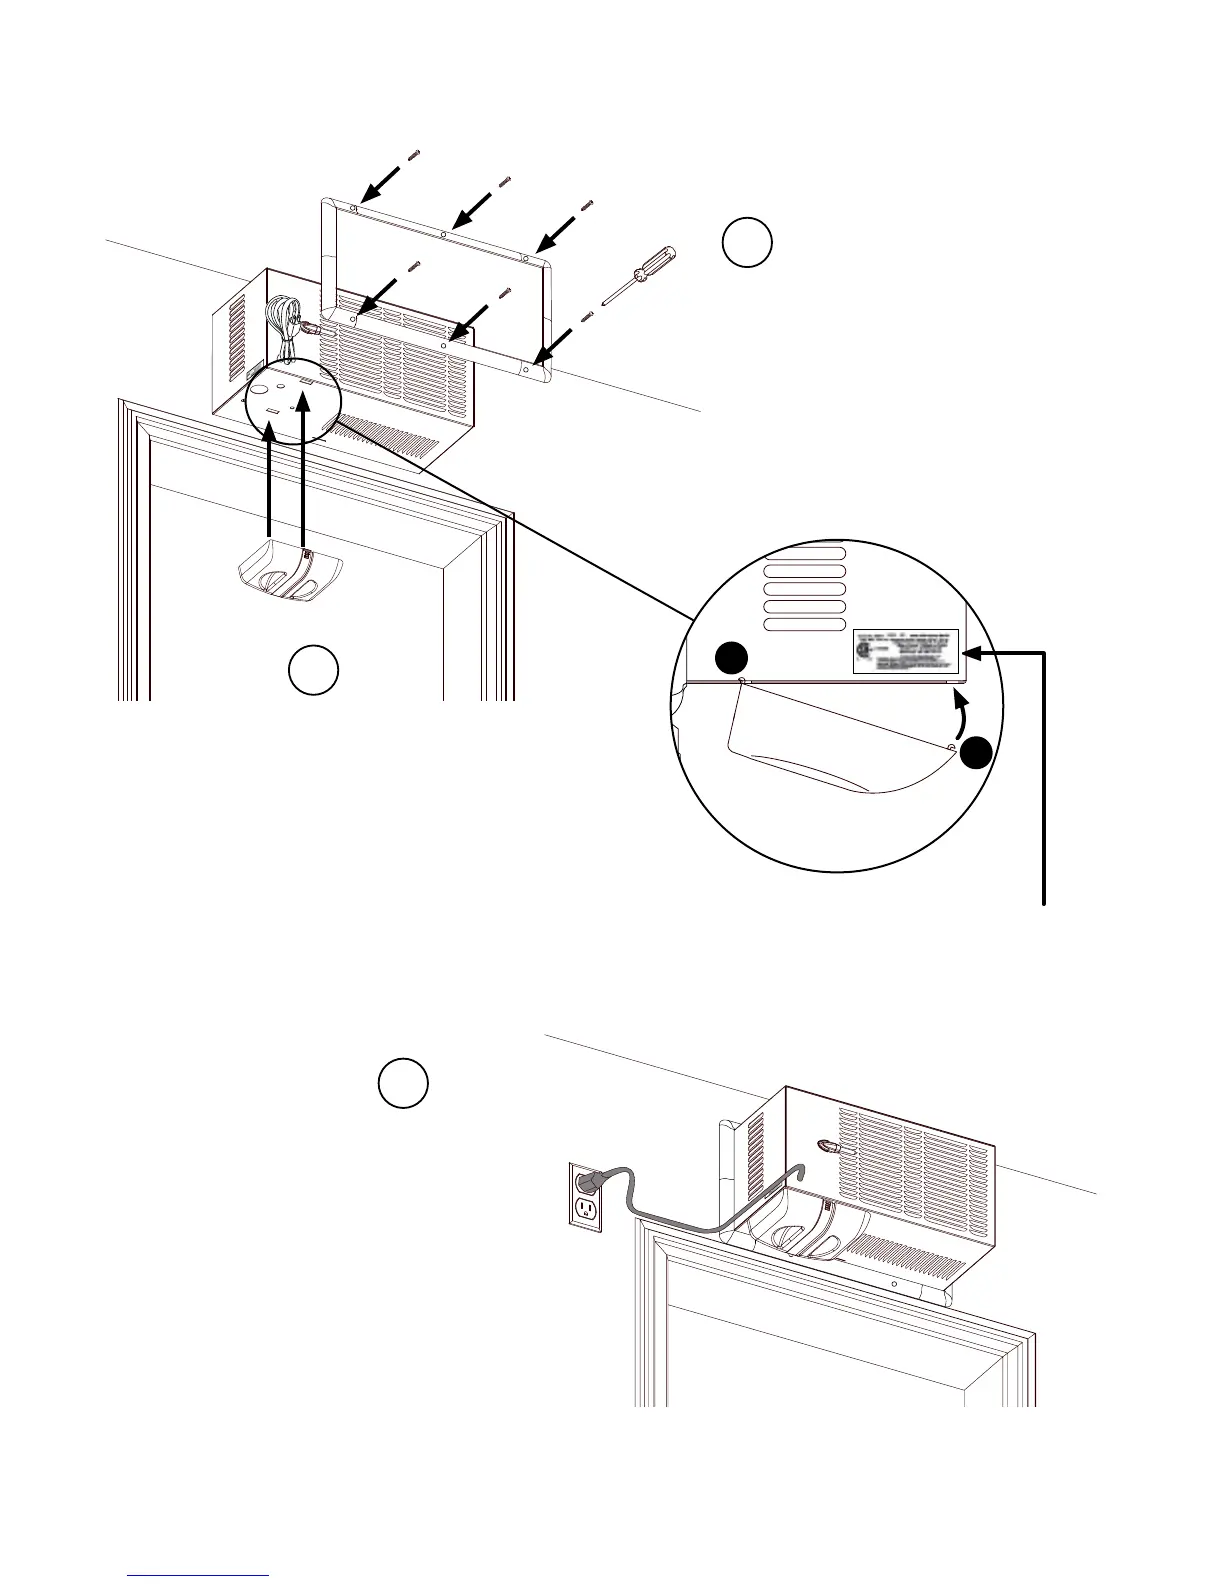
STEP 2 : INSTALLING REAR FRAME AND DRAIN PAN
Slide Frame over rear of cooling
unit.
Use WHITE screws to secure frame
to studs.
VERY IMPORTANT NOTE :
MAKE SURE THERE ARE NO GAPS
AND THERE IS A GOOD SEAL ALL
AROUND UNIT.
1
Insert Drain Pan by angling the
Drain Pan:
1. Insert back tab rst then
2. Push in front lip to allow
tab in.
2
ATTENTION!
PLEASE WRITE DOWN
THE SERIAL NUMBER
ON THE WARRANTY
REGISTRATION FORM.
1
2
LEFT SIDE VIEW
Plug in cooling unit.
You can keep the cord neat by wrapping
cord around door frame using clips and
add an extension cord if required to
reach outlet. Extension cord must be
rated a minimum of 15 Amps.
3
FRONT
BACK