EnglishFrançaisDeutschEspañol
Playing sounds
En-19
Using controllers to modify the sound
Joysticks, ribbon, and switches
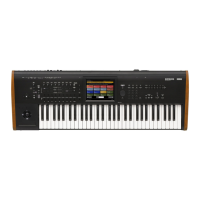
Notice the many controllers located on the left side of the
KRONOS’ front panel. You can use all of these controllers–
including the joystick, vector joystick, ribbon controller, and
SW1/SW2 switches–to vary the sound as you play. For more
information on these controllers, see their sections under
“Front Panel” on page 6.
The result will differ for each Program or Combination, so
try them all out to see what each controller does for the
selected sound.
Control Surface overview
Notice the mixer-like arrangement of sliders, knobs, and
switches on the left side of the front panel. This is called the
Control Surface. You can use it in a variety of ways, such as
editing sounds, controlling KARMA, mixing, or sending
MIDI messages to external devices.
For instance, to set up the Control Surface for quick sound
editing and controlling KARMA:
1. In the CONTROL ASSIGN section, press the RT
KNOBS/KARMA button.
The button’s LED will light. Now you can use the knobs to
modify the sounds and effects, and use the sliders and
switches to control KARMA.
You can use these controls regardless of the page shown on
the LCD display. However, there is a page which provides
more information about the Control Surface assignments and
values.
2. Go to the P0: Control Surface page by pressing the
Control Surface tab, located in the lower right of the
LCD screen.
This page shows all of the Control Surface sliders, knobs,
and switches, along with their current assignments and
values. When you move a controller, the corresponding
object in the LCD screen will also move.
Using knobs to vary the timbre
When the RT KNOBS/KARMA button is lit, the eight knobs
at the top of the Control Surface modulate various aspects of
the sounds and effects.
Knobs 1-4 have dedicated functions, as printed on the front
panel: Filter Cutoff, Filter Resonance, Filter EG Intensity,
and Release Time.
Knobs 5-8 can be assigned to a wide variety of functions.
Often (though not always), knobs 5 and 6 modulate synthesis
parameters, knob 7 controls the depth of a chorus or other
modulation effect, and knob 8 controls reverb depth.
For a detailed tutorial, see “Editing sounds & effects with the
Realtime Knobs” in the OG, under “Quick edits using the
knobs, sliders, and switches.”
Using Tone Adjust
Tone Adjust lets you use all of the sliders, knobs, and
switches on the Control Surface to edit Program parameters,
like the knobs and sliders on an analog synth. Each physical
control can be assigned to any one of a number of Program
parameters.
The specific parameters available through Tone Adjust will
vary depending on the type of Program. HD-1 Programs
support a certain set of parameters; each EXi also has its
own set of parameters. The PolysixEX works particularly
well with Tone Adjust, so let’s take a look at it now.
1. In Program mode, press the button for Bank I-A.
2. Select Program I-C085: Polysix Strings.
This uses the PolysixEX.
3. Under CONTROL ASSIGN, press the TONE
ADJ/EQ button.
4. Play the keyboard while moving sliders 1-4 and knobs
1-2.
Notice as the knob graphics on the display move as well.
Sliders 1-4 control the envelope shape; knobs 1-2 control the
filter cutoff and resonance.
5. On the display, press the Control Surface tab.
This page shows the assignments and values for all of the
sliders, knobs, and switches.
6. Press the Main tab to return to the main Play page.
7. Touch the PolysixEX graphic around the Cutoff and
Resonance knobs.
The display jumps to the main PolysixEX page.
8. Experiment with playing while using the Control
Surface sliders, knobs, and switches.
Notice how the graphics respond, as well. You can also
select a graphic control on the screen and edit its value using
any of the data entry controls.
Restoring the sound to its original state
When you’re editing a Program, you can compare back and
forth between the edited and saved versions.
1. Press the front-panel COMPARE switch.
The COMPARE LED will light, and the Program’s saved
settings will be recalled.
2. Press the COMPARE switch again, to return to the
edited settings.
The COMPARE LED will go dark, and the sound will return
to the edited version. You can switch back and forth as many
times as you like.
Resetting individual controllers
You can also reset individual controllers to their saved
values, such as the vector joystick or any control surface
slider, knob, or switch. To do so:
1. Hold down the front-panel RESET CONTROLS
switch.
2. While holding down the switch, move or press the
control that you’d like to reset.
3. Release the RESET CONTROLS switch.
The controller will be reset.

 Loading...