Installing batteries
Make sure that the monologue’s power is turned off.
1.
Open the battery cover on the monologue’s
bottom panel.
While pressing the latch, pull upward and
remove.
2.
Insert six AA batteries, taking care to
observe the correct polarity (+/− ori-
entation). Use alkaline or nickel-metal
hydride batteries.
3.
Reattach the battery cover.
In order for the remaining battery
amount to be detected and shown correctly, you must use
the parameter in GLOBAL EDIT mode to specify the type of
batteries that you’re using. By default, this setting is set to
“Alkaline.” For details, refer to the Owner’s Manual ( www.
korg.com ).
When the batteries become depleted, “Battery Low” will appear
on the display. When this occurs, it’s time to replace the batteries.
Remove old batteries immediately. Otherwise, battery leak-
age may occur, resulting in a malfunction. If you don’t think
that you’ll be using the unit for a long period of time, you
should remove the batteries.
TIP The monologue can also be used with the separately sold
AC adapter connected to the DC 9V jack.
Turning the monologue On and O
Turning the monologue On
1.
Make sure that both the monologue and any external output
devices such as powered monitor speakers are turned off, and
turn the volume of all devices all the way down.
2.
Hold down the Power switch on the rear panel of the monologue.
The monologue will enter Play mode upon startup.
3.
Turn on any external output devices such as powered monitor
speakers. Adjust the volume of your external output equipment,
and adjust the monologue’s volume using the MASTER knob.
Turning the monologue O
1.
Lower the volume of your powered monitors or external output
system, and turn them off.
2.
Hold down the Power switch on the rear panel of the monologue;
to turn off the power after the display goes blank, take your
finger off the power switch.
Once you have turned the monologue off, wait about 10
seconds before turning the monologue on again.
Auto Power O Feature
The monologue features an Auto Power Off feature that can auto-
matically turn the monologue off after 4 hours have elapsed with
no operation of the knobs, switches, buttons, or keyboard of the
monologue. By default, the factory setting for the Auto Power Off
is enabled.
The Auto Power Off can be disabled using the steps below.
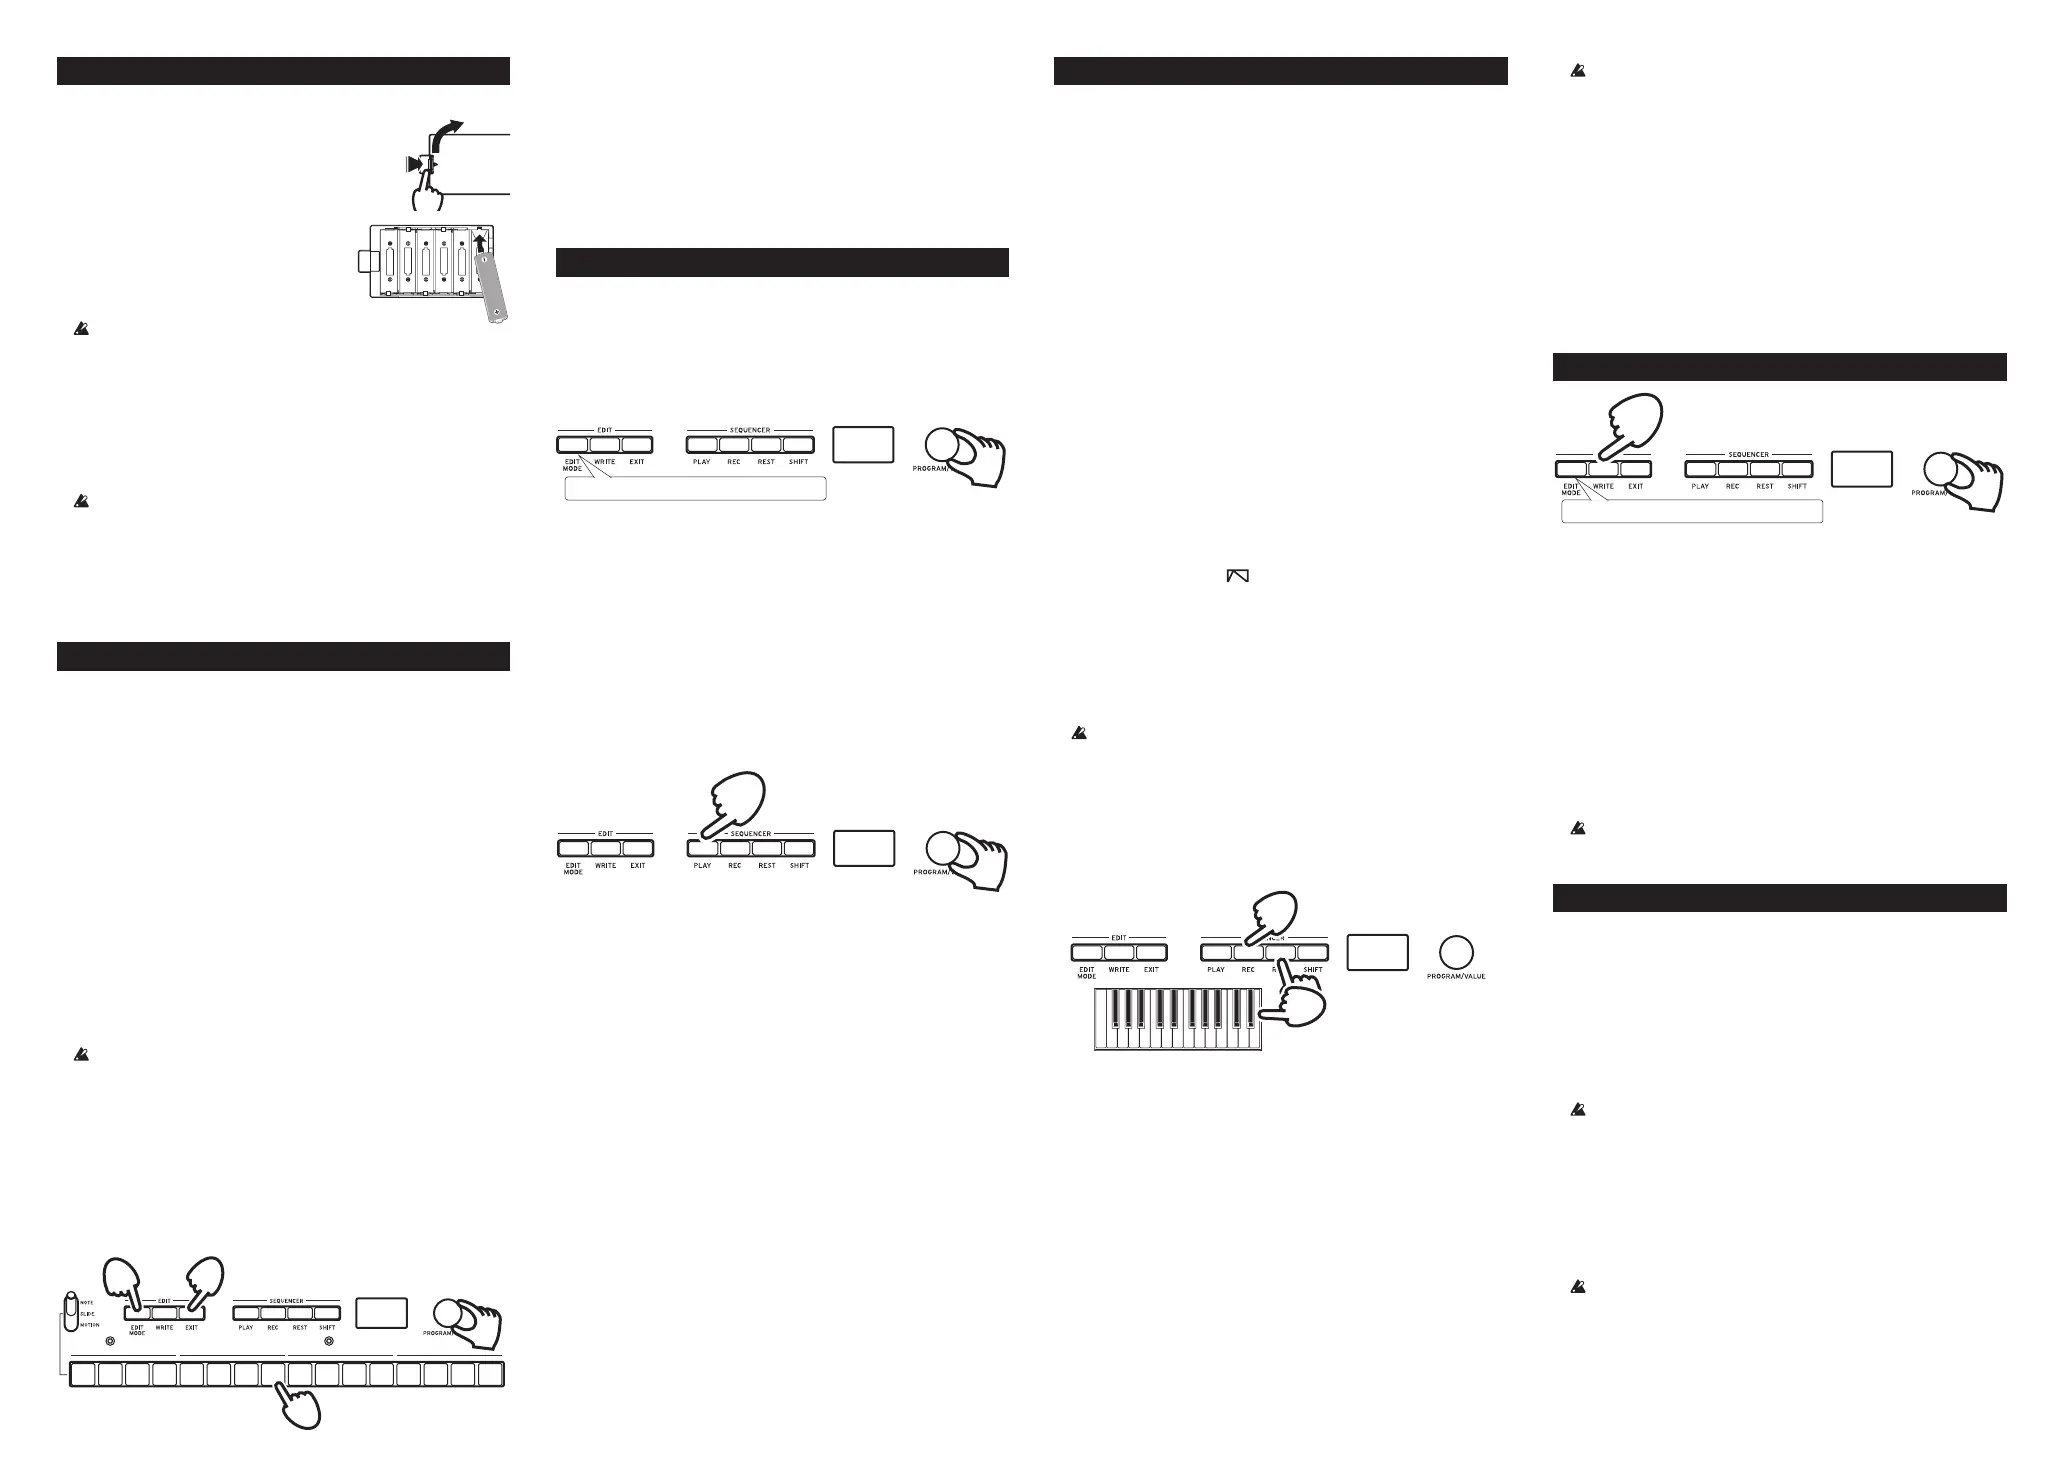
1
12345678910 11 12 13 14 15 16
5
3
1
2, 4
1.
Press the EDIT MODE button.
2.
Turn the PROGRAM/VALUE knob, and select GLOBAL EDIT.
3.
Press button 8 twice.
“Auto Power Off” will be displayed.
4.
Turn the PROGRAM/VALUE knob, and select “Off”.
5.
Press the EXIT button.
TIP Settings in GLOBAL EDIT are saved automatically.
Playing Programs & Sequences
Playing a Program
The monologue contains 100 Program locations—80 Presets and
20 user locations. The Preset programs are assigned to program
numbers 1–80 and are organized into sound categories for easy
selection. When the unit is shipped from the factory, program
numbers 81–100 contain Init Programs.
1.
Check that the monologue is in Play mode.
In Play mode, verify that the EDIT MODE button on the front
panel are unlit. If the EDIT MODE button is lit, press the EXIT
button.
2.
Turn the PROGRAM/VALUE knob to select a Program.
3.
Play the keyboard to hear the sound.
Playing the Sequencer
The monophonic sequencer in the monologue can record up to 16
steps. In addition to note data, it can automate up to four param-
eters (motion sequence).
1.
Turn the PROGRAM/VALUE knob to select a program in Play
mode.
2.
Press the PLAY button.
The sequence data recorded for the selected program will play.
TIP The sequence data will play back even if you press the KEY
TRG/HOLD button instead of the PLAY button to make it
light, and then play the keyboard. You can also transpose
the sequence data when playing it back, according to the key
played on the keyboard.
3.
Press the PLAY button once more to end the Sequencer playback.
Adding variations to the sequence data during playback
Select NOTE using the MOTION/SLIDE/NOTE switch, and press
one of the buttons from 1–16 to turn the note for that step on (en-
able) or off (disable). When the button is lit up, the note will play
back; and when the button is dark, the note will not play back (rest).
Select SLIDE and press one of the buttons from 1–16 to turn the
portamento for that step on or off. When the button is lit, porta-
mento is on; and when the button is dark, portamento is off.
Select MOTION and press one of the buttons from 1–16 to turn the
motion recorded for that step on or off. When the button is lit, mo-
tion is on; and when the button is dark, motion is off.
TIP These settings will be saved for each program.
2
1
Make sure EDIT MODE button is unlit.
2, 3
1
Editing a Program
Changing the sound
The basic parameters that make up a sound are assigned to the
knobs and switches on the front panel. Use these controls to quick-
ly check how the sound changes when you operate the controls.
1.
Turn the PROGRAM/VALUE knob to select a program in Play
mode.
2.
Use the knobs and switches on the front panel.
You can select different VCO waveforms in the VCO 1/VCO
2 section, and change the waveforms using the SHAPE knob.
VCO 2 includes an oscillator sync and ring modulator function.
Use the MIXER section to set the waveform output levels pro-
duced by VCO 1 and VCO 2, and to adjust the volume balance.
With the FILTER section, you can use a low-pass filter to re-
move or emphasize specific frequency regions of the sound from
the oscillator, making the sound brighter or darker or giving it
more character.
Edit the settings in these sections to create a basic program.
Now, let’s make time-based and cyclical changes to the pitch,
tone and volume of the sound.
In the EG section, PITCH, PITCH 2 and CUTOFF can be selected
to change the volume, pitch and tone over time, in addition to
the VCA. However, the EG will not affect the VCA when the
TYPE switch is set to “
”.
The LFO section is used to make cyclical changes to a sound,
with PITCH, SHAPE and CUTOFF.
Use the MASTER controls to make overall adjustments to the
volume, distortion and tonal range.
For details on how the sound changes when operating the knobs
and switches, refer to the owner’s manual (www.korg.com).
We recommend that you save the program on the mono-
logue after editing the sound. Any edits that you make
will be lost if you turn off the power or recall a different
program.
Recording Sequence data
Step Recording
1.
Press the REC button while the sequencer is stopped.
“STEP REC” and “STEP 1” will be indicated in the display.
If the sequence has already been recorded, the note names will
be indicated in the display.
TIP Select the step you wish to edit. Use buttons 1–16 to select
steps 1–16.
2.
When you press a key on the keyboard, a note will be re-
corded; and when you press the REST button, a rest will be re-
corded. The display will automatically move to the next step.
Press the REST button while holding down a key to record a tie.
The note recorded will be tied to the next step.
3.
To finish recording, press the REC button. Step recording will
also stop after the number of steps set in SEQ EDIT mode have
been recorded (the REC button will go dark). For details, refer to
the owner’s manual (www.korg.com).
1
2
We recommend that you save the program on the mono-
logue after the step recording. Any edits that you make
will be lost if you turn off the power or recall a different
program.
Other ways to record
Besides step recording, there are other recording methods, includ-
ing real-time recording (press the PLAY button and then REC) and
motion sequences (where changes to the knobs and switches that
affect the sound can be recorded, by pressing the REC button dur-
ing sequence playback and then moving the knobs and switches
while the MOTION/SLIDE/NOTE switch is set to MOTION). For
details, refer to the owner’s manual (www.korg.com).
Saving a Program
1.
Check that the monologue is in Play mode.
In Play mode, verify that the EDIT MODE button on the front
panel is unlit. If the EDIT MODE button is lit, press the EXIT
button.
2.
Press the WRITE button.
The monologue will enter the Write standby mode, and the
WRITE button will blink.
3.
Turn the PROGRAM/VALUE knob to select the Program num-
ber where your new sound will be saved.
TIP To cancel, press the EXIT button.
4.
Press the WRITE button once more.
The Program will be saved in internal memory, and the message
“Complete” will appear in the display.
Never turn off the power while Programs are being saved.
Doing so may destroy the internal data.
Restoring the Factory settings
You can restore the monologue’s preset Programs and global set-
tings to their original factory-set state at any time.
1.
Begin with the monologue turned Off.
2.
While holding down the WRITE button and the EXIT button,
turn the monologue On.
“FACTORY RESET” will be indicated in the display.
3.
Use the PROGRAM/VALUE knob to choose the settings you wish to
reset (PRESET, GLOBAL, ALL)
.
If you select “ALL” and execute, all user progras will be
erased.
4.
Press the WRITE button.
The display will indicate the message “Are you sure?”.
5.
Turn the PROGRAM/VALUE knob to select “Yes”, and press the
WRITE button.
The factory-set default data will be reloaded, and the monologue
will be restored to its factory default state.
Never turn off the monologue while data is being loaded.
Doing so might damage the internal data.
1
Make sure it is unlit.
3
2, 4
7 8
 Loading...