TRITON HD Manual
- 1 -
Content of the Triton internal HD:
• Triton HD Board with SCSI to IDE converter and hard disk
• 1m flat cable with 25 pin connectors
• Plastic bag 1, mounting material for the Triton HD Board
• Plastic bag 2, mounting material for the SCSI Boards
1. General
The room in which the components are installed must be clean and dry. Note that there
are delicate electronic components inside the TRITON, which could be destroyed by
electrostatic discharge. For this reason you should avoid touching the components con-
tacts.
The only tool required for installation is a Phillips screwdriver.
2. Open the KORG Triton
Switch off the instrument and disconnecting all connecting cables, especially the power
cord of the keyboard.
Turn the keyboard upside down (please mind the joystick!) and unscrew the two silver
metal plates that cover the SCSI and MOSS board and the Memory boards first.
Now loosen all the screws on the bottom including the four ones of the floppy disk drive.
Carefully remove the bottom to the front side direction.
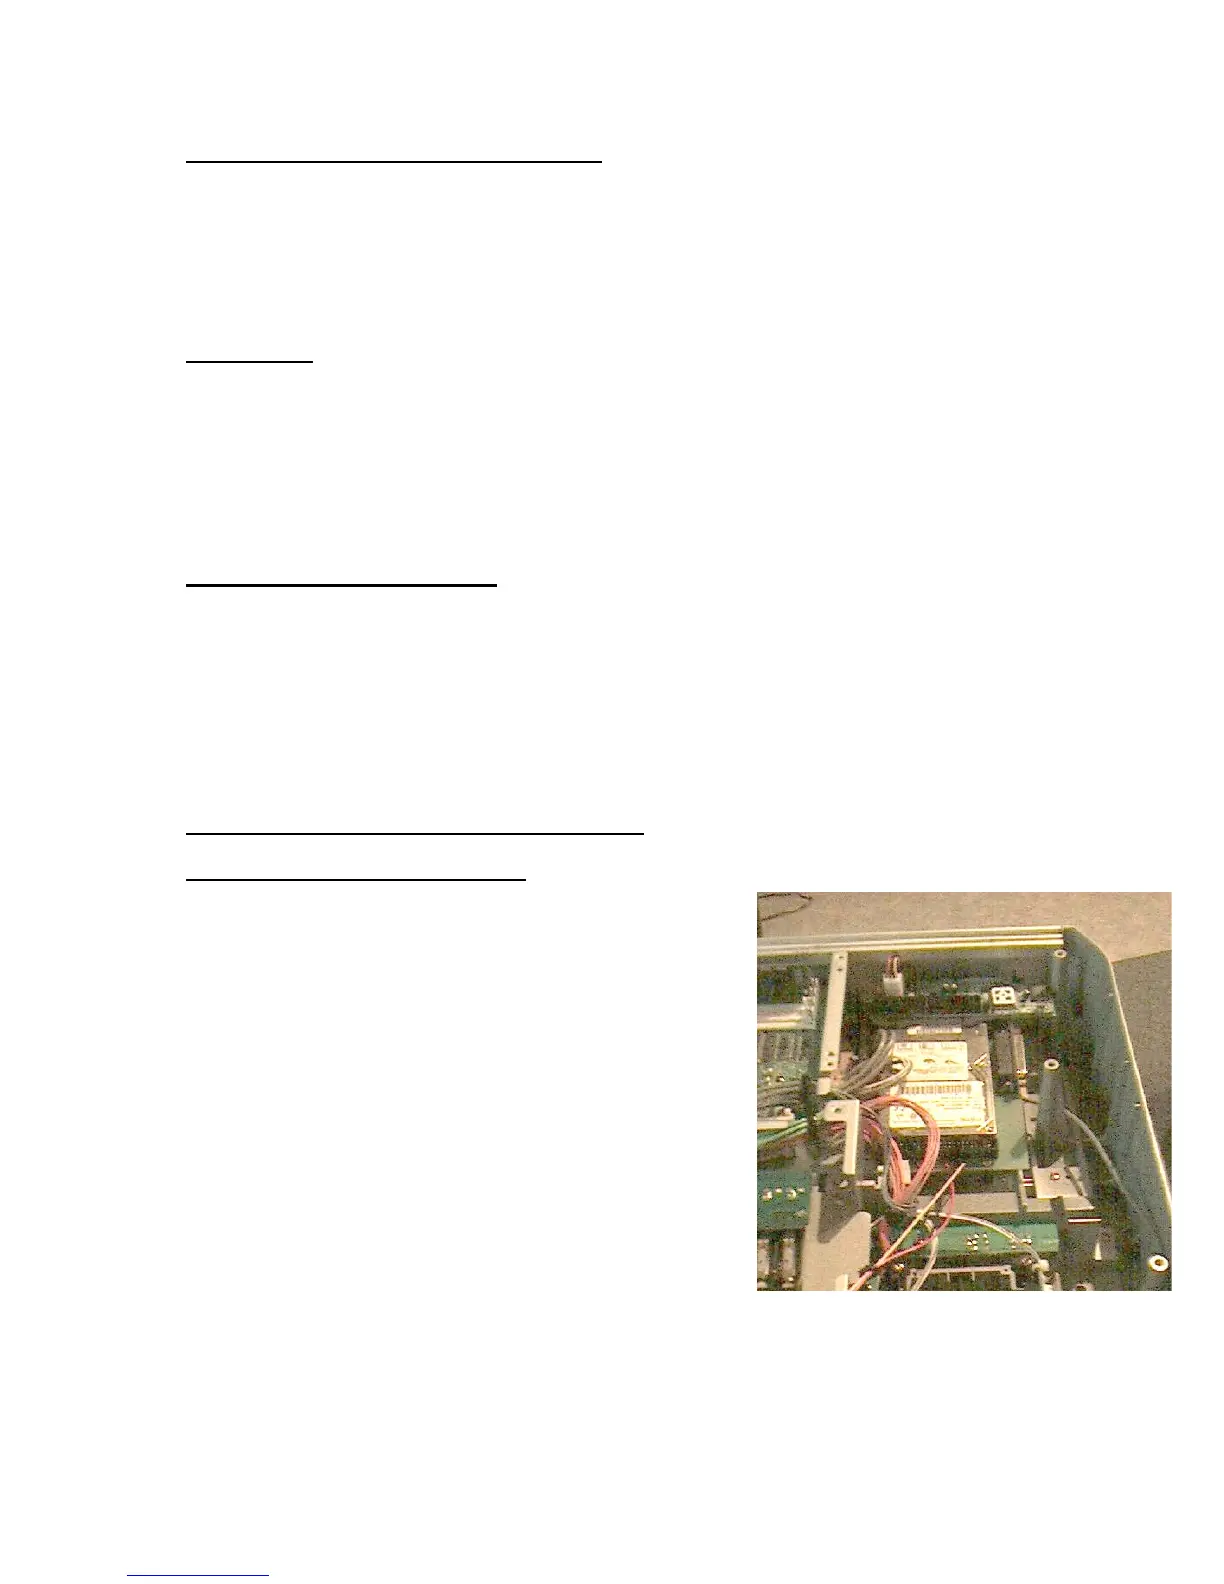
3. Installation of the Hard Disk board
3.1 Mounting the Hard Disk Board
Now you see a big free place behind the floppy disk
drive, here the
SCSI to IDE converter electronic and the Hard Disk will
be installed.
Remove the SCSI to IDE bridge board from the board
with the hard disk, so it is easier to install it.
Screw the HD Board with the 3 attached short screws
on the metal angle of the KORG Triton. On the other
side use two holes with the long screws and the plastic
separation ring of plastic bag 1. Fasten the Hard Disk
Board on the aluminium track lying underneath.
Now you can connect the SCSI to IDE bridgeboard
again on the Hard Disk board. You can safe the SCSI
to IDE bridge board with the added cable tie. NOTE: If
you have the Pro Version, do not use the backside
of the Triton. Use the metal track under the board.
The holes are marked with “PRO”. It is a good idea to
fix the spacers with some glue before you install it.