TRITON HD Manual
- 3 -
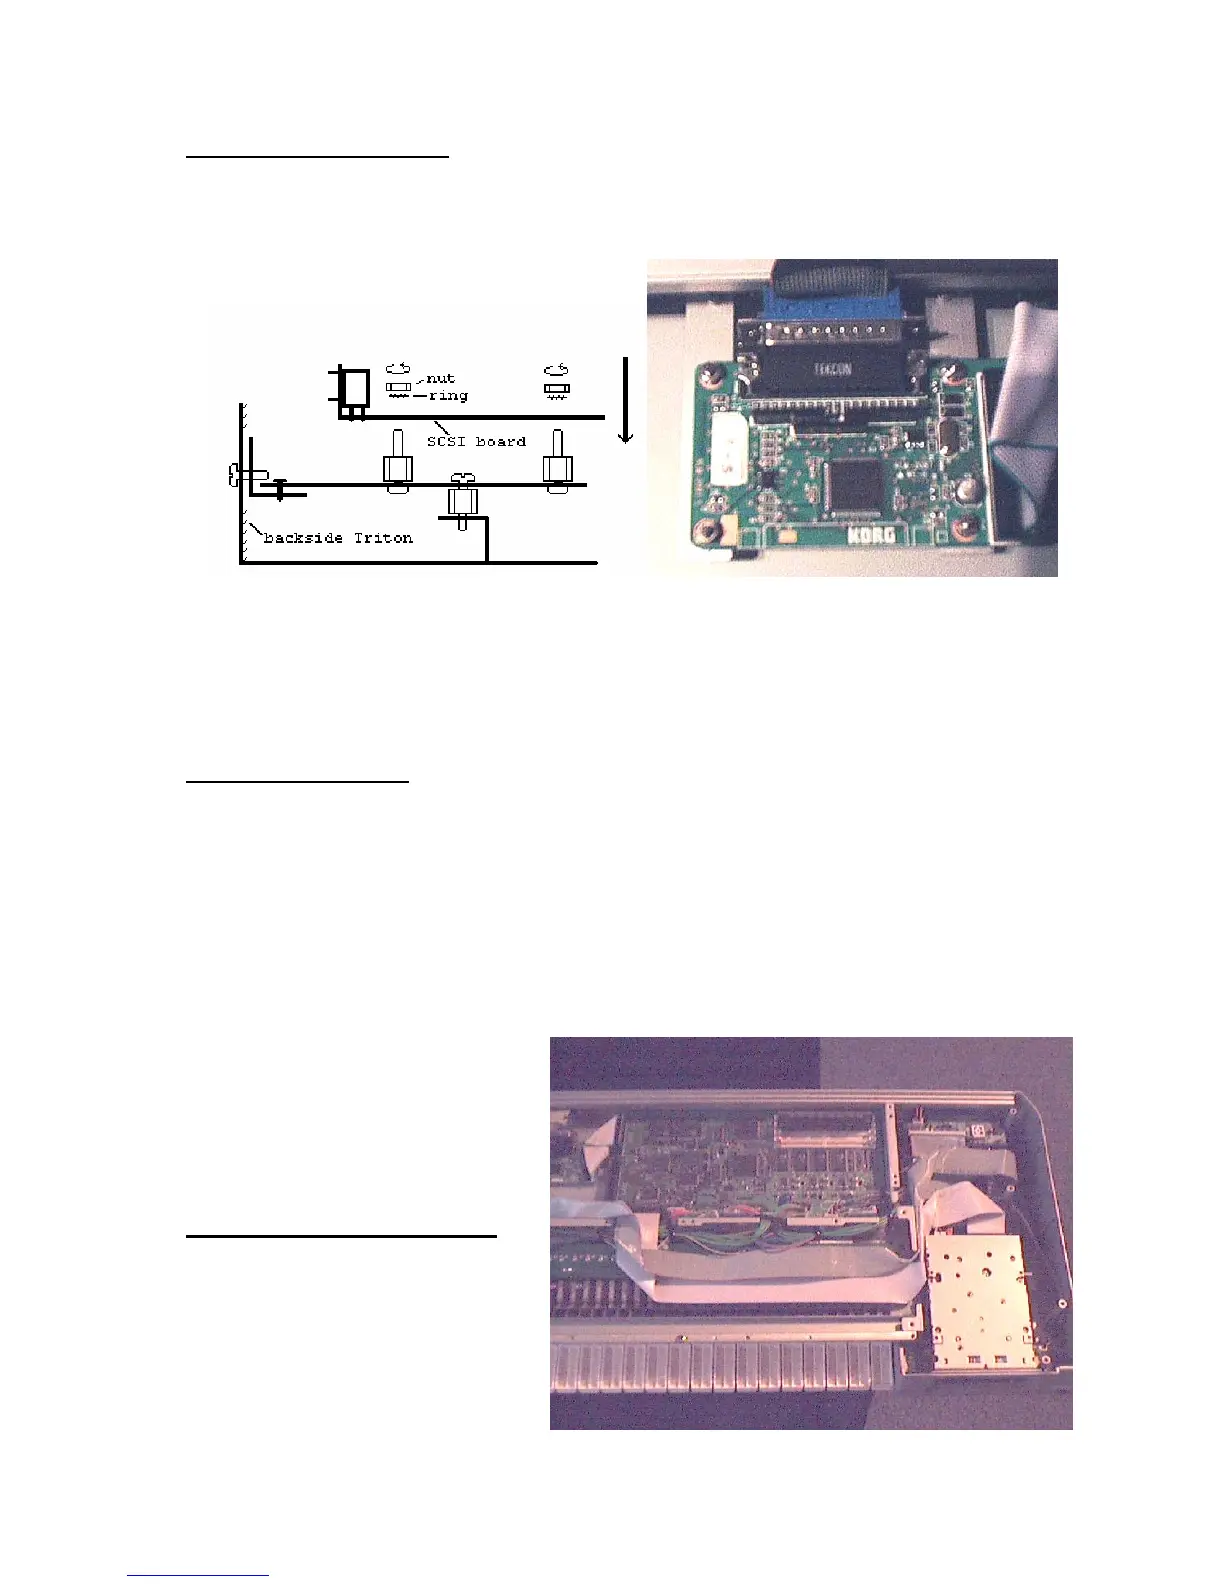
5.3 Mount the SCSI Board
Connect the SCSI Board with the mail connector of the flat cable and mount it into the
Triton as shown below:
NOTE: If you also have the MOSS-Board installed, take care that the metal tracks do not
touch the MOSS-Board. We recommend to put some isolation tape or some carton be-
tween the SCSI-Card and the
MOSS Board.
6. SCSI ID change
Before you reassemble the KORG Triton you should think about the SCSI ID of your
Hard Disk. We have set the SCSI ID to ID1 but with the added jumpers you can change
it.
The table shows the jumper position and the assigned SCSI-ID:
SCSI-ID: 4 2 1
ID 0: : : : : = without jumper (open)
ID 1: : : | | = with jumper (connected)
ID 2: : | :
ID 3: : | |
ID 4: | : :
ID 5: | : |
ID 6: | | :
ID 7: | | :
7. Reassemble the Triton
Before you close the Triton look
that the flat cable is installed
properly. The best way is that the
flat cable follows the flat cable that
comes from the floppy disk. You
can put the two cables together
with some adhesive tape.
When you mount the bottom be careful that the flat cable isn’t squeezed between metal.