Getting ready to play
7
FrançaisDeutsch
EnglishVoice Name
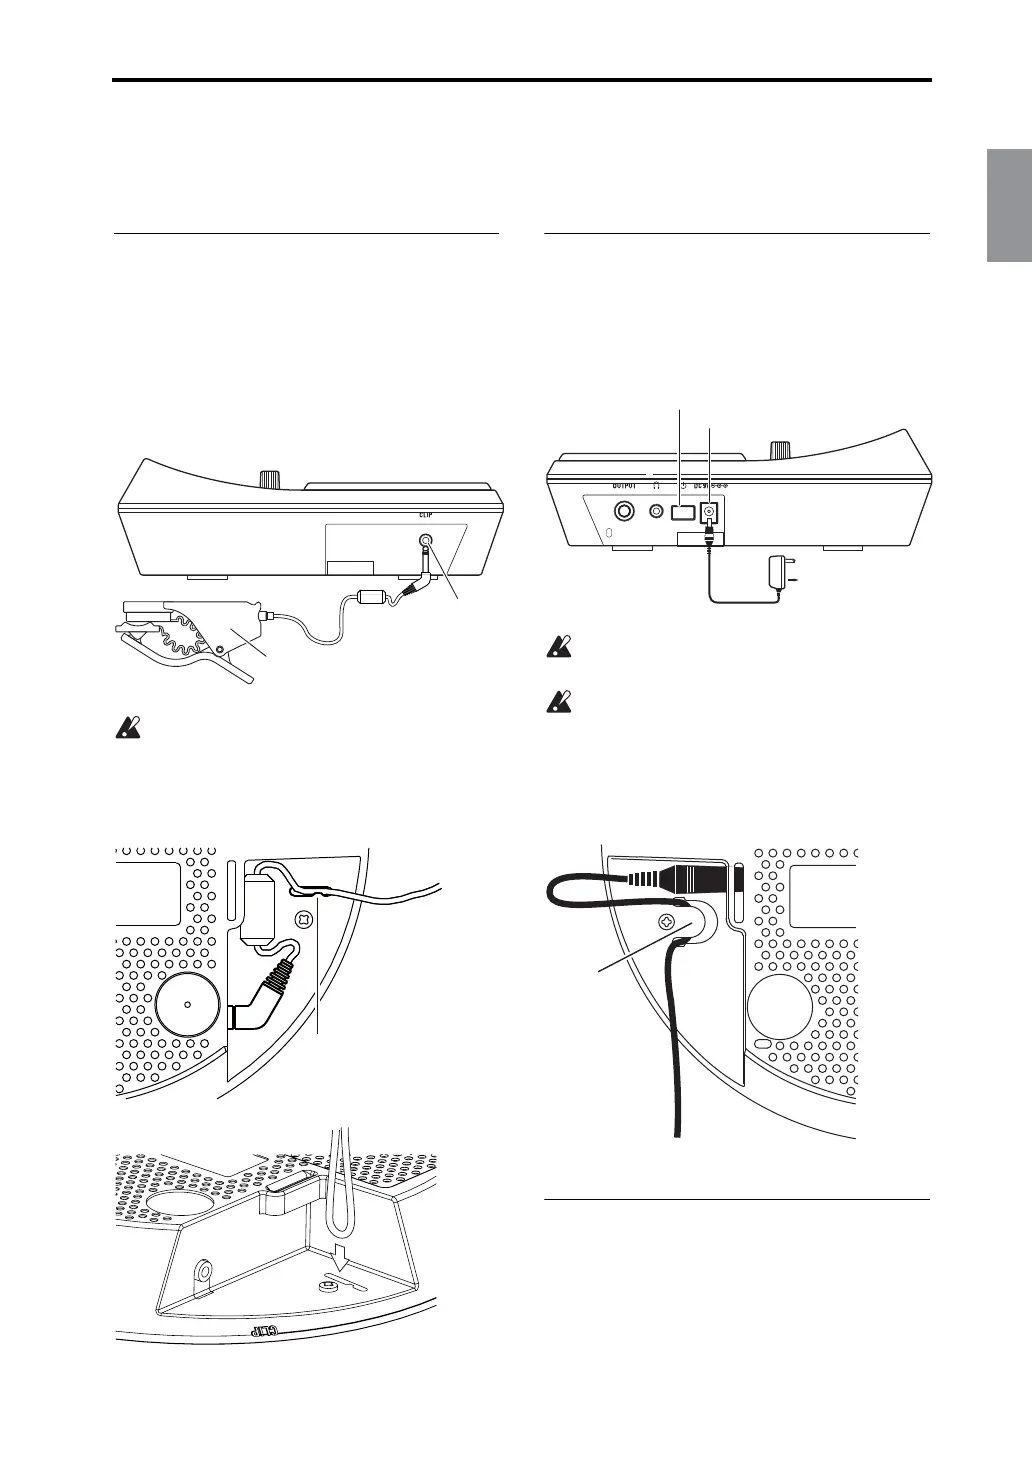
Getting ready to play
Connecting the clip to the WAVE-
DRUM Mini
1.
Make sure that the WAVEDRUM Mini's power
switch is turned off. (The display and indicators
should be unlit.)
2.
Connect the clip to the CLIP jack located on the
left side of the WAVEDRUM Mini.
Do not connect anything other than the
included clip to the CLIP jack.
3.
To prevent the clip cable from being unplugged,
use the cable hook located on the bottom of the
WAVEDRUM Mini to secure the cable in place.
Connecting the power
1.
Connect the DC plug of the included AC Adapter
to the DC9V jack located on the right side of the
WAVEDRUM Mini.
2.
Plug the AC Adapter into an electrical outlet.
Use only the included AC Adapter. Using any
other AC Adapter may cause malfunctions.
Use an AC outlet of the correct voltage for the
included AC Adapter.
3.
To prevent the AC Adapter cable from being
unplugged, use the cable hook located on the bot-
tom of the WAVEDRUM Mini to secure the
cable in place.
Turning the power on
1.
Lower the volume by turning the VOLUME
knob all the way to the left.
2.
Press the power switch to turn the power on.
Sensor clip (Clip)
CLIP jack
DC9V jack
Power switch
to an electrical outlet
AC adapter (included)