Do you have a question about the Kostal PIKO Series and is the answer not in the manual?
Details how the inverter should be used for its intended purpose and warns against misuse.
Lists directives and standards the inverters comply with, including CE mark application.
Explains the manual's content, target audience, and importance of following instructions.
Describes symbols and conventions used for warnings and information notes within the manual.
Explains the meaning of various symbols and abbreviations used throughout the document.
Illustrates and explains the meaning of safety signs and labels found on the inverter housing.
Illustrates the components of a typical single-phase and three-phase photovoltaic system.
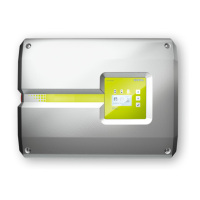
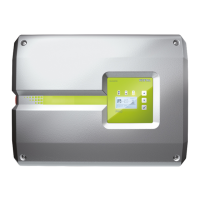
Details the exterior and interior views of the PIKO inverter, identifying key components and their functions.
Provides guidelines for safely transporting, storing, and handling the inverter to prevent damage.
Lists all items included in the packaging for the PIKO inverter models.
Covers selecting the proper installation site and provides important warnings and requirements for mounting.
Explains the inverter's electrical connections and external wiring requirements, including safety notes.
Details how to connect the solar modules (PV strings) to the inverter, emphasizing safety and proper procedures.
Describes how to connect communication components like the communication board and its interfaces.
Guides the user through the step-by-step procedure for the initial setup and commissioning of the inverter.
Outlines the procedure for safely switching the inverter on and preparing it for operation.
Explains the steps required to safely switch off the inverter, including additional steps for maintenance.
Details the critical safety procedure for completely de-energizing the inverter before any work is performed.
Describes the inverter's control panel, including the display, LEDs, and buttons for operation.
Explains how to interpret the operational status notifications displayed on the inverter's screen.
Details the meaning of the different LED indicators on the inverter for monitoring its operational status.
Provides an overview of the main menu structure displayed on the inverter for navigation and settings.
Explains how to access and use the service menu for advanced installer settings, requiring a service code.
Describes the energy management system (EMS) and its role in controlling energy flow within the building.
Provides guidance on identifying and rectifying faults, including event codes and troubleshooting measures.
Introduces the web server as a graphic interface for configuring inverters, detailing its available content.
Explains the necessary computer settings and procedures to connect to and use the inverter's web server.
Describes the different pages available on the web server, such as Main page, History, and Settings.
Outlines three variants for connecting a computer to the inverter for configuration and data retrieval.
Explains the types of log data recorded by the inverter's data logger and their purposes.
Details procedures for downloading log data to a computer or transferring it to a solar portal for analysis.
Explains the necessity of active power control based on German regulations and outlines two control types.
Discusses reducing PV feed-in capacity to 70% as per regulations and alternative methods like using the PIKO BA Sensor.
Describes how the inverter's power can be regulated via a ripple control receiver at different levels.
Details the configuration and connection of a ripple control receiver to the master inverter for active power control.
Illustrates the components and configuration for self-consumption within a PV system.
Explains the electrical connections required for self-consumption functionality, including safety warnings.
Guides users on configuring self-consumption control functions through the inverter's web server interface.
Lists routine maintenance tasks for the inverter, such as fan tests and checking connections.
Provides detailed instructions and diagrams for safely cleaning the inverter's fans.
Explains the procedure for updating the inverter's firmware via a PC, including necessary precautions.
Details the process for updating the software on the inverter's communication board using a PC.
Describes how to update the inverter's country-specific settings using a dedicated tool.
Presents detailed technical specifications for various PIKO inverter models, including input and output parameters.
Shows a block diagram illustrating the functional components and connections within the PIKO inverter.
Covers requirements for a SIM data card and the process of setting up and installing the GSM modem.
Explains the installation and connection of the PIKO BA Sensor for monitoring building consumption and energy flow.
Introduces additional services and products like PIKO M2M Service, PIKO Solar Portal, and PIKO Solar App.
Illustrates the inverter's type plate and explains the meaning of the information provided on it.
Provides information on warranty conditions and contact details for service and technical support.
Outlines key points to cover when handing over the installed system to the operator.
Details the procedure for safely disassembling the inverter and proper disposal guidelines.
| Protection Rating | IP65 |
|---|---|
| Category | Inverter |
| Brand | Kostal |
| Series | PIKO |
| Type | String Inverter |
| Operating Temperature Range | -25 °C to +60 °C |
| Efficiency | 98.1% |
| Communication Interfaces | Ethernet, USB |
| Number of MPP Trackers | 2 |
| AC Output Frequency | 50 Hz |
| Cooling | Convection cooling |
| Warranty | 5 years (extendable) |
| Model Range | PIKO 5.5, PIKO 7.0, PIKO 8.0 |