5. For each screen, adjust the image on the display to appear fully on the
screen:
Use the AUTO ADJUST function in the FINETUNE menu
Open the FINETUNE and adjust the following parameters:
H-POSITION, V-POSITION, CLOCK and PHASE
1
6. Set the number of screens on the wall (for example, 2x2):
Press the MENU front panel button and enter the WALL
ARRANGEMENT submenu
Set the DISP. WIDTH to 2 and press ENTER
Set the DISP HEIGHT to 2 and press ENTER
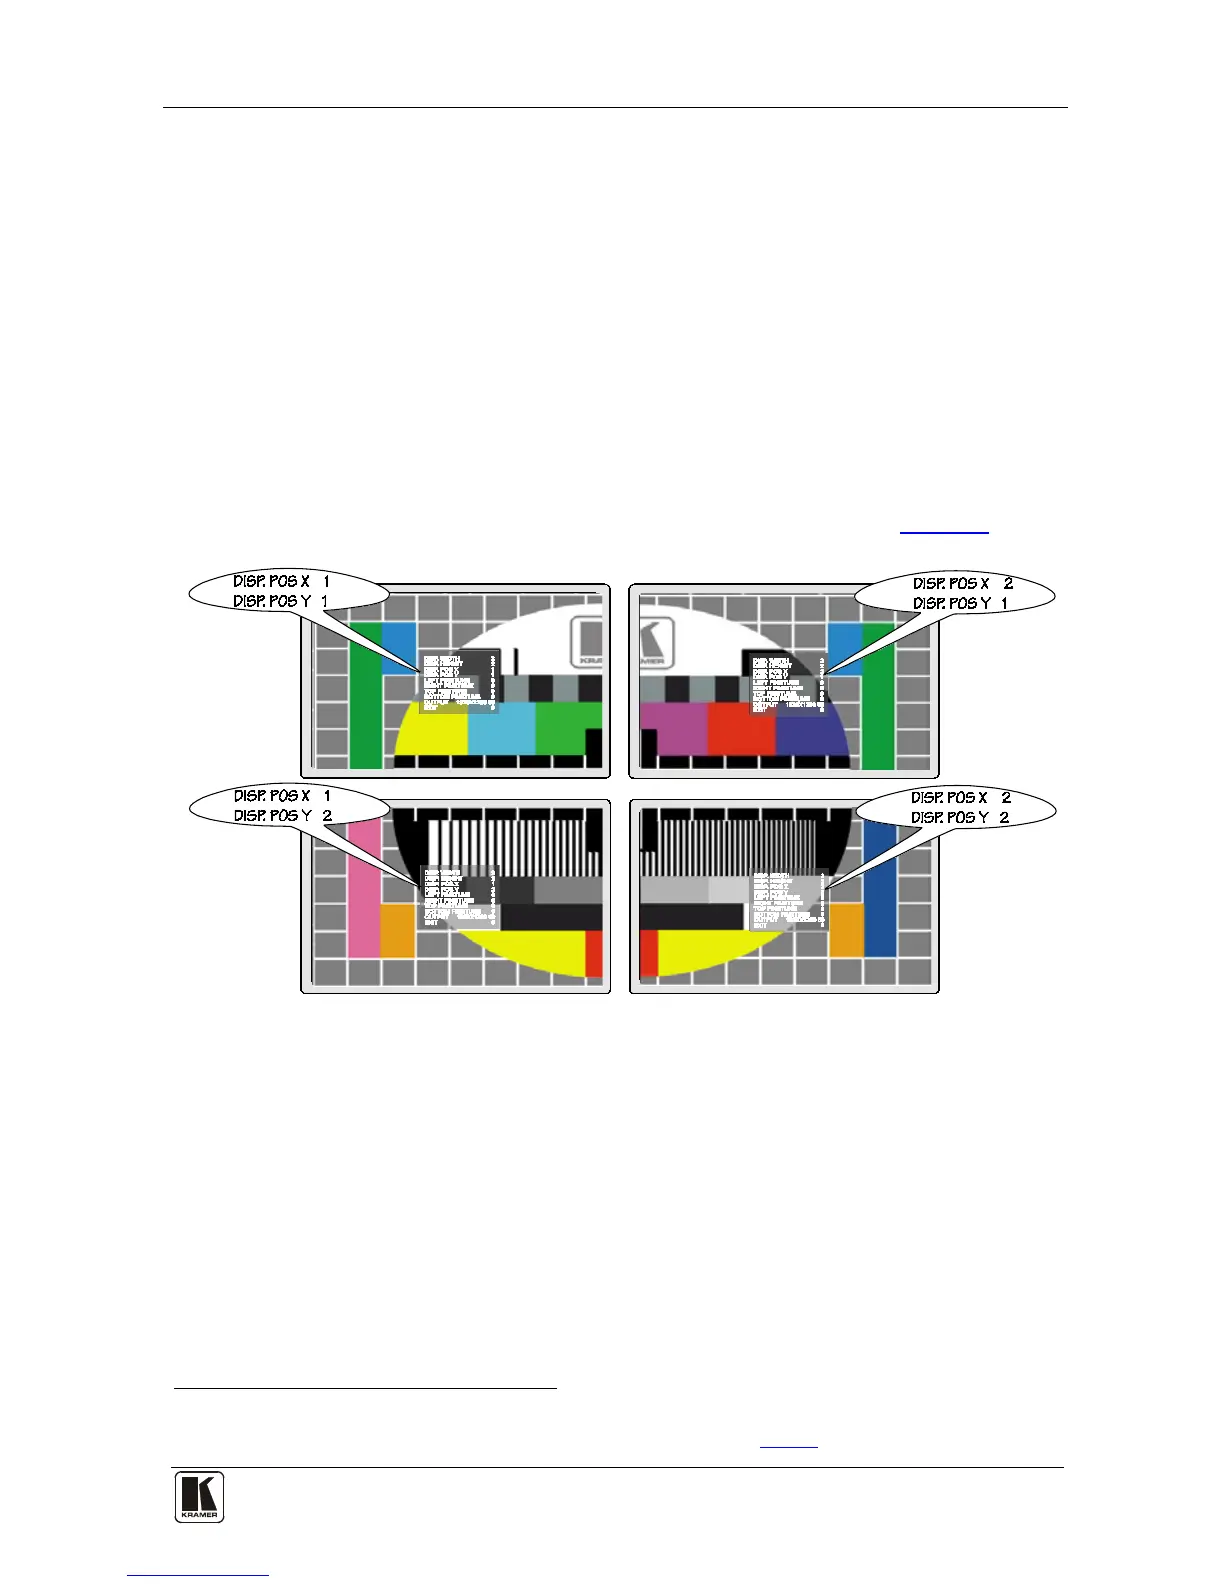
7. Set the position of each display
2
Figure 4
on the TV wall via the DISP. POS X and
the DISP. POS Y sub-menus for each screen, as defined in .
Figure 4: Setting the Position of Each Display
8. Adjust the color of the displays so that they all match:
Press the MENU front panel button and Enter the COLOR submenu
In the COLOR submenu select AUTOCOLOR
If required, adjust the CONTRAST, BRIGHTNESS, R, G and B
values on each display manually
1 We recommend adjustment via the auto adjust function rather than manually adjusting the clock and phase
2 The top display on the far left is defined by position X = 1 and position Y = 1 (see
Figure 3)