4 Your VP-423 PC Video-Wall Scaler
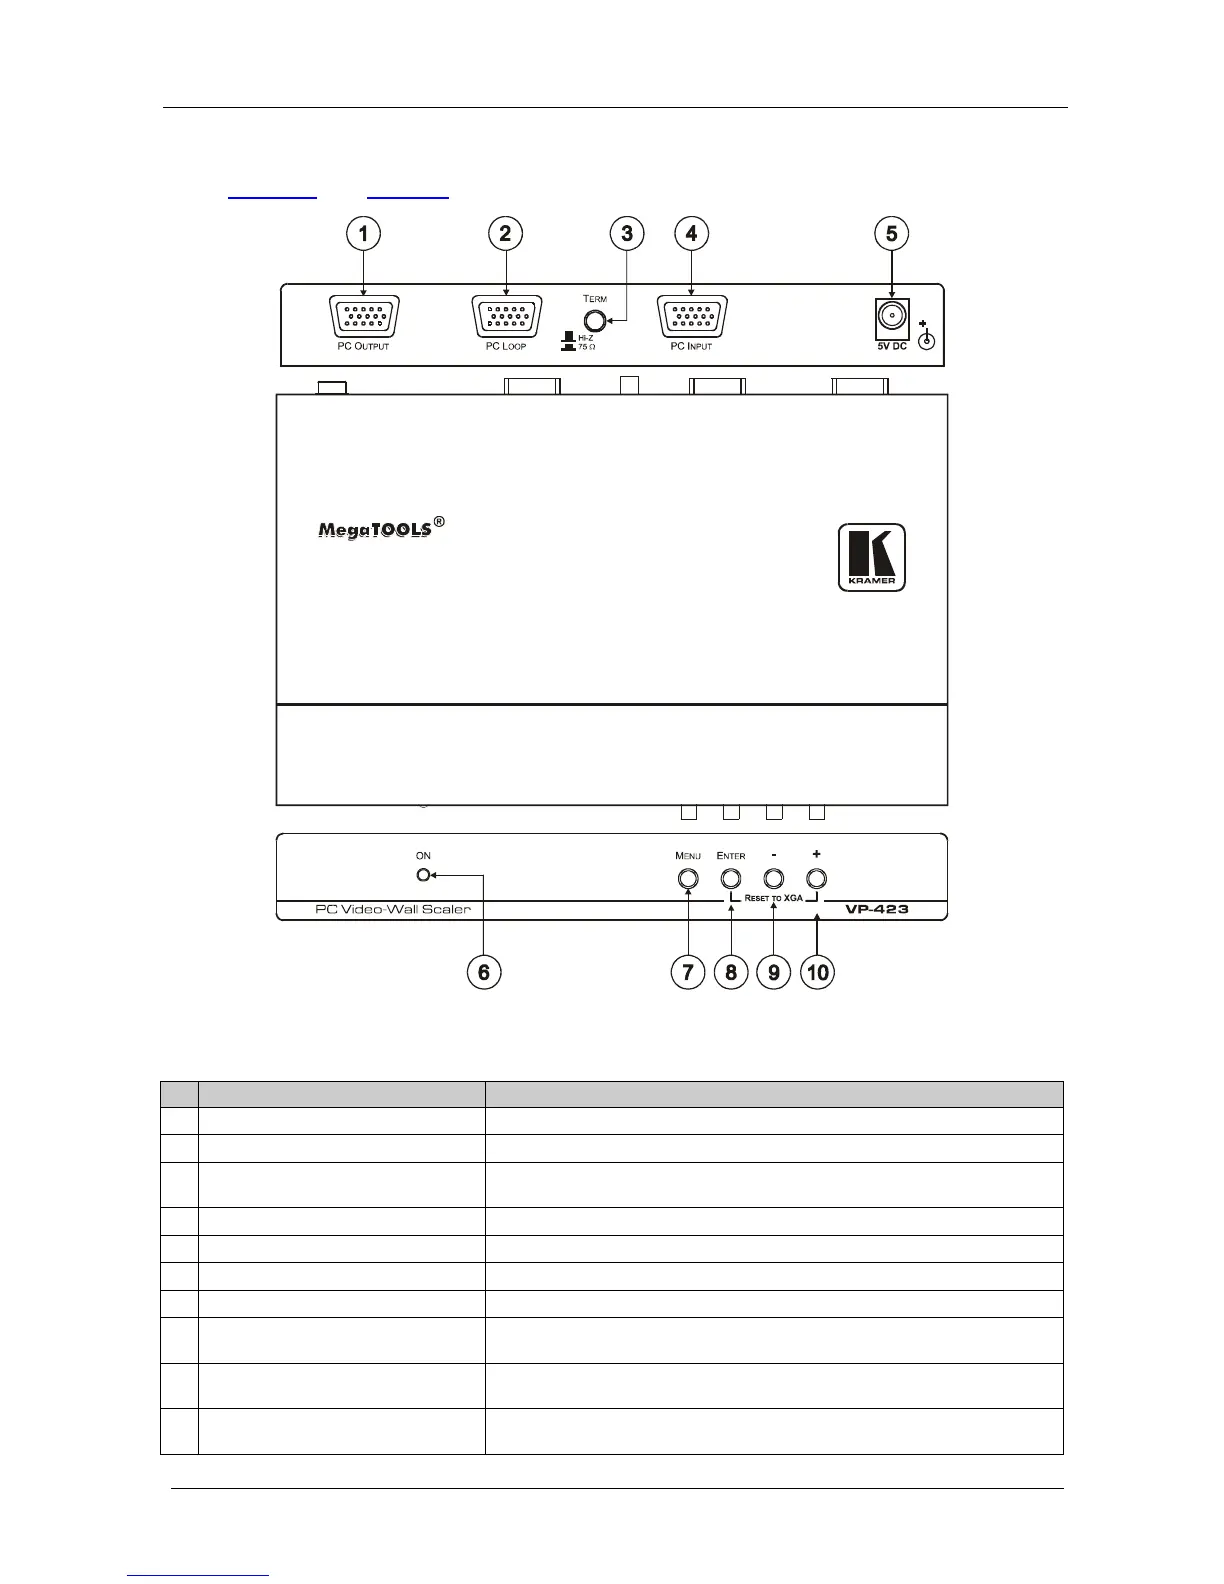
Figure 1 and Table 1 define the VP-423 PC Video-Wall Scaler:
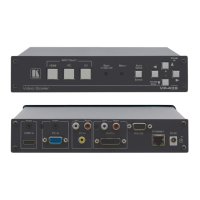
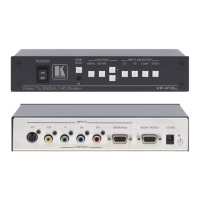
Figure 1: VP-423 PC Video-Wall Scaler – Front and Rear View
Table 1: VP-423 PC Video-Wall Scaler Features
1
PC OUTPUT 15-pin HD connector
Connect to a wall display
2
PC LOOP 15-pin HD connector Connect to the PC INPUT of the next VP-423 unit
3
TERM Button
Press to 75Ω TERM (when the PC LOOP connector is not used); release
to Hi-Z (when an additional unit is connected to the PC LOOP connector)
4
PC INPUT 15-pin HD connector
Connect to a computer graphics source
5
5V DC
+5V DC connector for powering the unit
6
ON LED
Lights when the unit is powered on
7
MENU Button
Press to view the on-screen display (OSD) menu
8
ENTER Button
In the OSD, press to choose the highlighted menu item.
Press together with the + button to reset to XGA
9
– Button
In the OSD, press to move backward through the list or to decrement the
parameter value
10
+ Button
In the OSD, press to move forward through the list or to increment the
parameter value. Press together with the ENTER button to reset to XGA