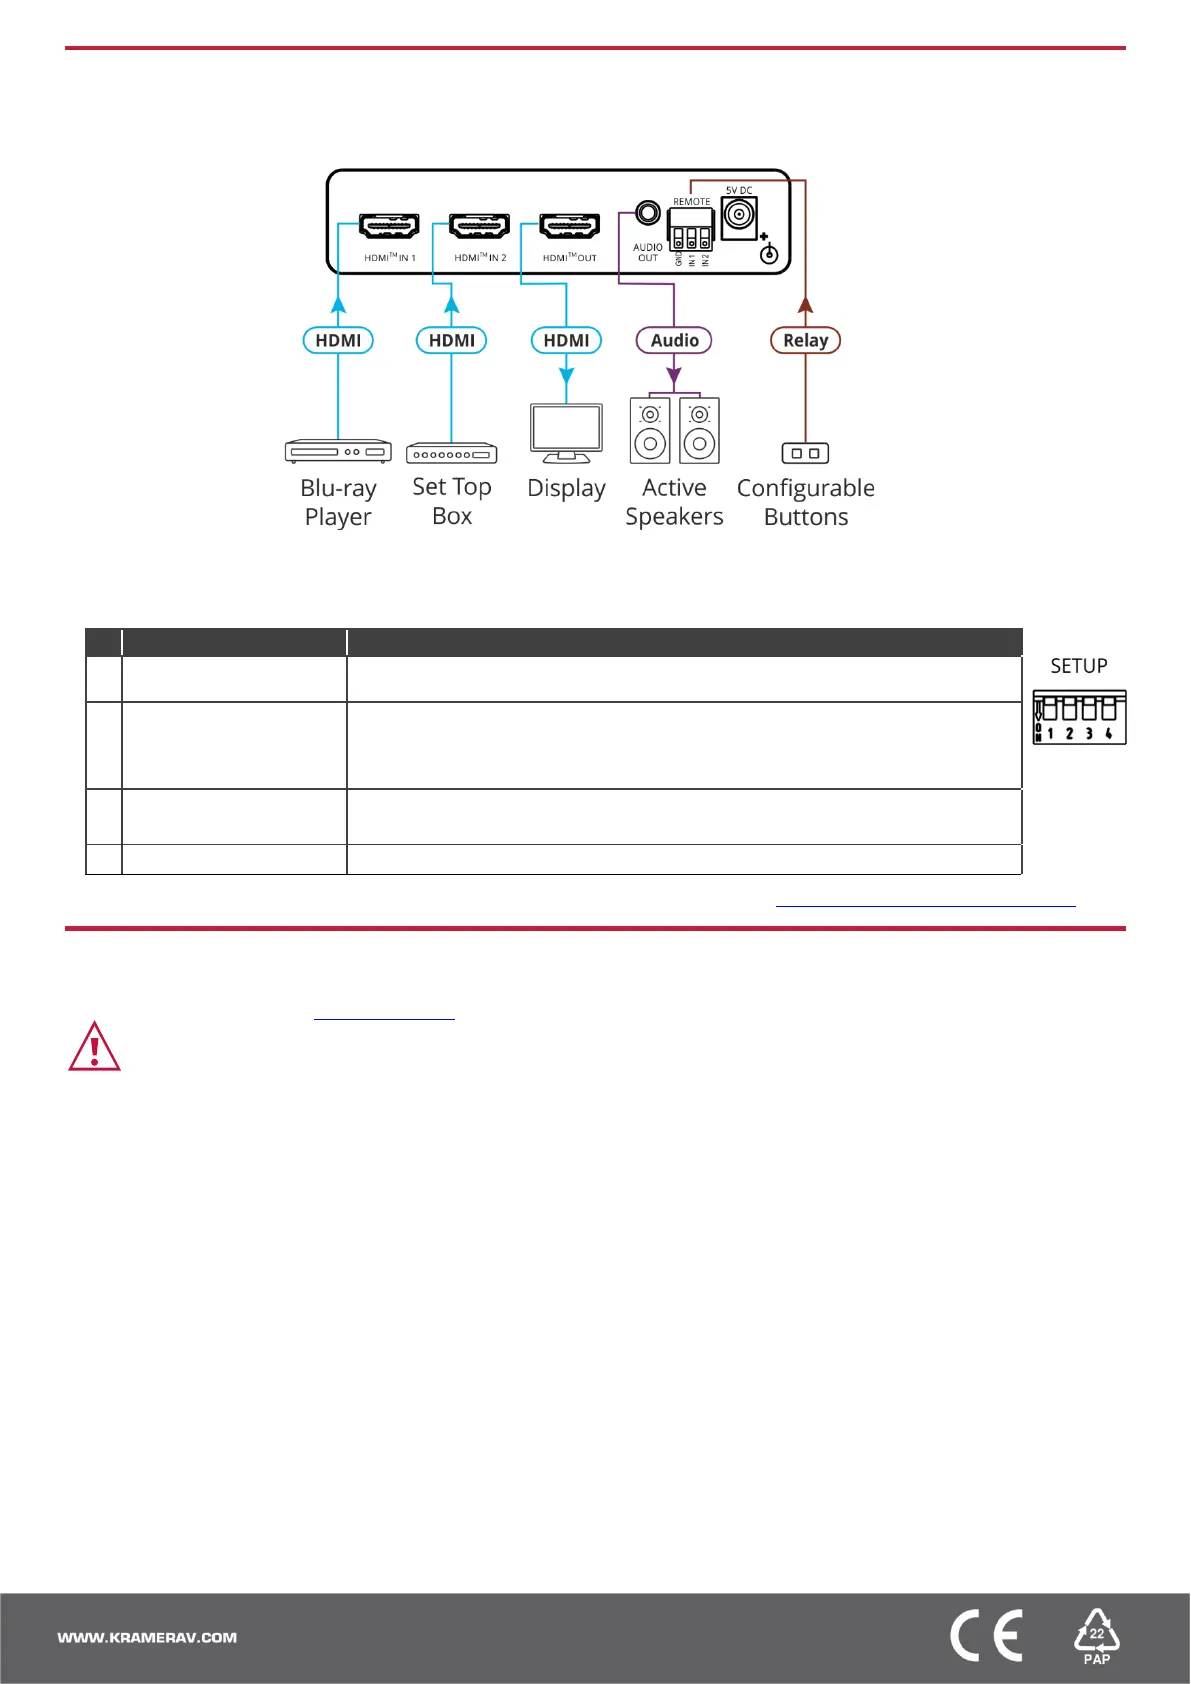
Step 4: Connect the inputs and outputs
Always switch OFF the power on each device before connecting it to your VS-211X. For best results, we recommend that you
always use Kramer high-performance cables to connect AV equipment to the VS-211X. VS-211X and VS-411X are identical
except for the number of inputs.
Setting the DIP-Switches
DIP-switches 1, 2 and 3 are set to ON (down) by default and DIP-switch 4 is always set to OFF (up).
DIP-switch changes take effect immediately.
OFF (up) – Manual mode.
ON (down) –Auto-switching mode.
OFF (up) – Priority switching mode: the device switches the source with the
highest priority to the output.
ON (down) – Last connected switching mode: the last detected active source is
auto-switched to the output.
Off (up) – EDID Locked.
On (down) – EDID parameters are passed-through.
It is mandatory to keep set to OFF (up).
For optimum range and performance use the recommended Kramer cables available at www.kramerav.com/product/VS-411X
Step 5: Connect the power
Connect the power cord to VS-211X / VS-411X and plug it into the mains electricity.
Safety Instructions (See www.kramerav.com for updated safety information).
Caution:
• For products with relay terminals and GPI\O ports, please refer to the permitted rating for an external connection, located next to the
terminal or in the User Manual.
• There are no operator serviceable parts inside the unit.
Warning:
• Use only the power cord that is supplied with the unit.
• Disconnect the power and unplug the unit from the wall before installing.