Balance
This function enables you to select the balance between the left and right chan-
nels. The options are:
CENTER, L .5-5 dB <, R .5-5 dB >.
Enter the menu, then:
1. Use the level control knob on the preamplifier chassis front panel or up and
down keys (16) on the remote control to select:
BALANCE.
2. Press the enter button on the preamplifier chassis front panel or the enter key
(18) on the remote control
. The front panel display (15) shows the default
mode:
CENTER.
3. Use the level control knob or the up and down keys to select the desired bal-
ance option from 0 to +5 dB, in .5 dB increments, left or right.
4. Press the enter button or key to confirm the selection. The front panel display
reads:
BALANCE.
Balance is not active if a preamplifier channel is not linked. At least two linked pre-
amplifier channels s are required for balance to activate.
For more information on
linked preamplifiers channels, see
Appendix: CAN Link and Multiple Evolution
Two Preamplifiers,
on page 51.
Channel Assign
This function enables you to override the factory set channel assignments. The
options are:
FORCE LEFT, FORCE RIGHT, FORCE NONE, NO OVERRIDE.
Enter the menu, then:
1. Use the level control knob on the preamplifier chassis front panel or up and
down keys (16) on the remote control to select:
CHANNEL ASSIGN.
2. Press the enter button on the preamplifier chassis front panel or the enter key
(18) on the remote control
. The front panel display (15) shows the default
mode:
NO OVERRIDE.
3. Use the level contr
ol knob or the up and down keys to select the desir
ed
option:
NO OVERRIDE, FORCE LEFT, FORCE RIGHT, or FORCE NONE.
4. Press the enter button or key to confirm the selection. The front panel display
r
eads:
CHANNEL ASSIGN.
FORCE LEFT
Use to make a left channel respond as a right channel.
34
(SECTION SEVEN: Customizing the Evolution Two continued)
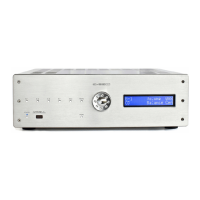
17 Menu Button or Key
Enter or exit the menu.
16 Volume Knob
or Level Keys
Navigate the menu hierarchy;
review functions and configu-
ration options.
18
Enter Button or Key
Select a configuration option;
confirm a selection.
BACK
Scroll backwards through the
menu hierarchy; exit a menu
option without confirming it.