Positioning Your Monitors
Positioning your monitors correctly in the studio is critical to their performance. Typically,
t
hey should be placed so that the listening position is fully “covered” with all monitors
resting on the same horizontal plane. A great way to test a monitor for its imaging
capability is to play back a CD or DVD recorded acoustically in stereo (or one recorded in
surround sound if you have a surround sound set up). We recommend acoustic music
because it represents the spectrum of sound. You can adjust the angle of each monitor by
listening for dead spots. Keep in mind, changing the angle or position of a monitor will
change the sound.
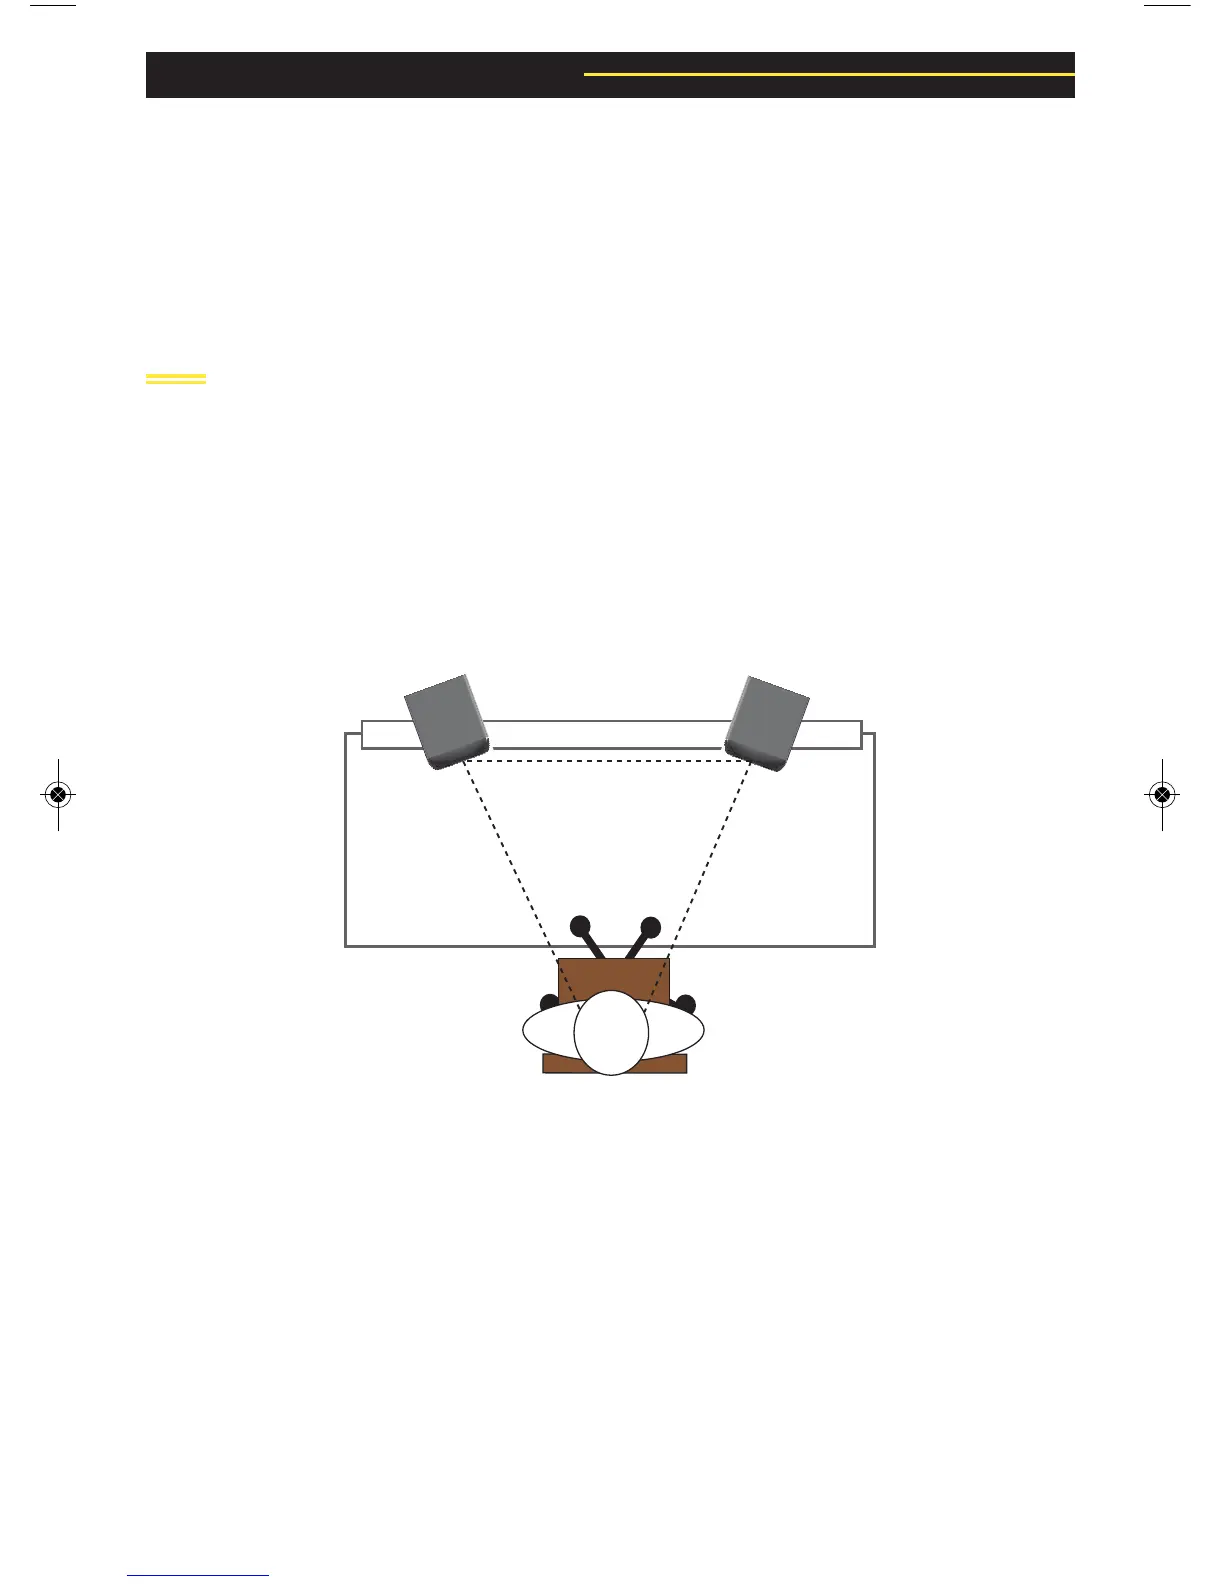
2-Channel Set Up
Close-Field Configuration – In a control room situation, the monitors are often times
placed on the meter bridge or in a close-field listening position. Initial placement starts by
measuring out a simple equilateral triangle (all three sides equal in length) with the apex at
the center of the listening position (as shown in Figure 1) as an “overlay” for the stereo
installation. In this configuration, the Left and Right monitors are each placed at a 60°
angle, equidistant from the listening position.