R E P A I R
Generaldisassembly
Thegeneraldisa ssembly
makesimportantcomponentsaccessibleforrepairorreplacement,
isrequiredfortheleakagecheck .
Safetyinformation
• Emptythefluidsystem beforerepair(ifpossible)an dshipment(seeseepage18).
• Thehousingbackisassembledwithspecialsafetyscrews.Pleaseinsertthesame
screwswhenreassemblingthemachineforsafetyreasonsfortheuser.
• Witheachrepair
alwaysaccomplishinternalcleaning
renewallpressurehosesandcl ipswhendisassembled.
• Handlesnapconnection sandlatcheswithcaretoavoidanydamage.
• Ifitisnecessarytocutorpulloffhoses,holdatowelreadytowipe awayleakingwater.
Preparationfordisassembly
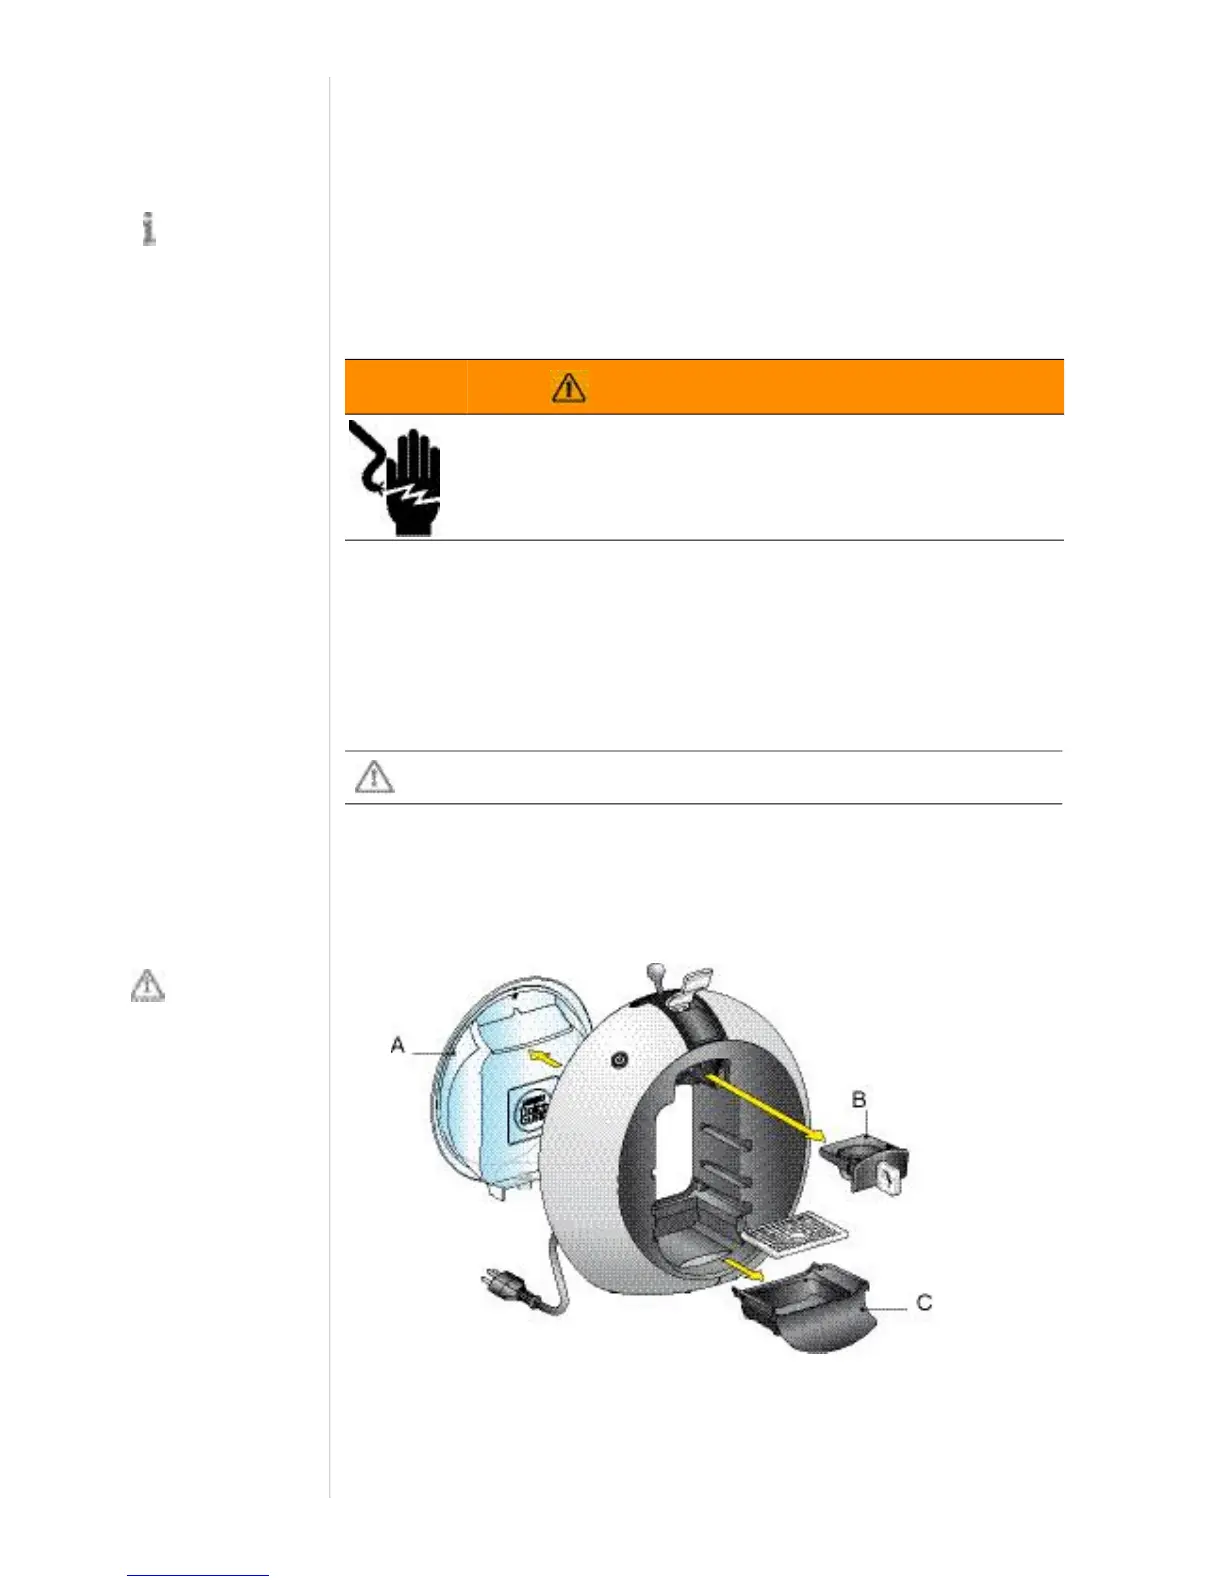
1. Removewatertank( A),capsuleholder(B)anddriptray(C)togetherwithdripgrid.
General disassem-
bly is presented as
step by step instruction.
Pay attention to the
sequence of disassembly
steps, e.g. housing front
cannot be removed
before housing back is
unscrewed.
WA R NI NG
Dangerofelectricshocklivepartsinside coffeemachine.
Unplugfromthemainsbeforedisassemblingthemachine
appliancemustbeisolated!
Everytimeapressurehoseoraclipisdisconnected,itmustbereplaced
byanewone.
Unplug machine
from the mains
before disassembling -
appliance must be
isolated!
 Loading...