Do you have a question about the KTM 85 SX 2016 and is the answer not in the manual?
Manual details work to be performed before vehicle delivery to customer.
Explains the meaning of specific symbols used in the document for clarity.
Explains typographical formats used in the document, such as proprietary names and trademarks.
Steps for unpacking the motorcycle, using a lift stand, and checking for transport damage.
Instructions for installing the front wheel and mounting the front fender.
Steps for mounting the shock absorber and handlebar.
Ensures handlebar markings are centered and cables are correctly routed.
Instructions for installing the start number plate and connecting brake/fuel lines.
Steps for mounting footrests and performing final alignment and brake checks.
Procedures for safely raising and removing the motorcycle from the lift stand.
Detailed steps for installing the front wheel, checking bearings, greasing seals, and tightening spindle.
Instructions for positioning the front fender and mounting the start number plate.
Safety warnings and steps for opening and closing the fuel filler cap.
Safety precautions and steps for refueling, including fuel type and capacity.
Lists specific torque values for various chassis screws and nuts.
Specifies the required 2-stroke engine oil classification, grade, and recommended supplier.
Details fuel requirements and the correct mixture ratio for the 2-stroke engine.
Recommends a specific long-life grease and supplier for lubrication.
Explains the JASO FD classification for 2-stroke engine oil, highlighting its racing suitability.
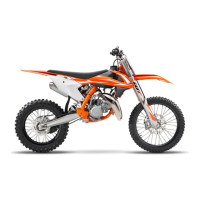
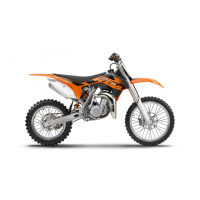
This document provides comprehensive setup instructions for the 2016 KTM 85 SX motorcycle, designed to ensure proper assembly and preparation before delivery to the customer. It emphasizes the importance of following each step carefully and assumes that the work will be performed by a fully trained mechanic. The instructions are presented with clear symbols and formats to guide the user through various tasks, from unpacking the vehicle to final checks and refueling.
The setup process begins with unpacking and positioning the vehicle. Users are instructed to remove the box and plastic packaging, with a note to keep the protective film on the motorcycle until setup is complete to prevent damage. An assistant is recommended to prevent the motorcycle from falling over during this stage. The separate enclosure, containing additional parts, should also be unpacked and its contents checked against the packing list. Once unpacked, the vehicle needs to be taken off the palette and positioned on a lift stand, ensuring neither wheel is in contact with the ground and the motorcycle is secured against falling over. This initial phase also includes checking for any transport damage.
A key part of the setup involves mounting the front wheel. This task requires careful attention to ensure proper braking efficiency and safety. Before installation, the wheel bearing should be checked for damage and wear; if any issues are found, the front wheel bearing must be changed. The shaft seal rings and bearing surface of the spacers need to be cleaned and greased with long-life grease before the spacers are inserted. When positioning the front wheel, it's crucial to ensure that the brake linings are correctly positioned. The wheel spindle is then inserted, and the screw of the wheel spindle is mounted and tightened to the specified torque of 35 Nm (25.8 lbf ft).
The handlebar assembly is another critical step. After positioning the handlebar, users must ensure that all cables and wiring are correctly routed. The handlebar clamps are then positioned, and their screws are mounted and tightened evenly to a torque of 20 Nm (14.8 lbf ft). It's important to align the markings on the handlebar with the center of the handlebar clamps and maintain equal gap widths during tightening. Following this, the handlebar cushion is positioned and secured with cable ties.
The front fender and start number plate also need to be installed. The front fender is positioned, and its screws are mounted and tightened to 10 Nm (7.4 lbf ft). The holding lugs on the fender must engage correctly in the start number plate. Similarly, the start number plate is positioned, and its screws are mounted and tightened to the same torque. The brake line and clamp are then positioned and secured.
Mounting the footrests involves attaching them with springs and pins, and then securing the pins using washers and cotter pins. Specialized pliers for footrest springs may be required for this task.
After these components are installed, the vehicle is taken off the work stand. The hand brake lever should be operated several times until the brake linings are properly seated against the brake disc. To align the fork legs, the front brake is activated, and the fork is compressed forcefully a number of times. The fork stub screws are then tightened to 15 Nm (11.1 lbf ft).
Refueling the motorcycle is a crucial final step before handover. The document provides detailed warnings regarding the highly flammable and poisonous nature of fuel. Users are advised to never refuel near open flames or burning cigarettes, always switch off the engine first, and clean up any spilt fuel immediately. Fuel should not come into contact with skin, eyes, or clothing, and fuel vapors should not be inhaled. Proper storage of fuel in a suitable canister and keeping it away from children are also emphasized. Environmentally, fuel must not be allowed to contaminate groundwater, the ground, or sewage systems. To refuel, the filler cap is turned counterclockwise and lifted off. The fuel tank is then filled with super unleaded (98 octane) mixed with 2-stroke engine oil (1:40) up to the specified measurement of 35 mm (1.38 in). The fuel tank breather hose should be run without kinks. Finally, the filler cap is turned clockwise until it is tightly closed.
The document also includes a section on chassis tightening torques, providing specific torque values for various screws and nuts across different components, such as spoke nipples, brake bolts, handlebar clamps, and shock absorber screws. Some of these require the use of Loctite® 243™ or Loctite® 2701™ for secure fastening.
Information on substances and auxiliary substances is provided, detailing the recommended engine oil (fully synthetic, JASO FD compliant 2-stroke engine oil from a reputable brand like Motorex® Cross Power 2T) and long-life grease (Motorex® Bike Grease 2000). The fuel type specified is Super unleaded (ROZ 98 / RON 98 / PON 94) conforming to DIN EN 228. The mixture ratio for fuel and 2-stroke engine oil is 1:40.
Finally, the document prepares the vehicle according to the specifications in the KTM Dealer.net for handover to the customer, ensuring that all necessary checks and adjustments have been made for a safe and ready-to-race motorcycle.
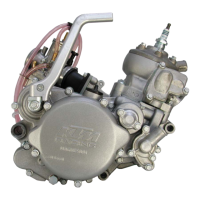
| Displacement | 84.9 cm³ |
|---|---|
| Starter | Kickstarter |
| Transmission | 6-speed |
| Secondary Gear Ratio | 13:46 |
| Rear Suspension | WP monoshock |
| Front Brake | Disc brake |
| Rear Brake | Disc brake |
| Front Brake Diameter | 220 mm |
| Seat Height | 890 mm |
| Fuel System | Carburetor |
| Cooling System | Liquid cooling |
| Front Tire | 70/100-17" |
| Rear Tire | 90/100-14" |
| Engine Type | Single-cylinder, 2-stroke |
| Bore x Stroke | 47 mm x 48.95 mm |
| Clutch | Wet multi-disc clutch, hydraulically operated |
| Front Suspension | WP USD, 43 mm |
| Tank Capacity | 5 L |
| Wheelbase | 1, 290 mm |