Startup in Detail
page 7
Startup in Detail
This section walks you through details of setting up your PC3A and connecting optional
components.
Before You Start...
Don’t connect anything until you make sure your PC3A is properly and safely situated. Also, if
your PC3A has been out in the cold, give it time to warm up to room temperature before starting
it, since condensation may have formed inside the PC3A. It is normal for the rear panel near the
MIDI jacks to become warm after a while.
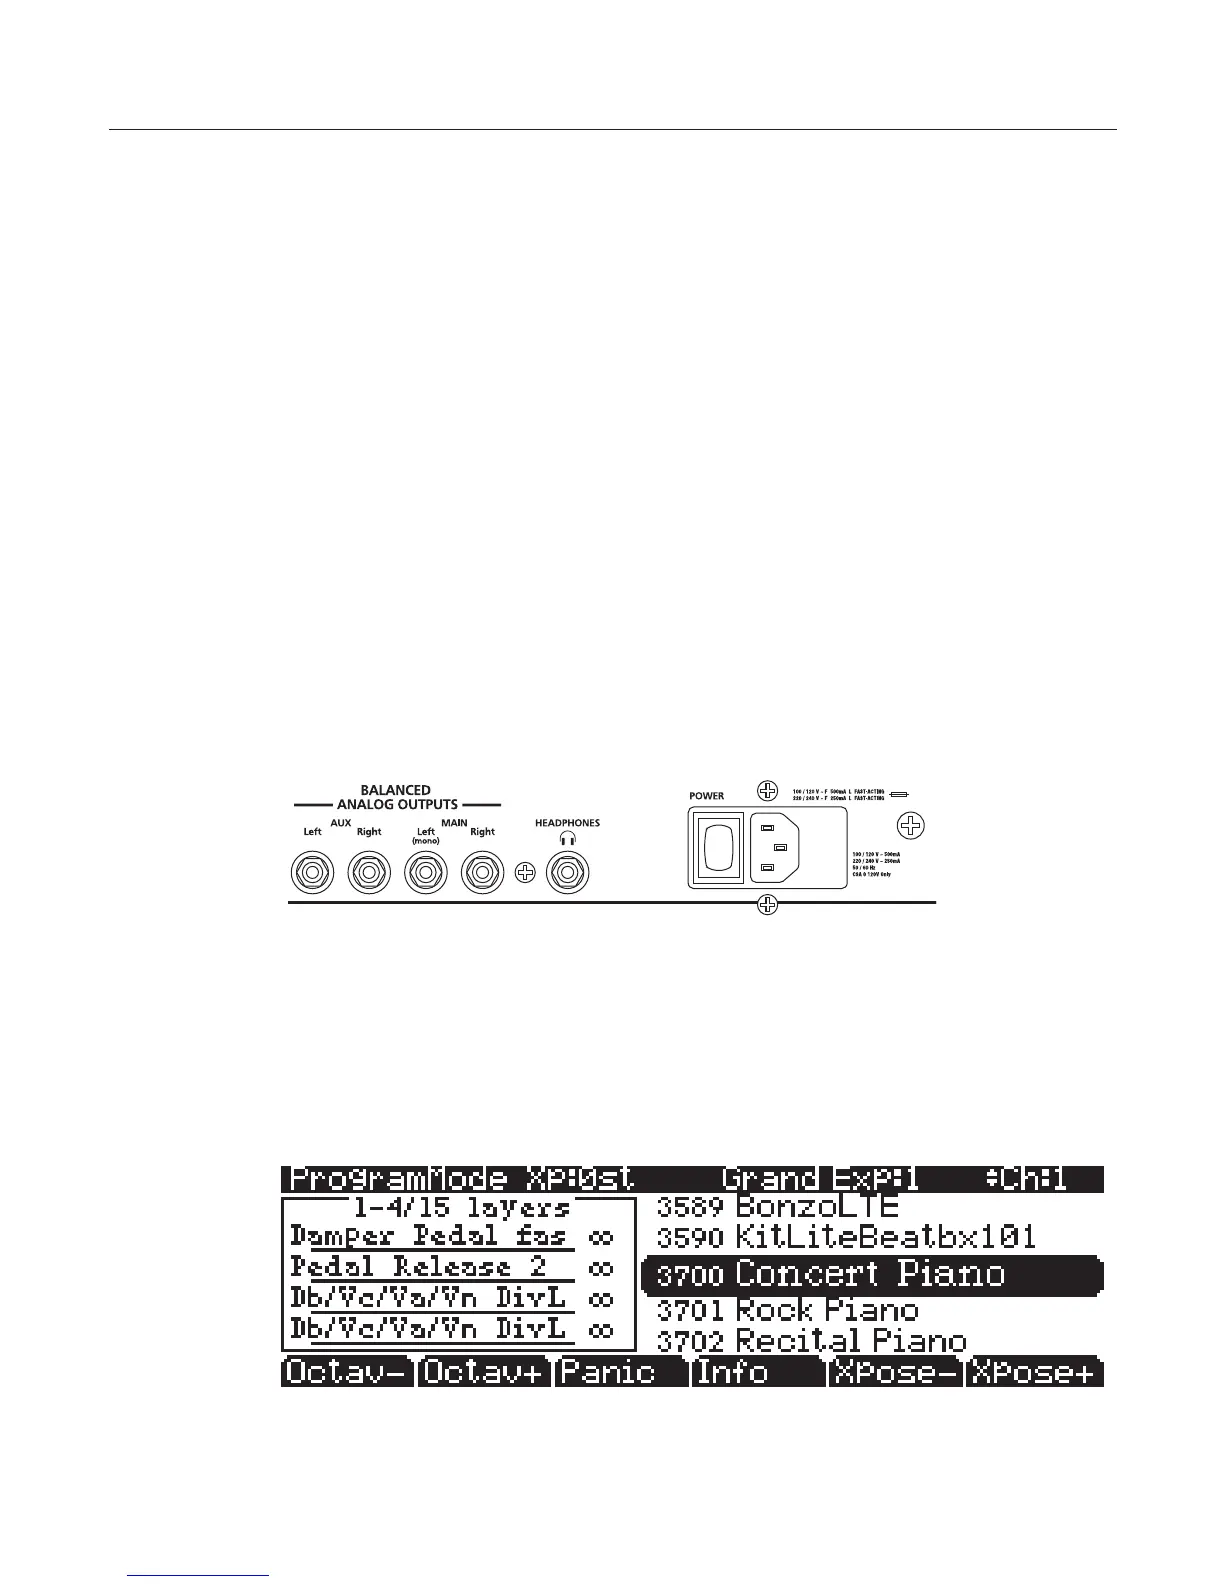
Connecting the Power Cable (Line Cord)
The PC3A runs on AC power: 100, 120, 230, or 240 volts at 50–60 Hz. Your dealer will set the
voltage switch to match the voltage in your area. The voltage level is set with a selector on the
rear panel of the PC3A. Unless you are sure it needs to be changed, you shouldn’t adjust this.
When you’ve connected the cable at the PC3A end (as you face the back of the PC3A, the power
connection is at the right), plug it into a grounded outlet. If your power source does not have the
standard three-hole outlet, you should take the time to install a proper grounding system. This
will reduce the risk of a shock.
Switching On the Power
The PC3A’s power switch is on the rear panel, adjacent to the power cable connection.
When you power up, the display briey shows some startup information. The Program mode
display then appears. The rst time you power up (or after a reset), your instrument will be set to
operate on MIDI Channel 1 (as shown at the far right of the display’s top line). It will look similar
to the diagram below, though your PC3A may be dierent from the example.