SECTION III
Adjustments
P 3.1
086A 08 08
THE FOLLOWING ADJUSTMENTS ARE TO BE
PERFORMED WITH THE CLOSER ELECTRICAL
POWER DISCONNECTED.
A. CLOSURE TRACK ASSEMBLY REMOVAL:
Some of the adjustments described in this section
require removal of the closure track assembly.
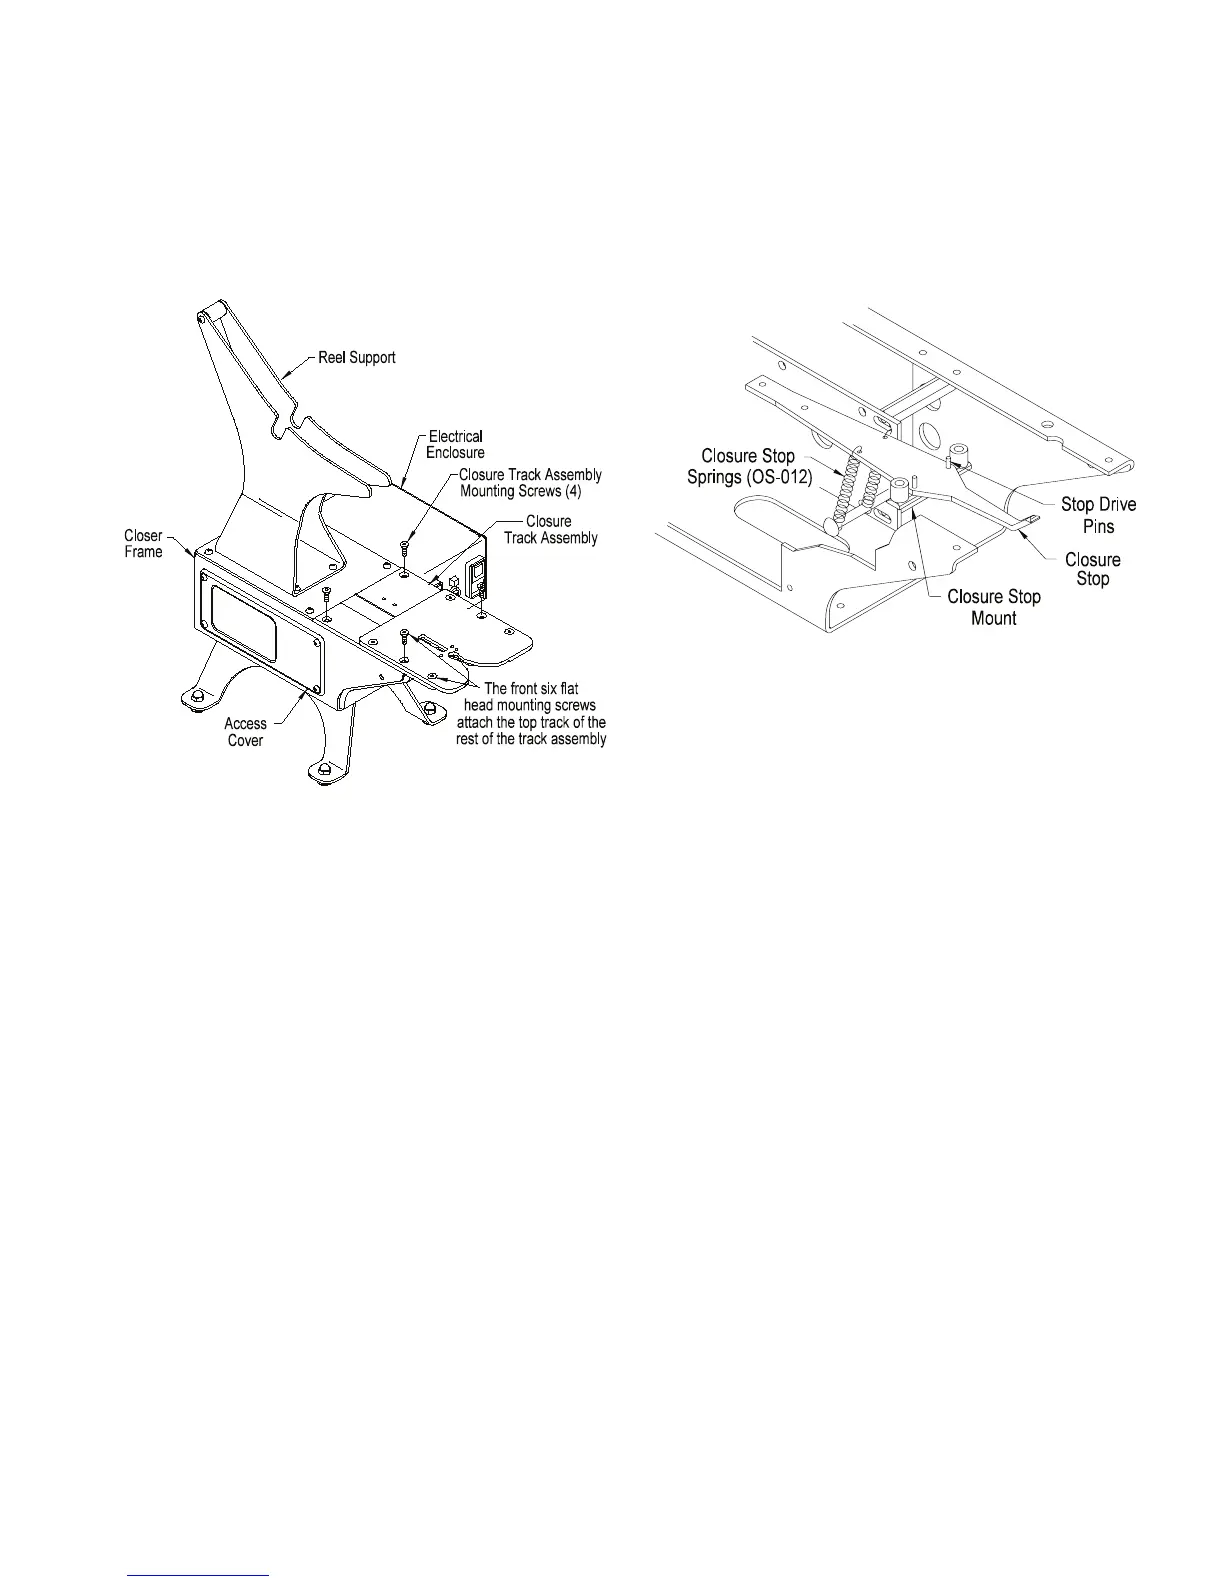
1. Remove the side access cover (Figure 3.1).
2. Disconnect the two gold colored closure stop
springs (OS-012) from the lower spring anchor
screw (Figure 3.2). When the springs are
reattached be careful not to stretch them.
3. Remove the four flat head mounting screws
which attach the closure track assembly to the
closer main frame.
When remounting the track assembly, tighten
the four mounting screws evenly.
4. Lift the closure track assembly slightly and
depress the tip of the pick to disengage it from
the closure track.
5. Raise the closure track assembly slightly off the
frame and disconnect the two wire leads from
the sensor lever limit switch.
To remount the closure track assembly, reverse the
above procedure. Before closing the access cover,
check to see that there are no pinched wires or
wires routed close to moving parts.
B. TOP CLOSURE TRACK REMOVAL:
The top of the closure track can be removed from
the closer while the closure track assembly remains
attached to the closer mainframe. This can be done
to expose the slot that the closures move through.
The closure track can be inspected and cleaned if
needed (Figure 3.1).
1. Remove the front six flathead screws from the
track top. Note the different screw lengths upon
removal.
2. Remove the top of the closure track from the
rest of the track assembly.
Figure 3.2
Figure 3.1
 Loading...