SECTION III
Adjustments
P 3.3
086A 08 08
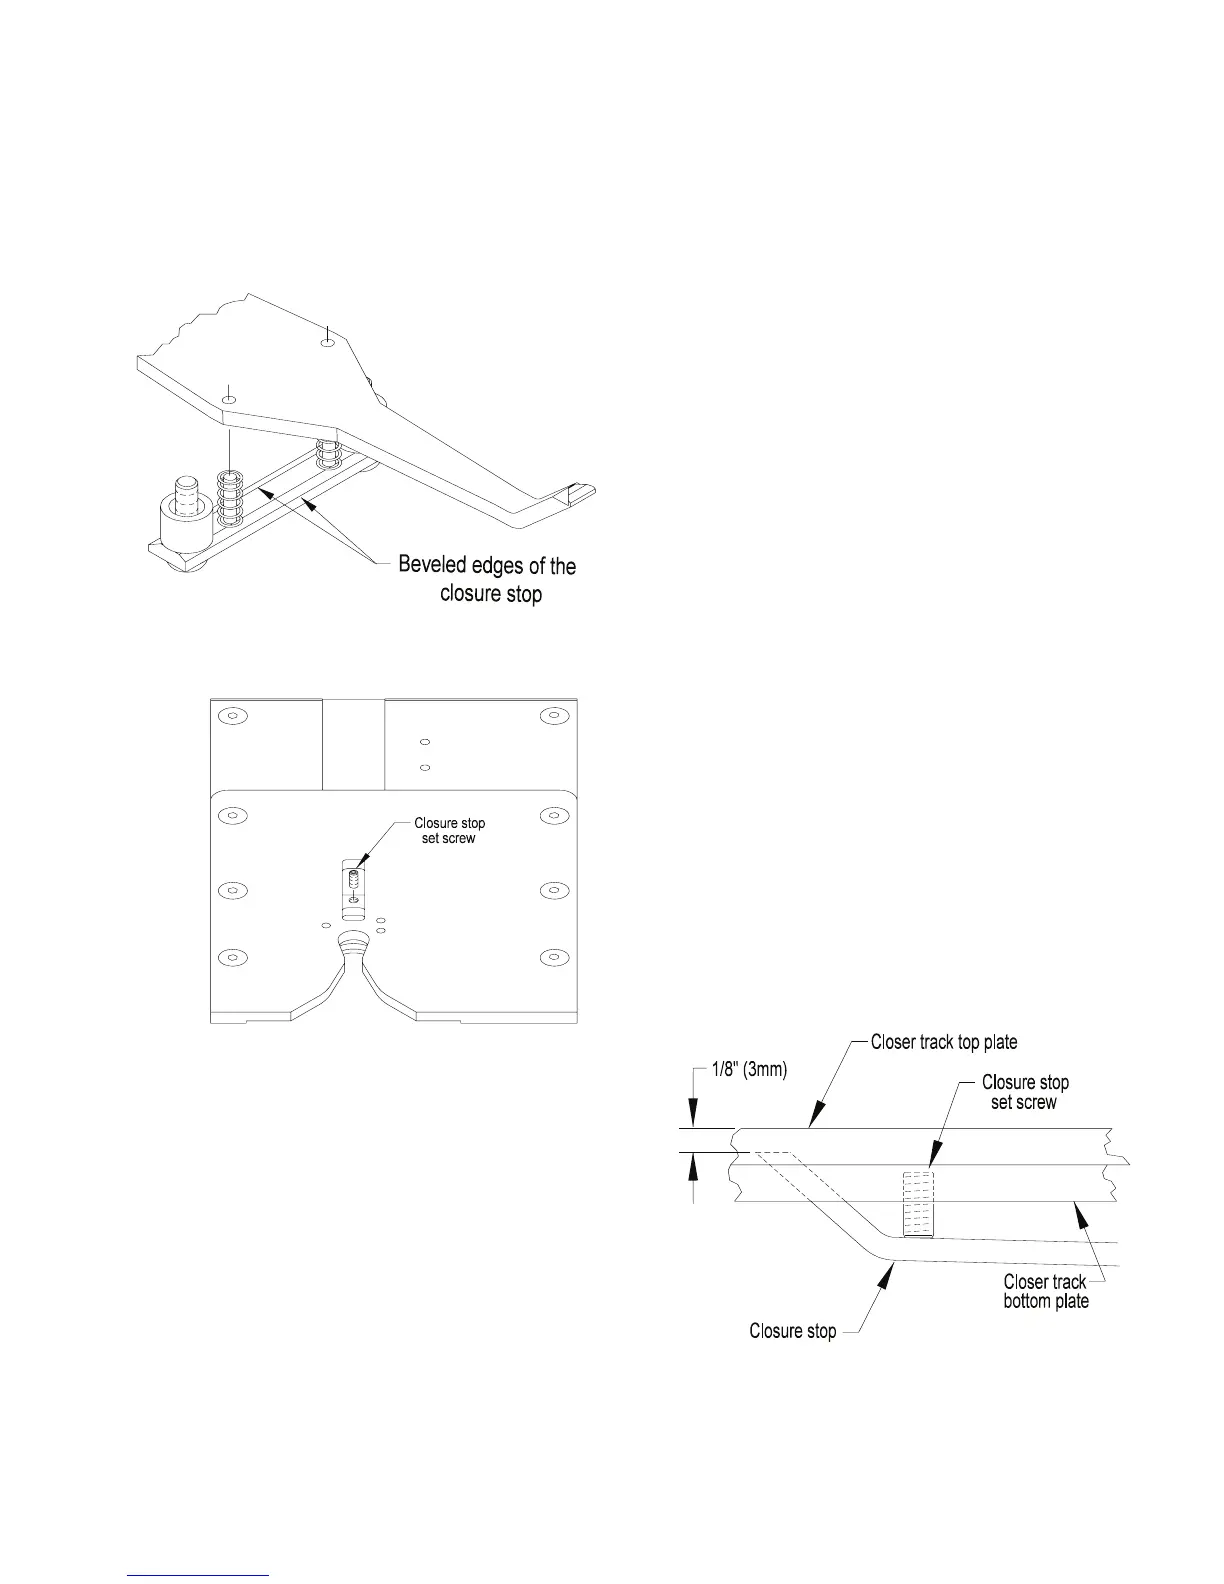
For 086 Models 200, 300, or 400, the stop
mount is mounted as shown (Figure 3.3 lower
view).
2. Be sure the beveled edges of the mount are
against the closure stop as noted in Figure 3.4.
The closure stop tip must be centered in the slot
located in the closure track for it.
3. Slightly loosen the stop mount mounting screws.
4. Move the closure stop tip side to side until it is
centered in the slot.
5. Tighten the mounting screws.
6. Turn the closure track assembly over so it is
right side up in your hands. Again check the
position of the closure stop tip as this is the way
the closure track is oriented during operation.
Readjust if needed.
F. CLOSURE STOP SET SCREW ADJUSTMENT:
When properly adjusted the closure stop setscrew
sets the height of the stop so the second closure in
the strip is stopped while the leading closure
continues to move ahead and so is separated from
the closure strip. The closure track assembly need
not be removed to make this adjustment. Adjust as
follows:
1. Remove any closures from the track.
2. Locate the top of the set screw (Figure 3.5).
3. Turn the set screw in or out to lower or raise the
tip of the stop until it is 1/8” (3mm) below the top
of the track top plate (Figure 3.6).
Figure 3.5
Figure 3.4
Figure 3.6