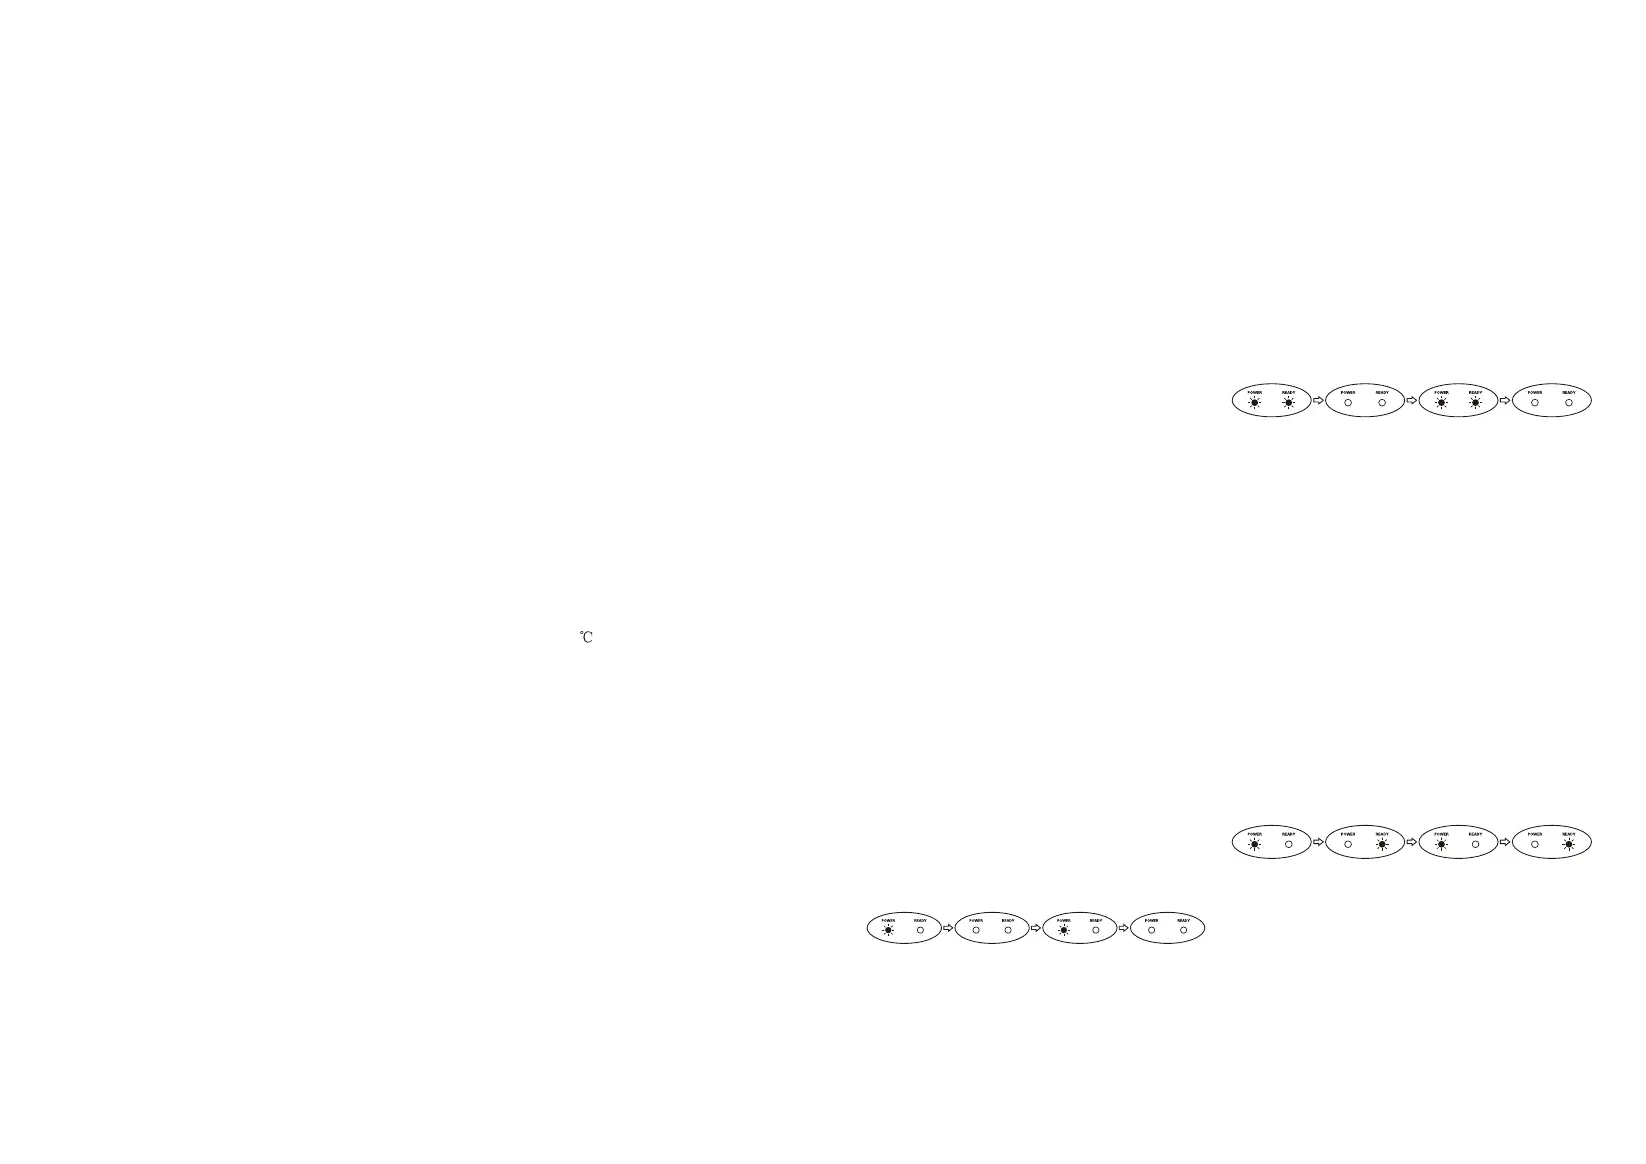
Fault 3: "THIRD LEVEL PROBE DETECTED
FAULT"
This fault occurs when the third water level
probe has detected that the water level is
higher than the normal operation. This is
normaly caused by a faulty or scaled up level
probe.
This fault will be indicated on the PC-board by
flashing the "FL" LED and by flashing the
"POWER" LED and "READY" LED in a
sequence as follows eg..
This fault can be corrected by removing the
water level probe and cleaning it or replacing
the part. A detailed cleaning procedure can be
found on our website at www.Kwikot.com. The
unit will remove itself out of this fault mode
once normal operation has been restored.
MODE 3 OPERATION:
4.3
The Element remains energised,
allowing heating of water to take place,
resulting in the water attaining set point,
detected by the Thermistor.
The Element is then de-energised
allowing cooling of water to take place.
Cooling continues to take place through
heat loss via the tank insulation until set
point minus 2 is reached, detected by
the Thermistor.
The Element is then energised,
allowing heating of water to take place.
3.
4.
5.
2.
1.
Page 05 Page 06
Water continues to enter the tank until
such time as the low Level Probe becomes
"CLOSED" , i.e. water is present , up to the
end of the Low Level Probe the "LL" LED
on the PC-Board will light up to indicate
this condition.
3.
The solenoid valve is then de-energised
stopping the flow of water into the tank and
the "SL" LED will go off on the PC-Board.
The Controller then steps into MODE 2
new line condition.
4.
5.
MODE 2 OPERATION:
4.2
The element is energised and the "HT"
LED on the PC-Board will light up
indicating power sent to the element,
allowing heating of the water to take place .
The continued heating results in the water
reaching the set point detected by
Termistor the ready light will the turn on.
The Solenoid Valve is then energised,
allowing ambient water to enter the tank
thus reducing the water temperature a
maximum. of 2deg and results in a shift
away from the set point , again detected by
the Thermistor.
When this occurs, the Solenoid vavle is
then de-energised, stopping the flow of
water into the tank.
Steps 2 to 4 are repeated until such
time as the High Level Probe be comes
"CLOSED" (unit is now full) and the
"HL" LED will light up indicating this
condition i.e.water is present.
5.
4.
3.
1.
2.
Steps 1 to 4 are repeated untill such
time as the water is drawn from the unit,
at which time the controller then steps
back into MODE 2
KWIKBOIL DIAGNOSTICS
4.4
This Kwikboil is fitted with self diagnostics
and indicative LED Lights.
The self diagnostic features programmed
into the PC-board enables the unit to
determine if a component is faulty or if there
is a fault in heating and/or filling modes i.e.
no water connected.
A further added safety feature to the unit is
a third Level water probe in the tank. This
will enable the PC-board to detect if the
normal operating water level probe is faulty
or dirty and will prevent the machine from
overflowing.
Diagnostic faults are indicated on the front
LED's of the face plate and on the PC-board
with the respective component LED, e.g.
"SL" meaning solenoid valve. The
respective LED will flash when a fault is
detected.
Fault 1: "NO WATER CONDITION FAULT"
This fault occurs when the unit goes
through its filling modes and does not
detect water filling into the tank after a set
time period. The cause of this fault could
be due to no water connection to the unit, a
faulty level probe or faulty solenoid valve.
This fault will be indicated on the PC Board
by flashing the "SL" LED on the PC-board
and by flashing the "POWER LED" on the
front face plate eg.
This fault can be corrected by identifying
the cause (refer to Fault Finding Guide) and
resetting the unit.
Fault 2: "NOT HEATING FAULT"
This fault occurs when the PC-board has
detected no change in the water temperature.
The first possible cause of this fault could be
due to the element not working, the element
thermal cut out then needs to be reset. The
second possible fault could be a lose power
connection.
This fault will be indicated on the PC-board by
flashing the "HT" LED and by flashing the
"POWER" and "READY" LED's similtaniously
on the front face plate eg..
This fault can be corrected by identifying the
cause (refer to Fault Finding Guide) and
resetting the unit.
 Loading...