3-8
Preparation before Use > Preparation for Sending a Document to a Shared Folder in a PC
Preparation for Sending a Document to a
Shared Folder in a PC
Check the information that needs to be set on the machine and create a folder to receive the document on your
computer. Screens of Windows 8.1 are used in the following explanation. The details of the screens will vary in other
versions of Windows.
Making a note of the computer name and full
computer name
Check the name of the computer name and full computer name.
1
Display the screen.
In Windows 8.1, right-click [PC] in the Start screen and select [Properties]. Or, right-click the
Window icon and select [System].
In Windows 8, select the desktop in the Start screen, right-click [Computer] from [Libraries],
and then select [Properties].
2
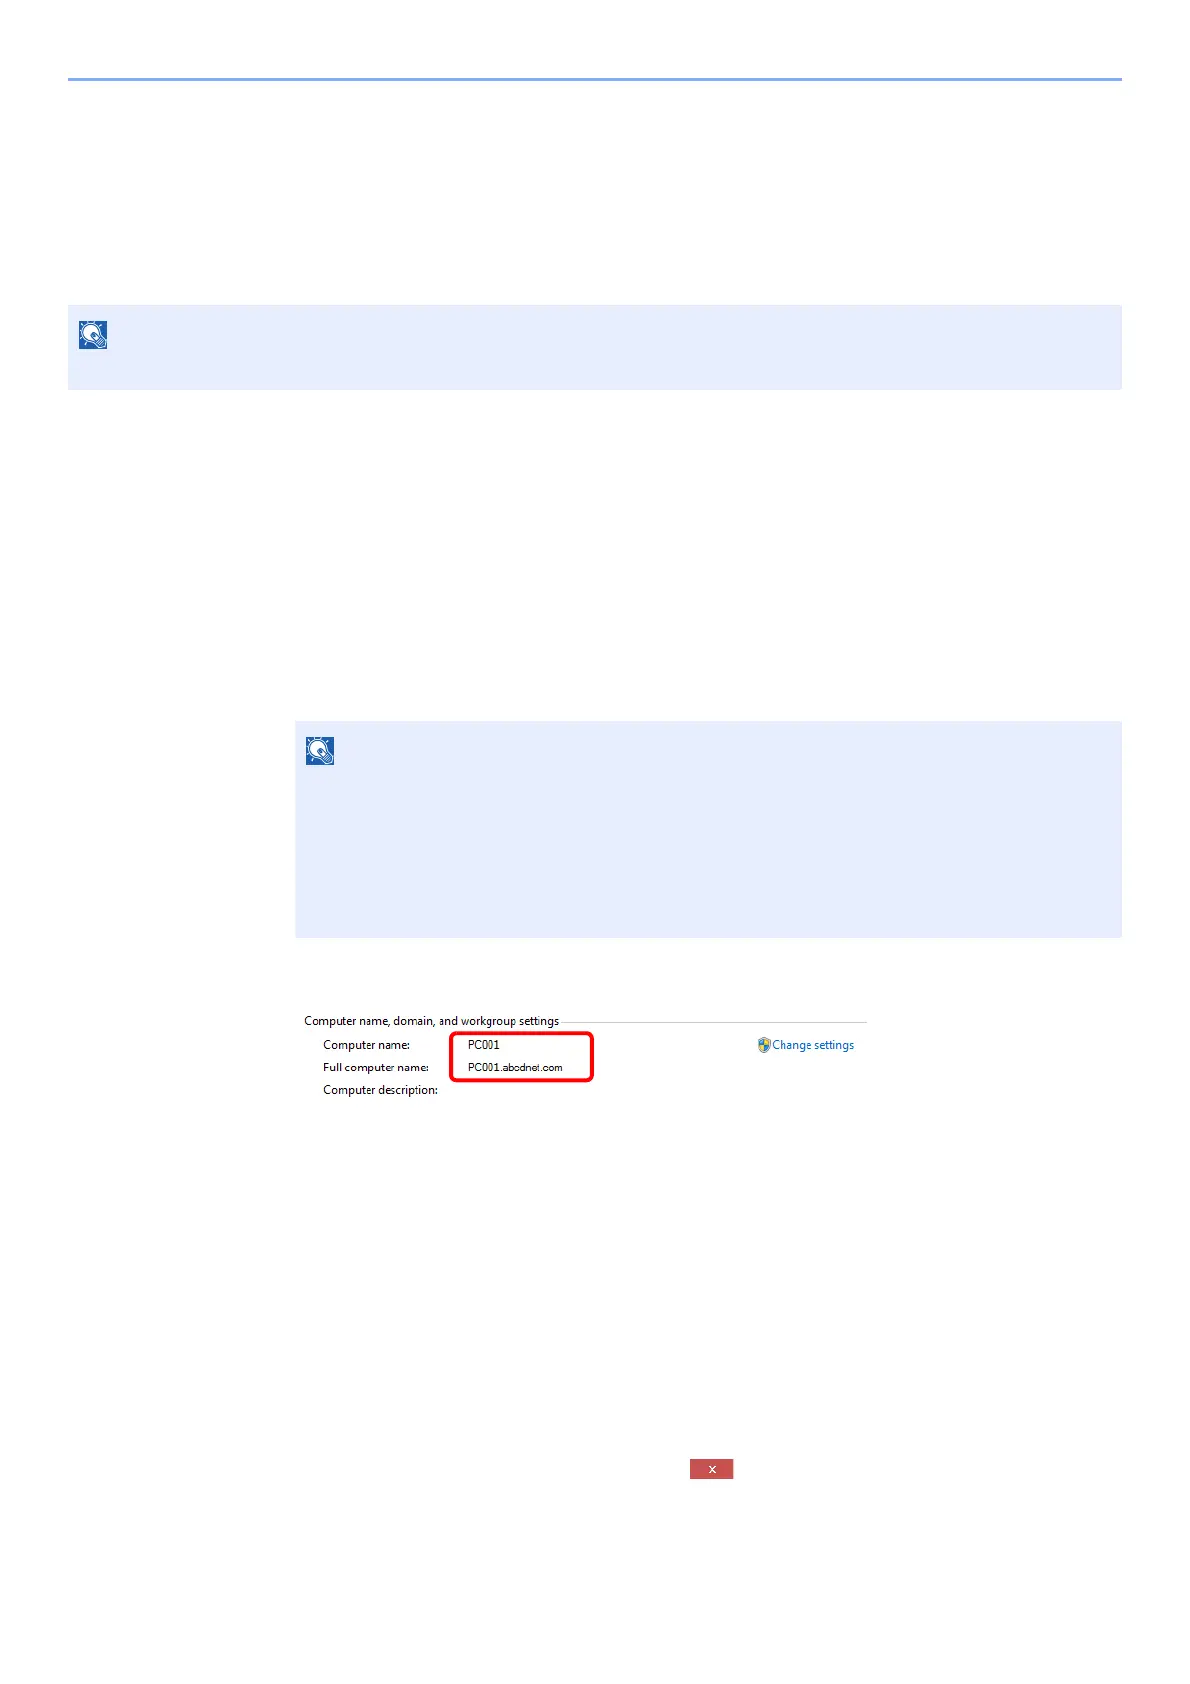
Check the computer name.
Check the computer name and full computer name.
Screen example:
Computer name: PC001
Full computer name: PC001.abcdnet.com
Windows XP:
If the full computer name does not have a dot (.), the full computer name and the computer
name are the same.
If the full computer name has a dot (.), the text string in front of the dot (.) in the full computer
name is the computer name.
Example: PC001.abcdnet.com
PC001 is the computer name
PC001.abcdnet.com is the full computer name
After checking the computer name, click the [Close] button to close the
"System Properties" screen.
In Windows XP, after checking the computer name, click the [Cancel] button to close the
"System Properties" screen.
Log on to Windows with administrator privileges.
In Windows XP, right-click [My Computer] and select [Properties]. The [System
Properties] dialog box appears. Click the [Computer Name] tab in the window that
appears.
In Windows 7, from [Start] button on the Windows, select [Computer] and then [System
Properties].
In Windows 10, right-click [Start] button on the Windows and select [System].
 Loading...