Do you have a question about the La Crosse Technology TX141-Bv2 and is the answer not in the manual?
Insert 5-volt a/c power adapter into station and wall outlet for backlight.
Insert 3 AAA batteries for optional battery operation. Observe polarity.
Ensure transmitter is within 10 feet of the station and insert batteries.
Station searches for outdoor transmitter for 3 minutes. Antenna symbol indicates status.
Hold SENSOR SEARCH to re-search. Press TX button on transmitter. Reset station/transmitter if needed.
Hold TEMP ALERT to set individual high/low alerts for indoor/outdoor temperatures.
Set specific values for OUTDOOR HI/LO and INDOOR HI/LO alerts.
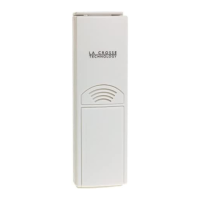
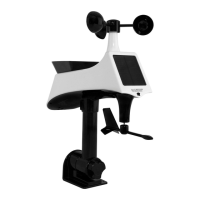
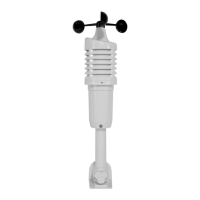
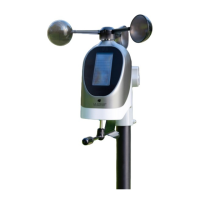
Mount transmitter vertically, shaded, protected area, at least 6ft high.
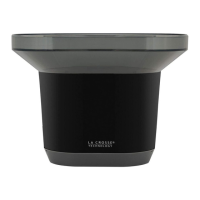
This document describes the La Crosse Technology Wireless Forecast Station, models TX141-BV2 and TX141V2, which provides weather forecasting, temperature, and humidity information, along with a USB charging port.
The Wireless Forecast Station is designed to provide users with a comprehensive overview of their indoor and outdoor environment. It features a manual set time and date, a weather forecast, and displays both indoor and outdoor temperature and humidity. Additionally, it includes temperature alerts, heat index, and dew point readings. The station boasts a stylish, colorful, and easy-to-read display. A key feature is its integrated USB charging port, allowing users to charge smartphones, cameras, or other devices when the Forecast Station is plugged into a power outlet.
The station "learns" and calibrates its barometer over time to generate an accurate, personalized forecast. It requires 3-4 weeks for barometer calibration to achieve optimal accuracy. The forecast is based on atmospheric pressure changes, with 70-75% accuracy for the next 12 hours. The station samples barometric pressure every twelve minutes, averaging these samples hourly and daily for storage in nonvolatile memory.
Initial Setup:
Searching for Transmitter: After battery insertion, the forecast station searches for the outdoor transmitter for 3 minutes. A flashing antenna symbol and dashed temperature display indicate reception. The antenna symbol scrolls during RF synchronization. If synchronization fails, the antenna symbol will show fewer bars. If reception continuously fails 5 times, the antenna symbol will be shown as an "X". A full display with a solid antenna symbol indicates successful RF reception. If the outdoor temperature isn't displayed after three minutes, hold the SENSOR SEARCH button for three seconds. If still no reading, remove the transmitter battery cover, press the TX button to send a signal, and if necessary, remove A/C cord and batteries from both units for 15 minutes before repeating setup.
Time and Date Settings: Hold the SETTINGS button for three seconds to enter time set mode.
Alarm Time Settings: In normal mode, press and release the TIME ALARM button to view alarm time. Hold the TIME ALARM button for three seconds to enter alarm set mode.
Activating/Deactivating Time Alarm: In normal mode, press and release the TIME ALARM button to view alarm time. Press and release the TIME ALARM button repeatedly to toggle the alarm ON/OFF. The alarm icon appears when activated. The alarm rings for 2 minutes and turns off if no buttons are pressed.
Snooze Function: When the alarm sounds, press the HI/LOW/OFF button to snooze for 10 minutes. This can be repeated three times. The alarm icon flashes during snooze. Pressing any button except TIME ALARM turns off the alarm.
Backlight Control: When using the A/C adapter, the backlight is continuously ON. It defaults to HIGH. Press HI/LOW/OFF to dim to LOW, press again to turn OFF, and press again to return to full strength. If the backlight is OFF, pressing any button activates it for 10 seconds. When operating on battery power only, pressing any button activates the backlight for 10 seconds.
Heat Index & Dew Point Temperature: Press the HEAT/DEW button once to view Heat Index, which combines heat and humidity to show the apparent temperature. Press the HEAT/DEW button twice to view Dew Point, which is the saturation point of the air.
Temperature Trend Icons: Indicators update every 30 minutes or less, showing temperature changes over the past three hours:
Temperature Alerts: Press and release the TEMP ALERT button to toggle between alerts. Hold TEMP ALERT to set individual high and low alerts.
Temperature Alert Sounds: When an alert sounds, the corresponding icon flashes, and the unit beeps once per minute until the temperature is out of range. Press any button to stop the alert (icon remains). To turn off an alert, hold and release TEMP ALERT, select the alert, then press MIN.
Min/Max Temperatures: The Forecast Station displays daily minimum and maximum temperatures, resetting at midnight (12:00 AM).
Weather Forecast Icons: The station displays icons for Sunny, Partly Sunny, Cloudy, Rainy, and Stormy, based on barometric pressure changes.
USB Charge Port: The integrated USB charging port on the back charges external devices. Connect your device's USB charging cord to the port. Charging times vary. Ensure your USB cord is for charging, not just data transfer. Do not overload the USB port.
Positioning the Forecast Station: Place the forecast station within range of the outdoor transmitter, on a table or desk. Keep it at least 6 feet away from electronics like cordless phones, gaming systems, televisions, microwaves, routers, and baby monitors to prevent signal interference. Best reception is achieved when the front or back of the forecast station faces the outdoor transmitter.
Positioning the Outdoor Transmitter: Once the outdoor temperature/humidity is displayed, place the transmitter in the desired location and wait approximately 1 hour before permanently mounting. Mount it vertically in a shaded, protected area, at least 6 feet from the ground to avoid damage and ensure accurate readings. The transmitter is water resistant, not waterproof, and should not be submerged in water or subject to standing water or snow. Choose a location under an overhang for accuracy.
Battery Care:
General Care:
| Type | Wireless Temperature and Humidity Sensor |
|---|---|
| Category | Accessories |
| Temperature Range | -40°F to 140°F (-40°C to 60°C) |
| Humidity Range | 10% to 99% RH |
| Power Source | 2 x AA batteries |
| Wireless Frequency | 433 MHz |
| Transmission Range | 300 feet (91 meters) in open air |