Do you have a question about the La Crosse Technology WT-8005U and is the answer not in the manual?
Instructions on how to select one of the four North American time zones for accurate atomic time.
Guide to switching the temperature display between Fahrenheit and Celsius units.
Details on how to set the alarm time, activate/deactivate it, and use the snooze function.
Information on using the reset button to restore the clock to default atomic settings.
Key technical details including temperature range, power requirements, battery life, and dimensions.
Contact details and availability for customer support and technical assistance.
Details on the limited warranty, Canada compliance, FCC statement, and safety cautions.
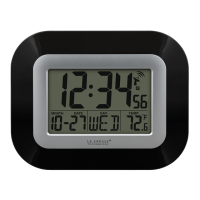
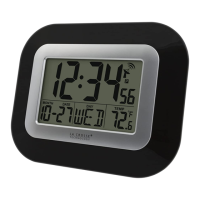
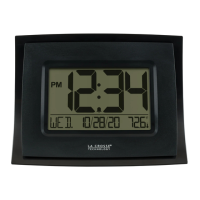
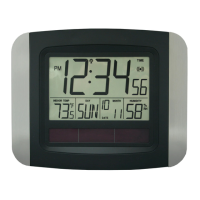
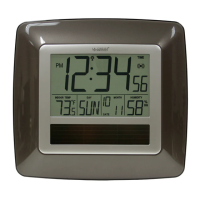
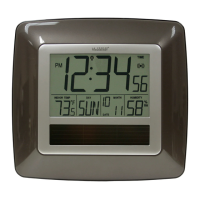
This document describes the La Crosse Technology Atomic Digital Clock, Model WT-8005U, DC:070218. It functions as an atomic digital clock, providing precise timekeeping and temperature display. The clock is designed for ease of use, with features for automatic time setting, manual adjustments, alarm functions, and temperature unit selection.
To begin using the clock, you need to insert two AA batteries. Once the batteries are in place, the clock will automatically initiate a search for the Atomic Time Signal. This search typically lasts for 7 minutes, during which the buttons on the clock will be temporarily inactive. Upon successful reception of the Atomic Time Signal, the clock will automatically set itself to the Pacific time zone by default. After this initial setup, you can press the ZONE button to cycle through and select your desired time zone from the available North American options: Pacific (P), Mountain (M), Central (C), and Eastern (E).
Alternatively, if you prefer to set the time manually or if the Atomic Time Signal is not immediately available, you can press the WWVB SEARCH button to stop the initial atomic time search. This allows you to proceed with manual time adjustments. It's important to note that even if you set the time manually, the clock will automatically attempt to search for the Atomic Time Signal again after midnight to ensure continued accuracy. You can also initiate an Atomic Signal Search at any time by pressing the WWVB SEARCH button. For more information about WWVB Atomic time, a link is provided in the manual.
The clock offers a comprehensive settings menu for customizing various display and time parameters. To access this menu, you need to hold down the SET button. Once in the settings menu, you can use the ARROW buttons to adjust the values for each setting. Holding down the ARROW buttons will allow for quicker adjustments. After setting a value, press the SET button again to confirm your selection and move to the next item in the menu. To exit the settings menu at any point, simply press the LIGHT button.
The settings menu allows you to configure the following items in order:
A convenient feature of this clock is that the weekday will automatically set itself correctly once the Year, Month, and Date have been configured.
The clock also displays the indoor temperature. You can easily switch between Fahrenheit (°F) and Celsius (°C) temperature displays by pressing and releasing the °F/°C button. This allows you to view the temperature in your preferred unit.
The clock includes a time alarm feature with options for setting, activating, and deactivating the alarm, as well as a snooze function.
To set the alarm time, hold down the ALARM button. When you enter the Alarm Settings Menu, the seconds display will be replaced by the letters "AL" to indicate that you are in alarm setting mode. The alarm hour will begin to flash, and you can use the ARROW buttons to adjust the hour. Press the ALARM button to confirm the hour and move to the minutes setting. The alarm minutes will then flash, allowing you to use the ARROW buttons to adjust the minutes. Press the ALARM button again to confirm the minutes and exit the alarm setting mode.
Setting the alarm time and activating it are two separate steps. To view the alarm time you have set, press the ALARM button. To activate or deactivate the time alarm, press and release the UP ARROW button. When the alarm is active, a bell icon will appear on the display. Conversely, when the alarm is inactive, the bell icon will disappear.
When the alarm sounds, you have two options to silence it:
If you encounter any issues with the clock's display appearing distorted or if the buttons become unresponsive, there is a reset function available. To perform a reset, use a pen or a paper clip to press the RESET button once. This action will reset the atomic clock to its default settings, which can often resolve minor operational glitches.
To ensure the longevity and proper functioning of your digital clock, it's important to follow some care and maintenance guidelines:
La Crosse Technology provides a 1-year limited time warranty from the date of purchase, covering manufacturing defects in materials and workmanship. For full warranty details, you can visit their support website. If you require additional support or have questions, you can contact their customer support team based out of La Crosse, Wisconsin, via phone or by filling out an online support request form. Their knowledgeable support team is available Monday-Friday during specified hours. The manual also encourages users to join the conversation on social media outlets to ask questions, watch detailed setup videos, and provide feedback.
| Display Type | LCD |
|---|---|
| Time Display | 12/24 Hour |
| Atomic Time | Yes |
| Atomic Time Signal | WWVB |
| Temperature Display | Yes |
| Humidity Display | Yes |
| Alarm | Yes |
| Snooze | Yes |
| Wireless Outdoor Sensor | Yes |
| Transmission Range | Up to 330 feet (100 meters) |
| Type | Atomic Clock |
| Temperature Units | °F / °C |
| Calendar | Yes |
| Power Source (Sensor) | 2 AA Batteries (Not Included) |