ASSEMBLY INSTRUCTION
PAGE 10
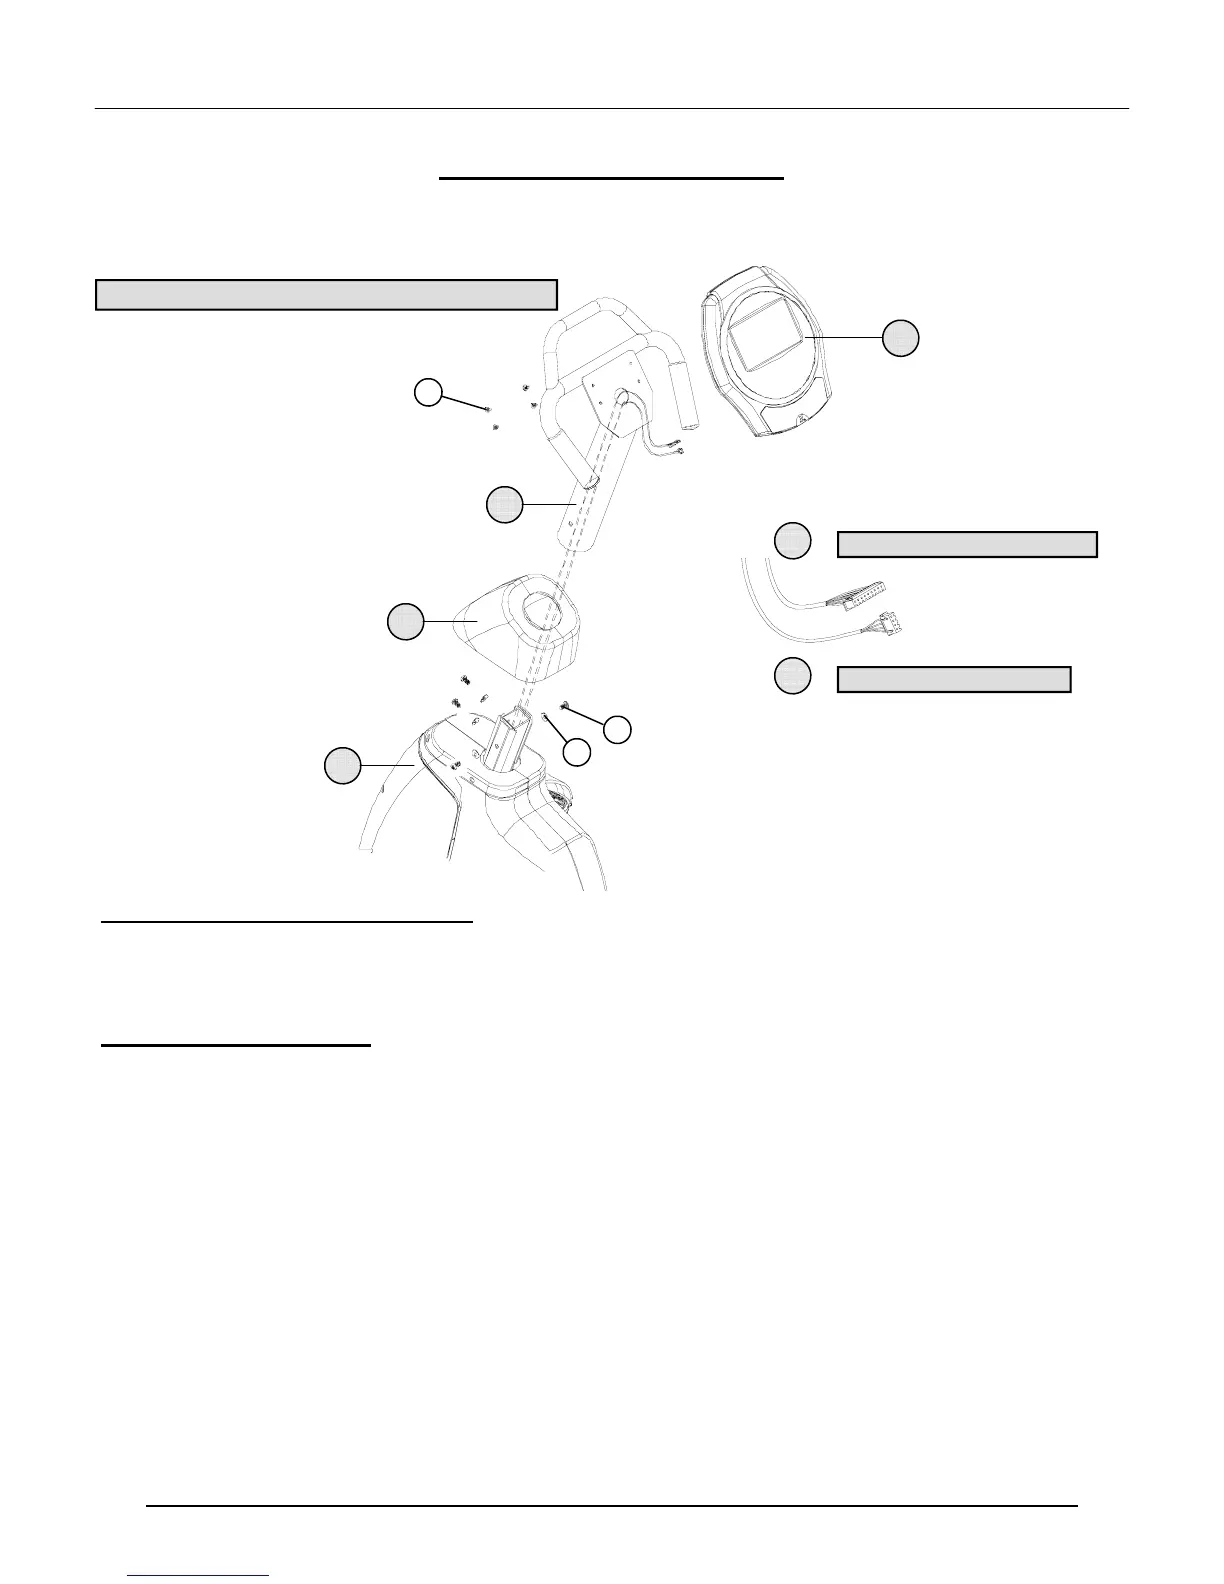
ASSEMBLY STAGE #6
Attach Mast & Mount Computer (Final Assembly Step)
Assembly Hardware Required: (*HARDWARE IS PREINSTALLED IN THE BACK OF THE COMPUTER)
#22 Cap Screw Qty. 4 #29 Curved Washer Qty. 4
#26 *Truss Screw Qty. 4
Assembly Description:
A) Remove the preinstalled mounting hardware (Truss Screws #26) from the back of the computer
B) Slide the Boot Cover (#15) over the lower end of the Mast (#16) and position it out of the way of the hardware
mounting area. (Use a piece of tape to temporarily keep the Boot Cover out of the way).
C) Route the cable assemblies up through middle of the Mast. Position the Mast down onto the Base Assembly and be
careful not to pinch the cables. Secure the Mast to the Base Assembly using 4-Cap Screws (#22) and 4-Curved
Washers (#29). Slide the Boot Cover down over the mounting hardware area.
D) Plug the 10-pin connector of Data Cable (#18) into the matching receptacle on the back of the computer.
E) Plug the 5-pin connector of the Heart Rate Cable (#19) into the matching receptacle in the back of the computer.
F) Tuck excess cable lengths down into the Mast (#16). Place the Computer (#17) on top of the mounting plate and
align the mounting holes with the threaded inserts on the back of the computer. Secure the Computer (#17) to the
mounting plate using the 4-(previously installed) Truss Screws (#26).
C
C
ONGRATULATIONS
ONGRATULATIONS
!
!
You have completed the assembly of this product and you are ready to start exercising toward a healthier lifestyle!
29
5-PIN HR CABLE ASSEMBLY
19
18
10-PIN DATA CABLE ASSEMBLY
16
15
1
17
22
26
# 26 TRUSS SCREWS ARE PREINSTALLED IN THE BACK OF THE COMPUTER

 Loading...