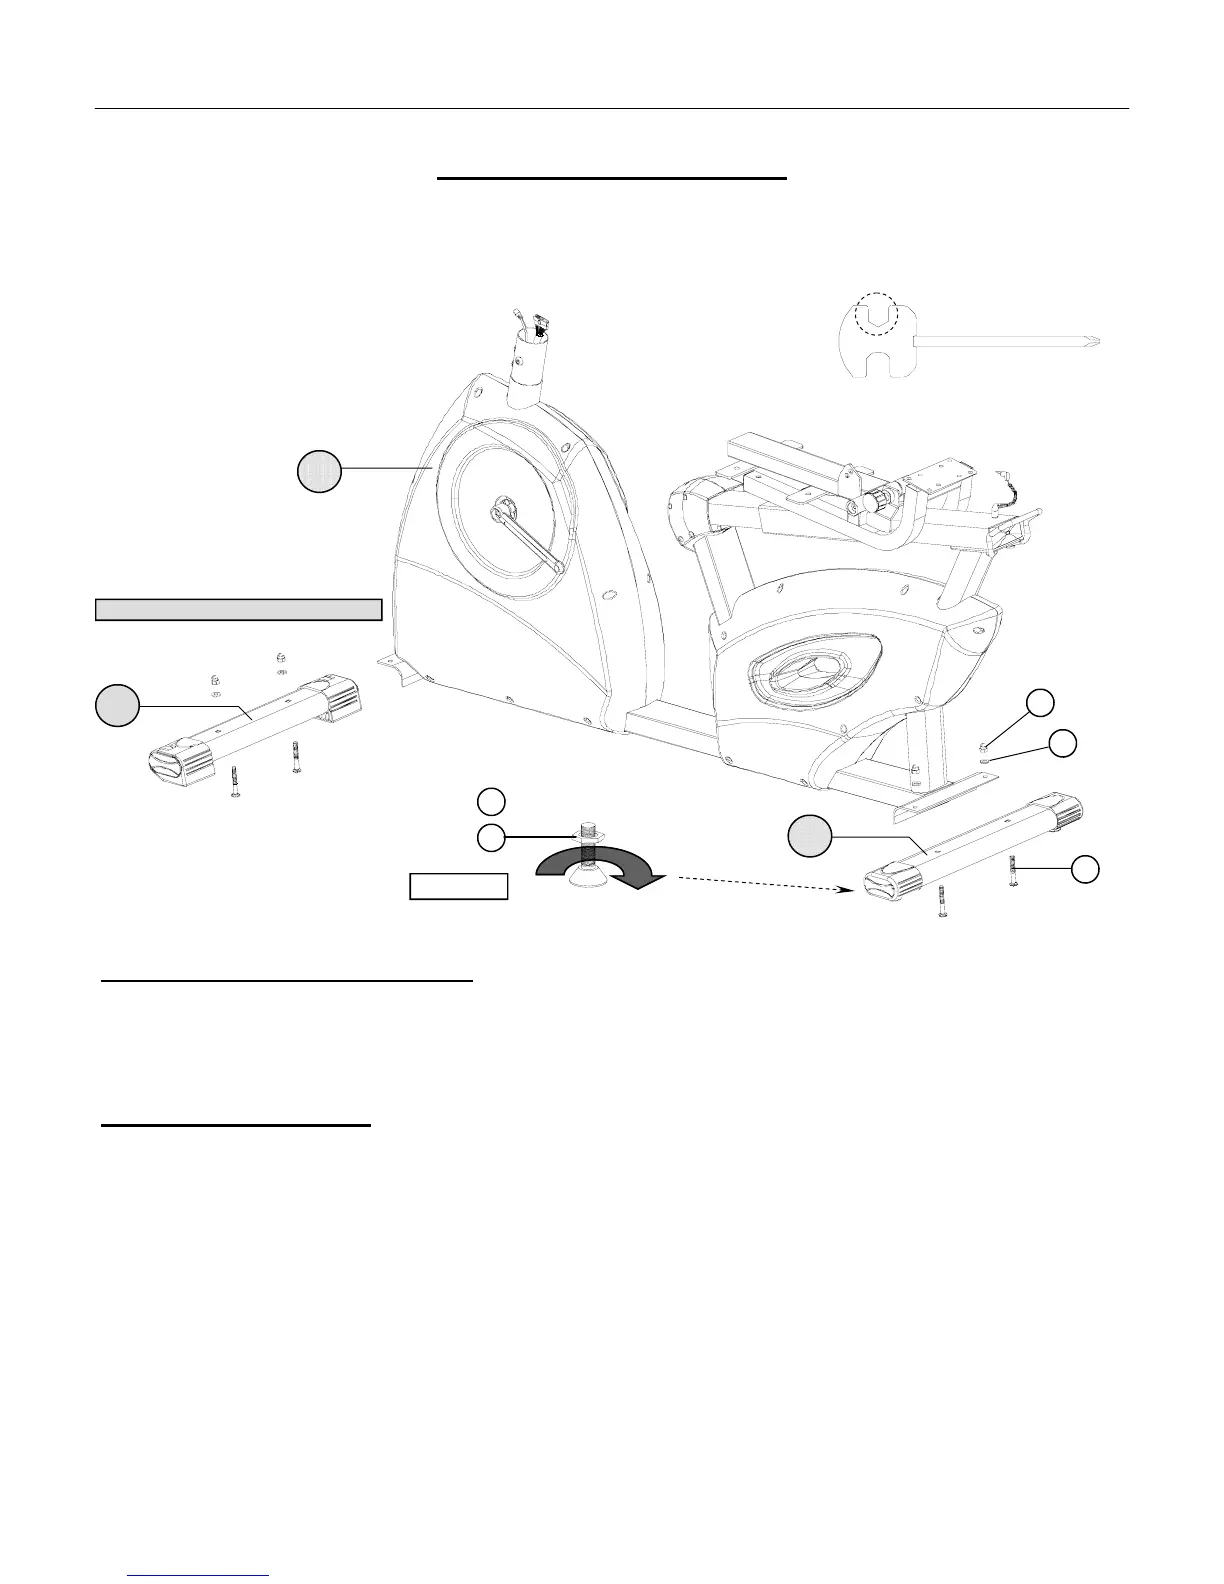
ASSEMBLY STAGE #1
Attach Stabilizer Assemblies to the Base Assembly
Assembly Hardware Required:
(Reference enclosed hardware pack).
#26 Carriage Bolt Qty. 4 #28 Acorn Nut Qty. 4
#27 Flat Washer Qty. 4
Assembly Description:
A) Securely fasten the Front Stabilizer Assembly (#2) to the Base Assembly (#1) using 2-Carriage Bolts (#26),
2–Flat Washers (#27), and 2-Acorn Nuts (#28). Note: The transport wheels should be facing outward..
B) Securely fasten the Rear Stabilizer Assembly (#3) to the back of the Base Assembly (#1) using 2-Carriage Bolts
(#26), 2–Flat Washers (#27), and 2-Acorn Nuts (#28).
Note: Use the Levelers (#37) on the bottom of the Rear Stabilizer Assembly (#3) to adjust the bike and keep it from
rocking on an uneven surface. Tighten the Hex Nut (#38) flush against the stabilizer surface to lock both levelers into
position. (Reference FIGURE 1).
♦ Assembly Stage #1 completed
ASSEMBLY INSTRUCTION PAGE 6
37
26
38
28
27
3
1
ADJUSTMENT LEVELER
2
USE TOOL
FIGURE #1
Note: Transport Wheels Face Outward
FRONT OF BIKE