ASSEMBLING YOUR L&L EASY-FIRE KILN
easy-fire-install.pdf 3/1/2007 Rev 1.3 Page 10
2007 L&L Kiln Mfg, Inc. 505 Sharptown Rd, Swedesboro NJ 08085 P:856.294.0077 F:856.294.0070 sales@hotkilns.com hotkilns.com
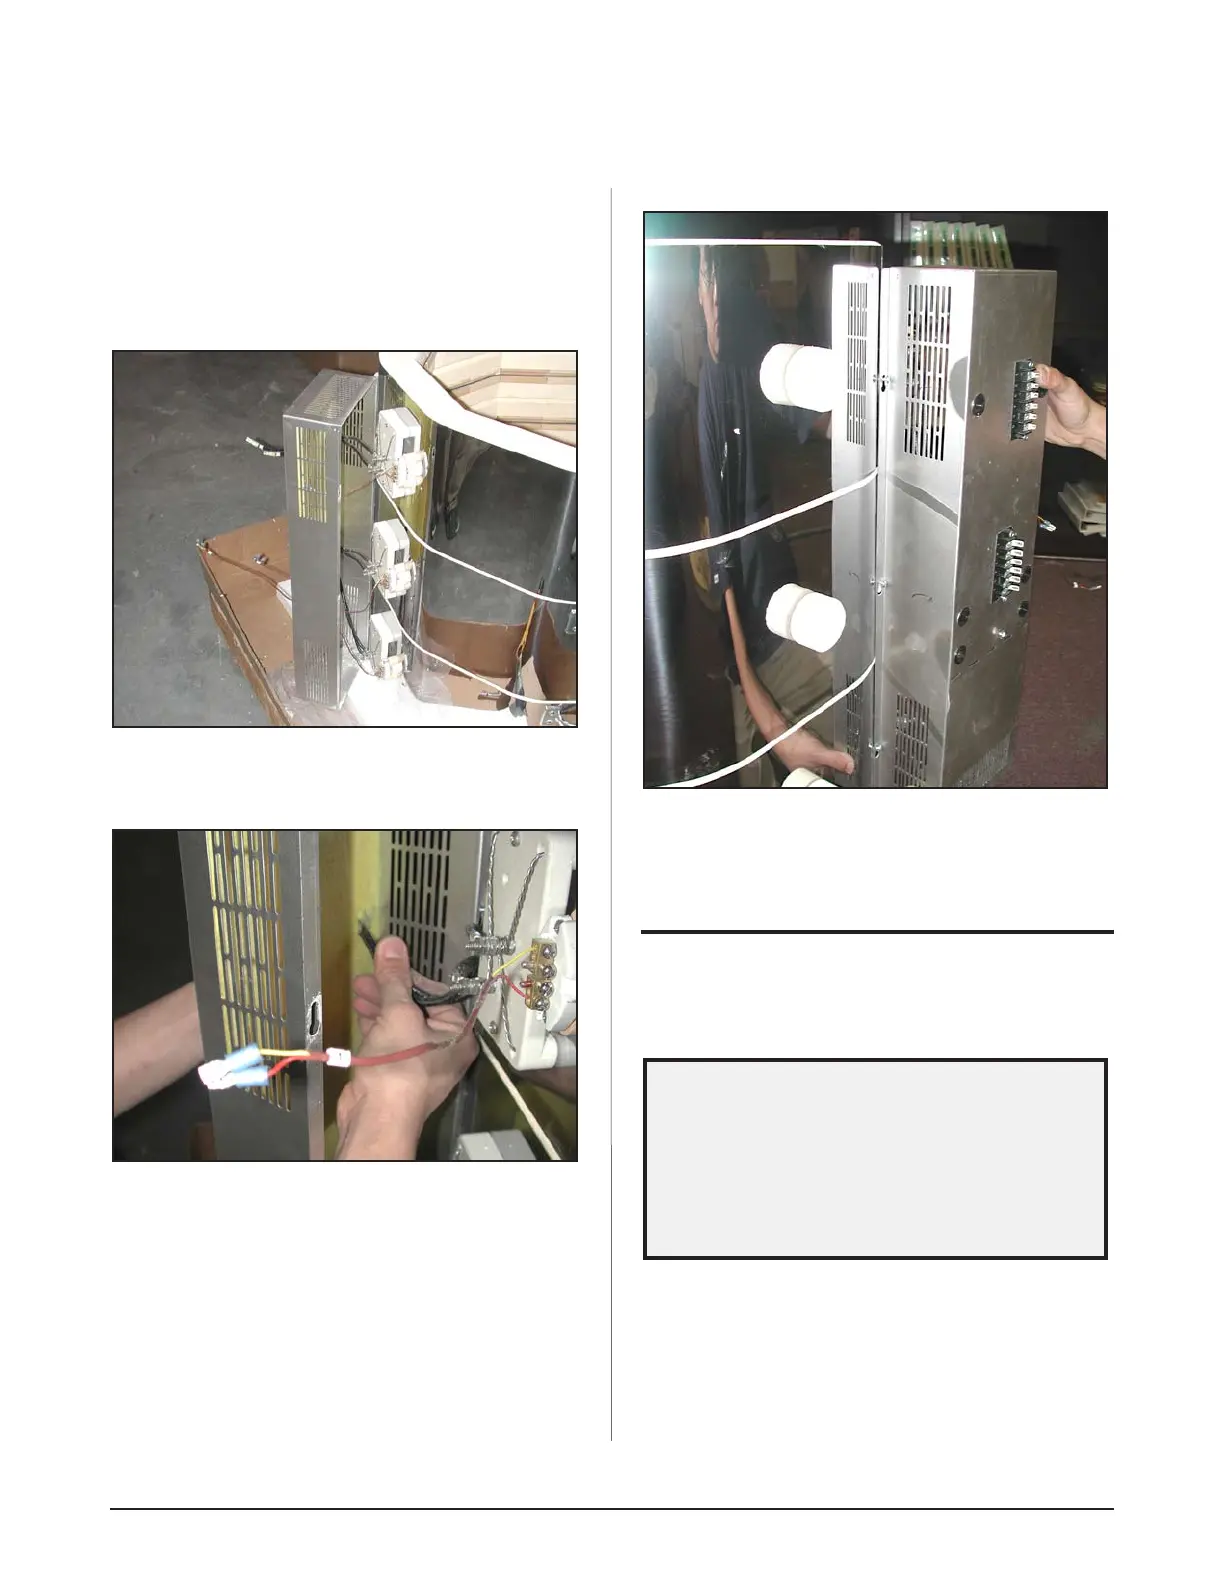
3) Gently push the right hand side of the element box
away from the kiln sections. This will give you access
to pull the element and thermocouple connection
wires through the element box.
The Element Terminal Box swings over to the left
side exposing the wires :
4) Pull the power and thermocouple wires out.
Pulling the wires out from the back of the
terminal box:
5) Gently lift the element box up and remove from the
kiln sections.
Removing the Terminal Box form the kiln:
6) You are now ready to set up the kiln.
LOCATING THE KILN
1) Place the stand on the floor in the desired location.
This should be set so that the outside stainless steel
surface of the kiln will be at least 12” to 18” from any
combustible wall. Floor must be nonflammable.
Information concerning clearances, ventila-
tion and electrical requirements is detailed in
the INSTALLATION Section of this manual.
Read now if you are uncertain about any of
these issues. DON’T PROCEED UNTIL YOU
ARE COMFORTABLE WITH THE LOCATION
2) Place bottom floor section of kiln on the steel stand
making certain it is centered properly.
3) Note that the kiln bottom is packed on top of the kiln
- so it is easily removed first without moving the kiln.
ASSEMBLING YOUR L&L EASY-FIRE KILN