ASSEMBLING YOUR L&L EASY-FIRE KILN
easy-fire-install.pdf 3/1/2007 Rev 1.3 Page 15
2007 L&L Kiln Mfg, Inc. 505 Sharptown Rd, Swedesboro NJ 08085 P:856.294.0077 F:856.294.0070 sales@hotkilns.com hotkilns.com
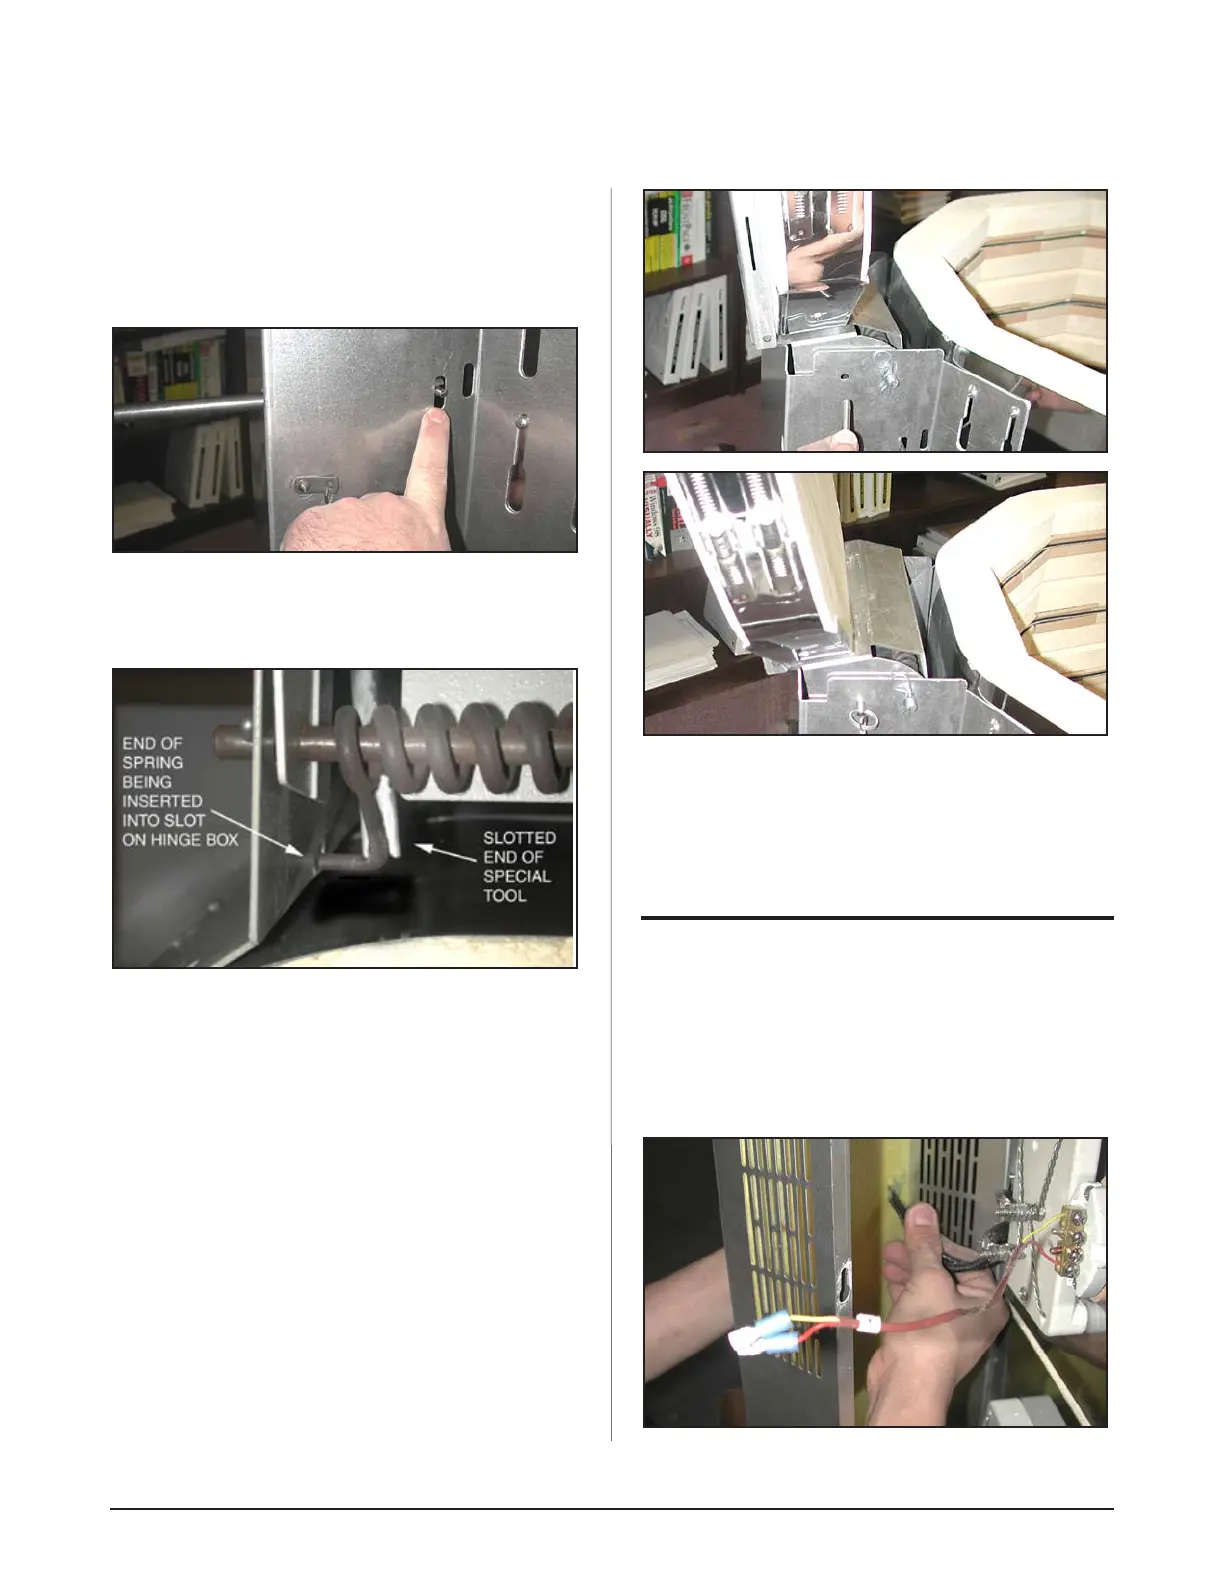
13) Push the spring into one of the two slotted holes
on the side of the large hinge piece. The slot closest to
the kiln will put more tension on the spring. (Note - it
is hard to get the spring into this slot when working
from above).
Below is a view from the top looking down into
the hinge box. NOTE: When removing the hinge
- use the reverse procedure and be sure to use
the special tool provided.
13) The hinge is now operational.
14) Raise and lower the hinge a few times.
15) Double check to make sure that each end of the
spring is through the appropriate hole in the ring
hinge piece.
16) Open the lid to the full open position and insert the
safety pin to keep the lid locked in the up position.
17) You are now ready to reassemble the panel onto
the kiln.
REASSEMBLING THE CONTROL
PANEL
1) Take the Control Box and Element Cover Box
Assembly and place it on the screws on the left hand
side of the element connection terminals (facing from
the front).
2) Push the whole assembly off to the side left side
slightly so you can access the wires and push them
through the holes.
ASSEMBLING YOUR L&L EASY-FIRE KILN