4: Installing the SpiderDuo Device
Spider™ and SpiderDuo® KVM-over-IP Device User Guide 36
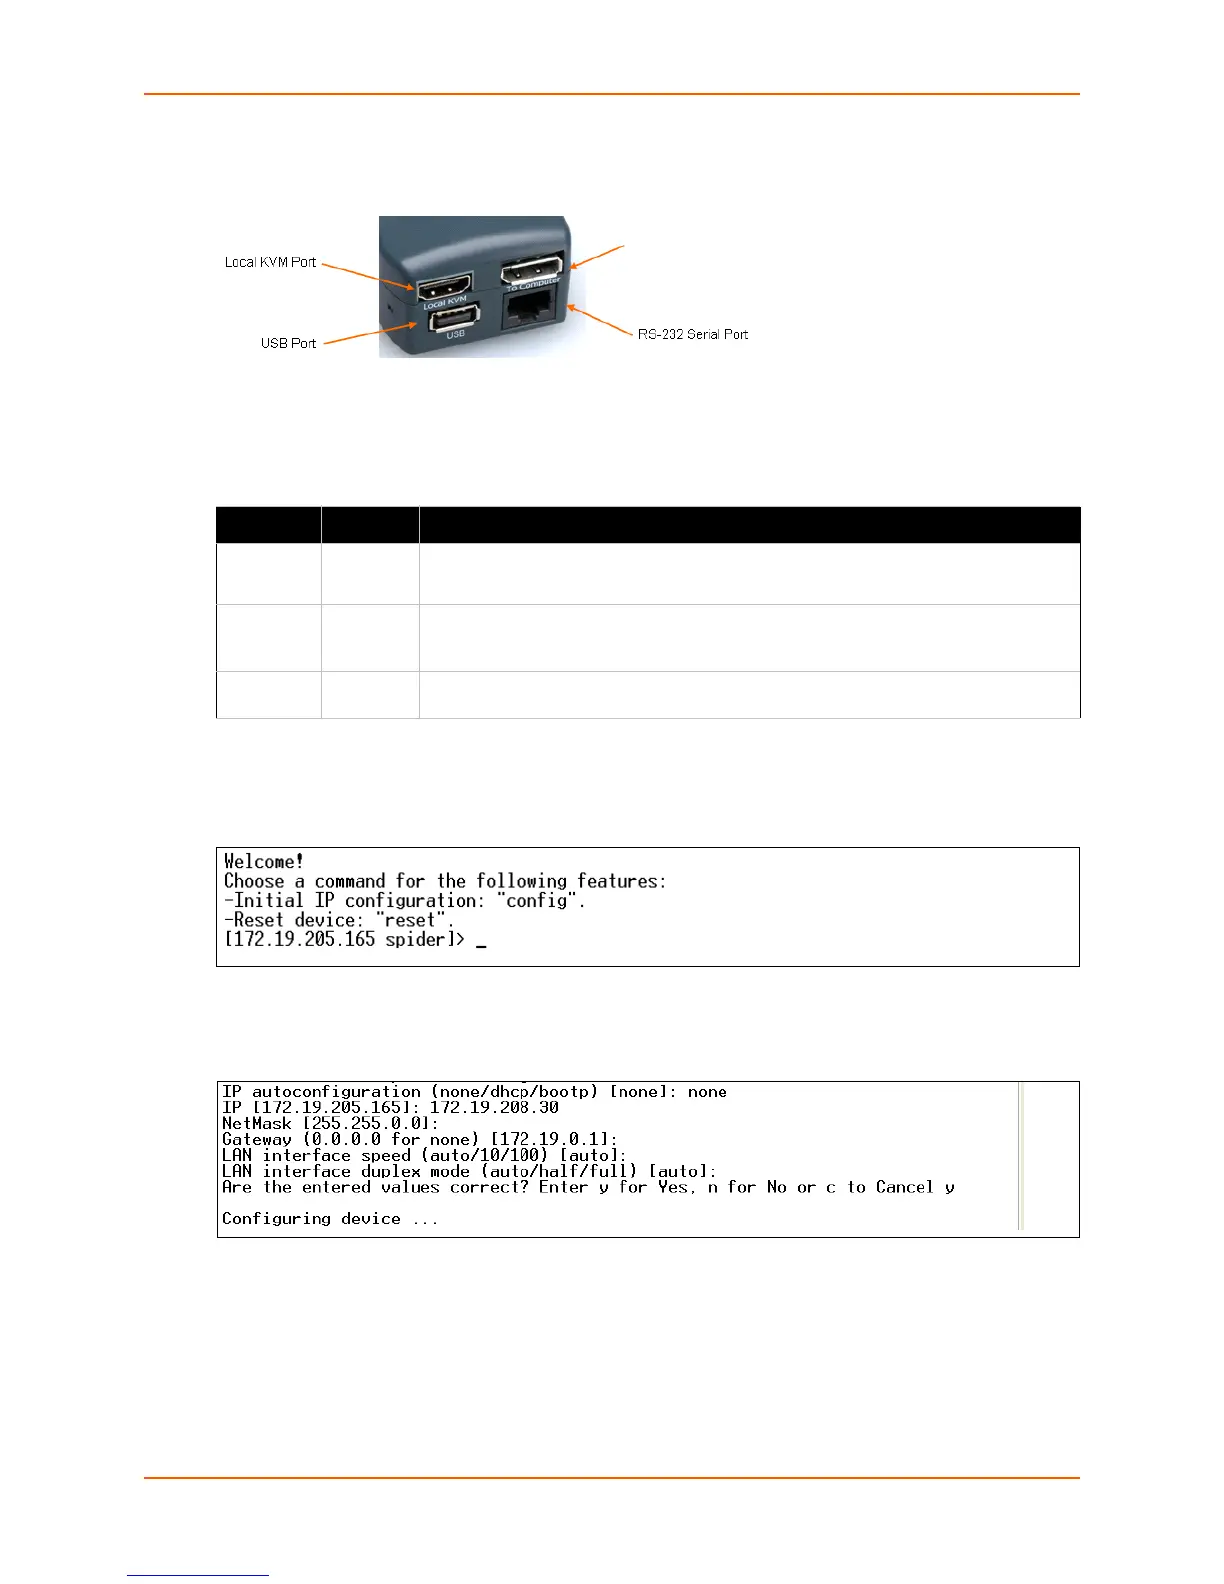
Figure 4-2 SpiderDuo Local KVM, USB, Computer Input and Serial Ports
5. Upon bootup, the terminal window displays the IP Configuration screen. At the command
prompt type config and press Enter.
Figure 4-4 SpiderDuo Welcome Screen
6. To change the default IP auto configuration from DHCP to a static IP address, at the IP
autoconfiguration prompt type none and press Enter.
Figure 4-5 SpiderDuo Default IP Configuration Screen
7. Follow the prompts to enter the IP address, subnet mask, default gateway, and LAN interface
information.
8. Type Enter, to accept the changes. The system takes about 20 seconds to complete. Type
Enter once again at the prompt to display the updated IP address.
9. Plug an Ethernet cable connected to your network into the Ethernet port. The Link LED
illuminates.
Pinouts
1 RTS (out)
2 PCU +5V (out)
3 TX (out)
4 PCu Sense (in)
5 GND (out)
6 RX (in)
7 PCU Drive (out)
8 CTS (in)
Table 4-3 SpiderDuo Indicator LEDs
Label Color Action
ID
Amber On - Unit ID Selected
Blinking -Thumb-drive Configuration Successful
SysOK
Blue On - Powered up and OK
Blinking - Booting
PCU
Green
On - Power Unit Connected,
AC power is passed through
Computer Input