ASSEMBLY OF THE MAST
1. The mast will be supplied flat packed and will
require some tools to assemble:
- Posidrive screw driver
- Small adjustable spanner x 2 ( or mole
grips ) Care required if using mole grips
as these can mark the fittings)
- Electrician / small screwdriver
- Tape measure 5meters
- Rig tension gauge (recommended)
- Plastic tape
2. The shrouds and halyards will all be in position
on the mast and will just require unwrapping.
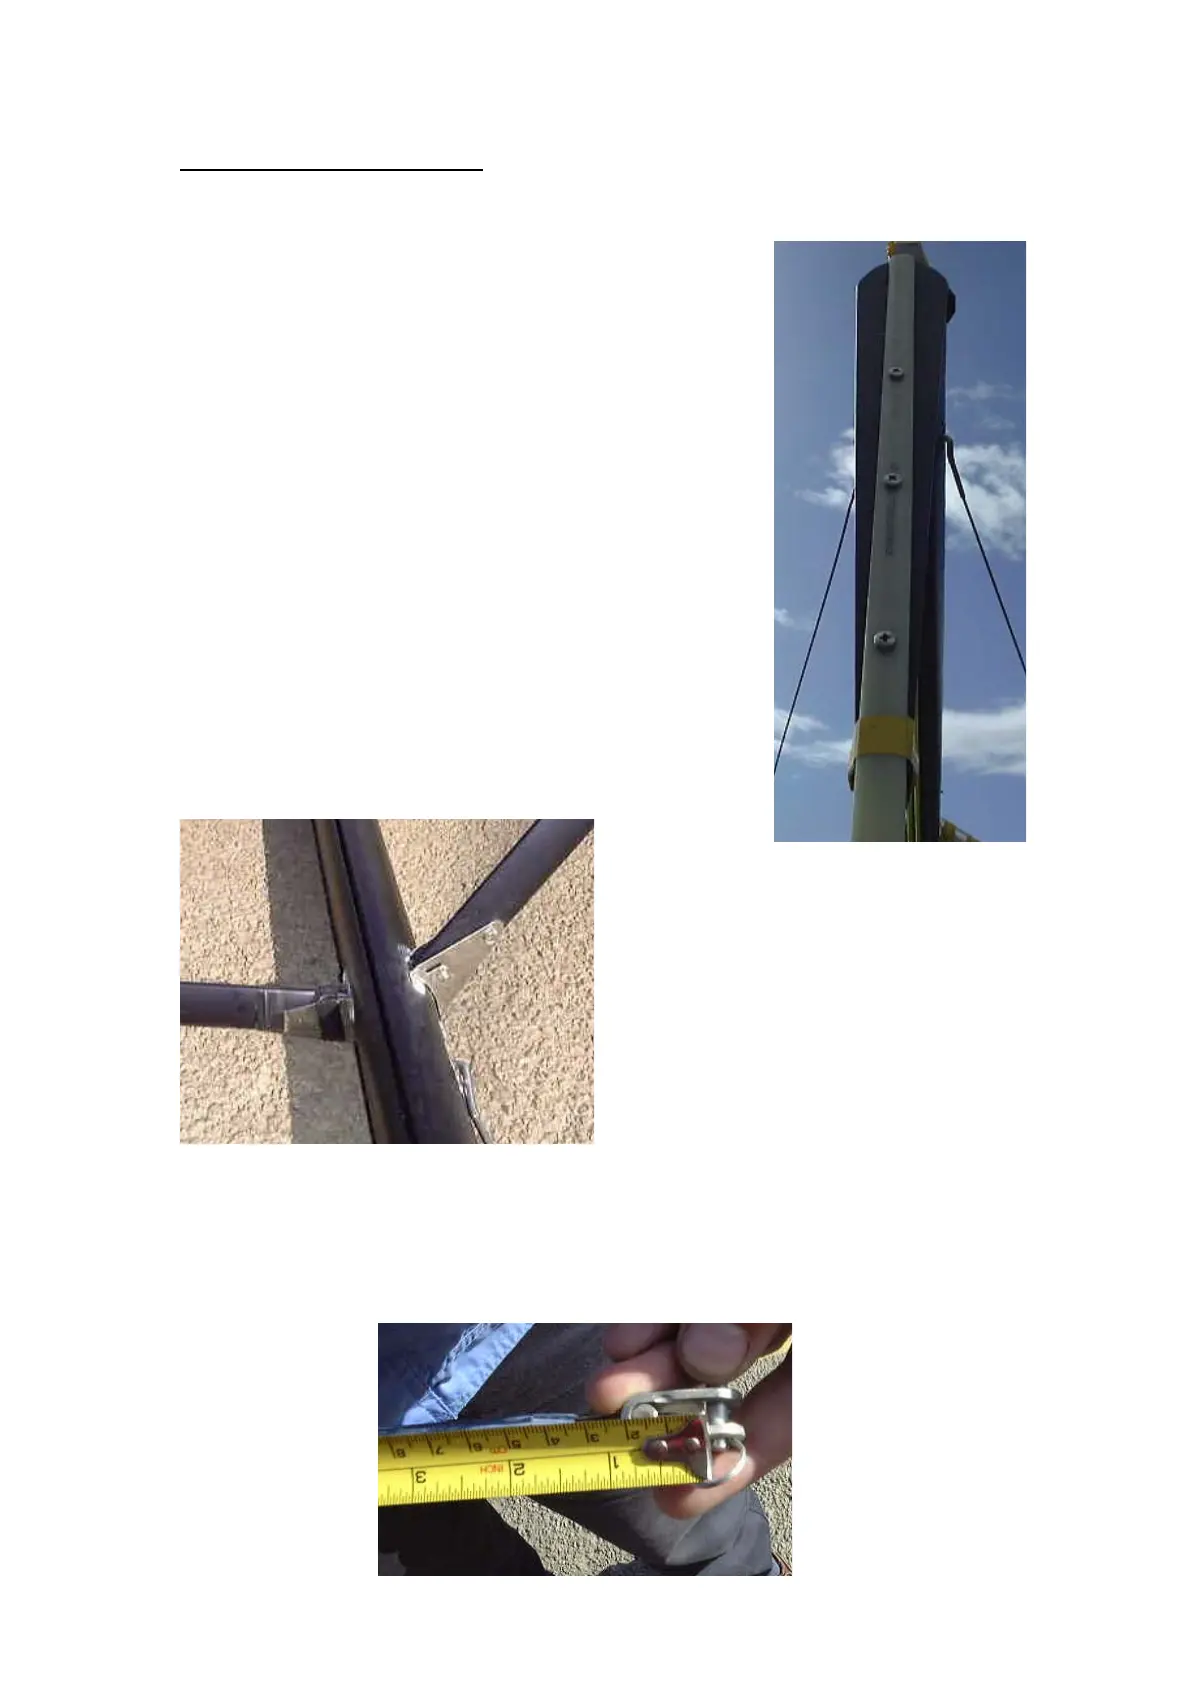
3. The 2 sets of spreaders and the backstay whip
are taped to the mast.
4. The backstay whip has 3 pre-drilled holes and
is attached to the crane at the top of the mast.
The screws are supplied in the crane.
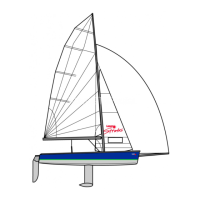
5. The spreader is fixed with no
adjustment. They are marked port
and starboard and simply attached
with two clevis pins and rings.
Ensure that these are taped up.
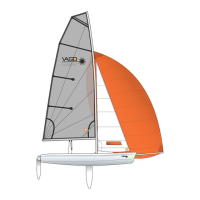
6. Measure the V2 / D4 ( Cap shrouds ) and adjust the bottle screw to give
a distance of 4440mm from the bearing surface of the pin to the bearing
surface of the T terminal on this shroud. This measurement may vary
slightly and is a starting guide, the objective is to achieve 4” prebend.